Showing posts with label Dessert. Show all posts

Sunday, June 1, 2014

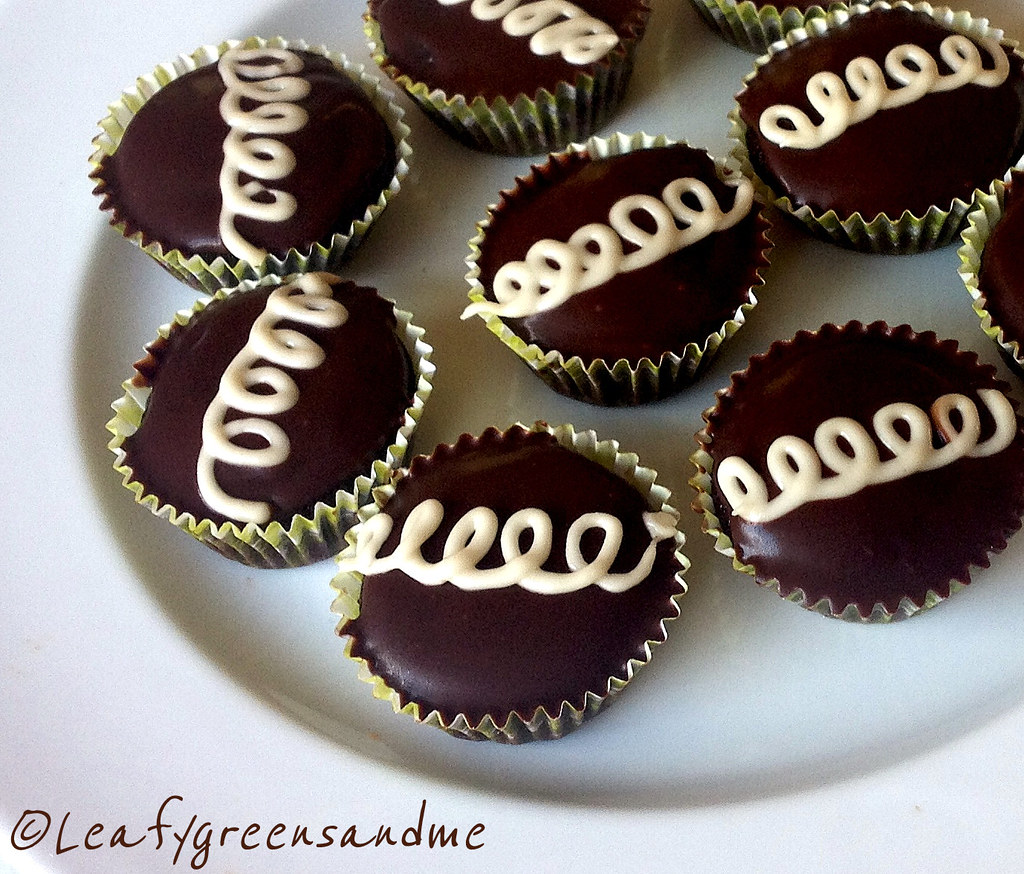
Gluten Free "Hostess" Cupcakes

My husband's birthday was a couple of weeks ago and I wanted to bake him a gluten-free cake from scratch, but I really didn't have time when I got home from work and so I made cupcakes using Pamela's Gluten Free Chocolate Cake Mix.  They were absolutely delicious...moist, rich and super chocolatey!  For the egg substitute, I used Bob's Red Mill Egg Replacer, but ground flax meal/water would work just as great.

https://farm3.staticflickr.com/2931/14321047731_2087b1719e_b.jpg

To be honest, my husband probably would of preferred if I made Hostess Twinkies instead of the cupcakes, but Twinkies are so boring...it's just a vanilla sponge cake with piped in frosting.  No creamy ganache icing or fun squiggly decoration on the top...just a boring sponge cake.  Anyway, he loved them and I think that I made a chocolate lover out of him!


For the filling I used the same buttercream recipe that I used for my Veggie Cupcakes, but only made half of the recipe and I added a little more cashew cream about 1 Tbsp to make the filling smoother.  Using a small plain piping tip and squeezed in enough frosting to cause the cupcake to puff up, but not to break.


For the ganache topping I used 1/2 cup Ghiradelli semi-sweet chocolate chips and about 3 Tbsp cashew cream.  I placed it in the microwave for about 30 seconds until melted and then stirred in 1 tsp Earth Balance Butter.  Before decorating the cupcakes, I let both the cupcakes and the ganache cool to room temperature and the iced the top of the cupcakes using a small off-set spatula. 


And for the squiggle design I used a 1/2 cup sifted confectioners sugar with 1 Tbsp cashew cream and stirred until smooth.  You want this to be really thick so that when you pipe the icing will hold its shape.  Also, let the ganache set-up completely for about 30 minutes before piping the squiggly design.  To speed up the process you can place the cupcakes in the fridge for about 10 minutes until the ganache sets.


Sunday, April 13, 2014

Gluten Free Cupcakes with Veggie Colored Frosting

Growing up as a kid my mom, sister and I would always dye eggs this time of year.  Our mom being the natural artist that she was would create the most beautiful designs. It was hard to compete, considering the only artistic ability I have is to draw stick people, but it was fun and I have great memories of sharing this tradition with my mom and sis.
 

https://farm4.staticflickr.com/3695/13831206343_abbc72702f_h.jpg 

I have never liked eating eggs and never understood how you could dye them, and then several days later peel and eat them.  The food coloring would seep through the shell and the white of the egg would be purple, blue or grey.  Luckily for me I got to skip that part and now since I am vegan, creating beautiful cupcakes is my new tradition.

My hubby wanted gluten-free cupcakes and so I purchased a bag of Wholesome Chow Vanilla Cake Mix.  I've tried making gluten-free products from scratch, but it is really expensive.  By the time you purchase all the starches, g-f flours, xantham gum, etc., you're looking at a substantial cost.  Of course if I had a gluten intolerance then this would be fine, but they end up sitting in my pantry and then I just throw them out.  Wholesome Chow has the best packaged gluten-free products on the market, at least in my opinion.  Another brand that is suitable for Passover because it doesn't contain leavener is Manischewitz Gluten-Free Yellow Cake Mix. It comes with a chocolate frosting but you can omit this and use the buttercream recipe below.  This product is not vegan but you could substitute flax eggs in the recipe.

So what to do about the food coloring and frosting the cupcakes?  There's no way I would ever use commercial food dyes and the organic/natural plant-derived dyes are too expensive. I did an internship at a bakery once and I watched how much food coloring they used in everything and I would never eat their cookies, cakes or cupcakes...especially their red velvet. 

https://farm4.staticflickr.com/3695/13831497744_63858e438d_h.jpg

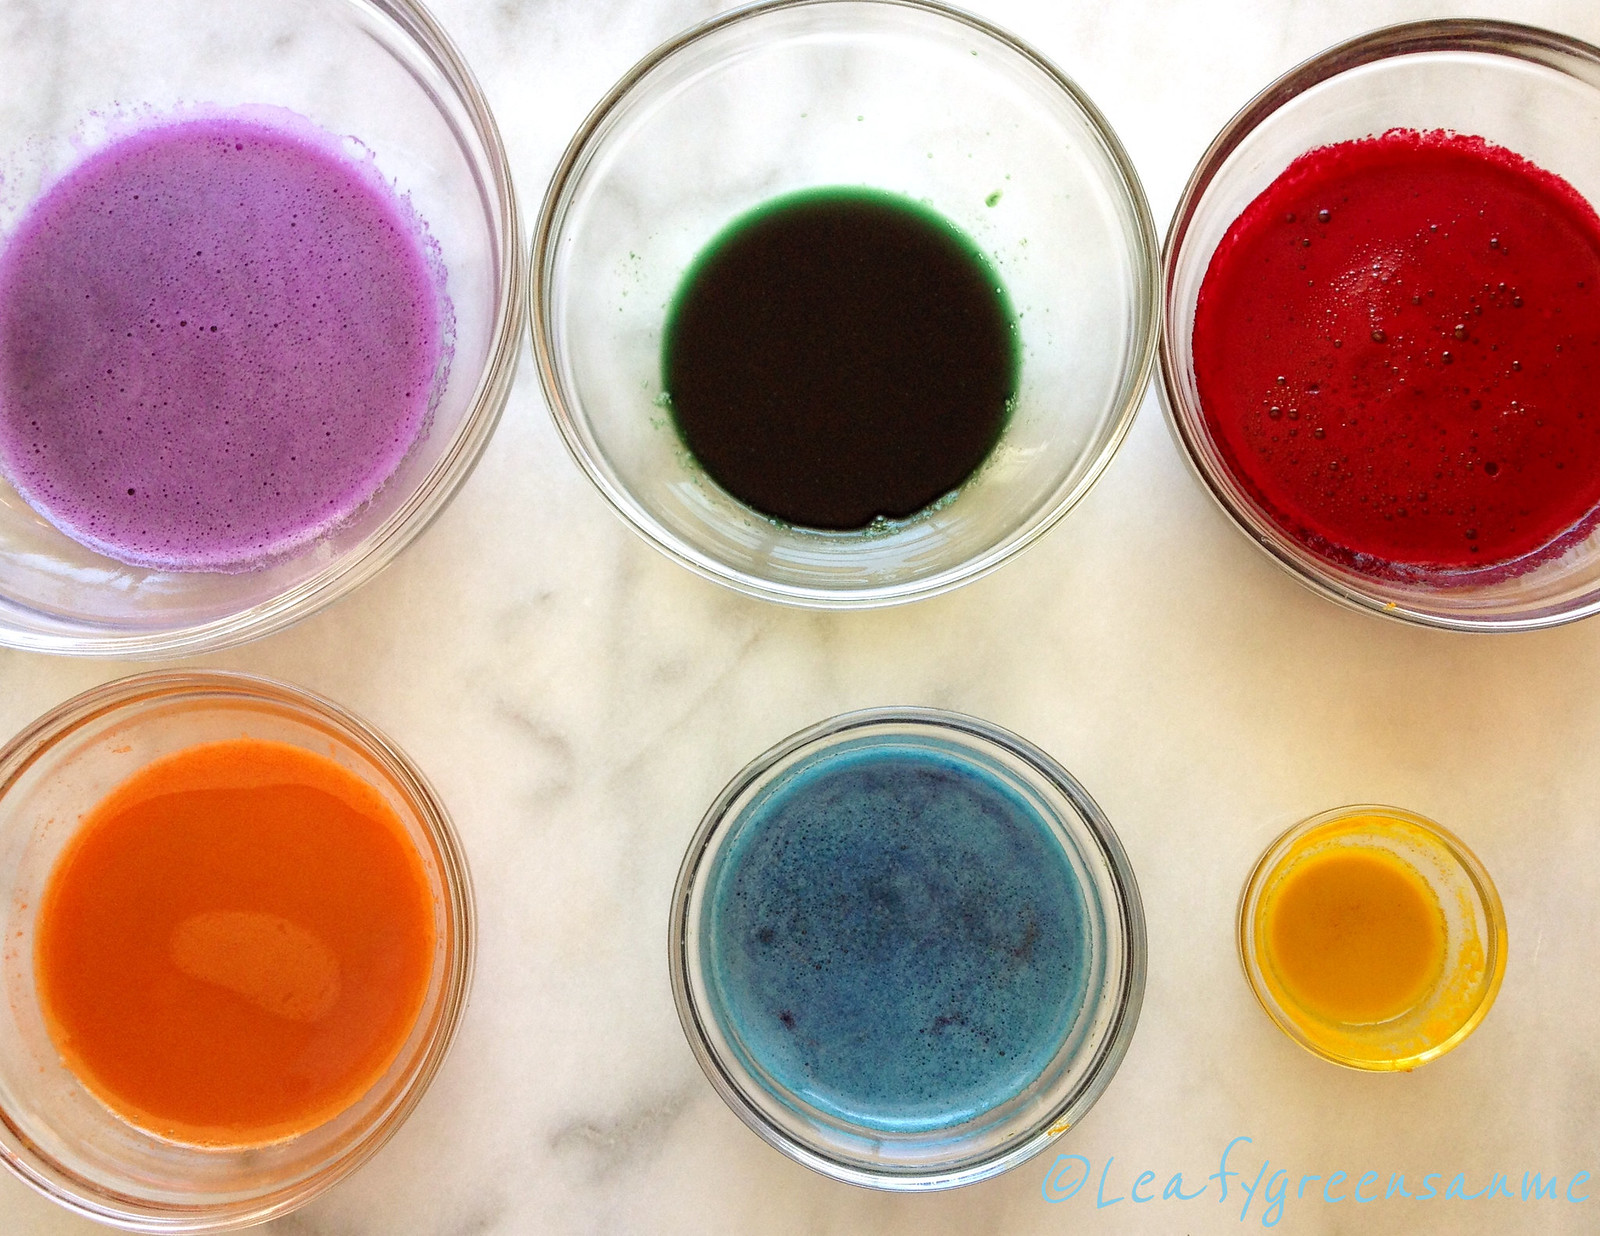
So instead of spending a lot of money, I decided to use what was in my fridge and the buttercream turned out beautiful and delicious.  Yes it takes a little bit more work because you have to juice the vegetables first, but you can still obtain beautiful pastel colors or even vibrant hues using vegetables.  Plus everything was organic!  Here's what I did:

Purple:  Red Cabbage
Green:  Spinach with a pinch of spirulina (could of used more spirulina to get a darker green--be careful though so that it doesn't taste like the ocean)
Red:  Beet
Orange:  Carrot (I also reduced the carrot juice down to a puree to obtain a darker hue)
Blue:  Red Cabbage and a 1/4-1/2 tsp of baking soda
Yellow:  Turmeric (I used about 1/4 tsp with 1-2 tsp water to make a paste)

Now you would think that by using vegetables and spices that it would impart these flavors into the frosting, but it is ever so faint and when you combine it with the cupcake you can't even tell.  Kids would love eating these even if they helped you make them and knew that they were made with vegetable juice!

https://farm4.staticflickr.com/3790/13831456534_30430bcd64_h.jpg

Vanilla Buttercream Frosting
1 tsp pure vanilla extract
2 - 3 Tbsp almond milk (or more to obtain desired consistency)
3 cups sifted organic powdered sugar

In a mixer fitted with a paddle attachment, beat butter and shortening on medium speed until combined and creamy.  Add vanilla extract, almond milk and then with speed on low, add powdered sugar until combined.  Once combined, increase speed to medium and then whip until creamy and fluffy about four minutes.  Portion buttercream evenly into six bowls and then start out adding 1/2 tsp vegetable juice to each bowl and whip with a spatula until creamy.

Note:  Because of the acidity of the vegetable juice, it will look as if the buttercream will start to curdle.  This is why it is good to start with a small amount and add slowly and beat with a spatula until creamy.  For all of the above colors, I used no more than 1 tsp veggie juice to each to get the desired effect.  Also, you can use all Earth Balance and not the Spectrum Shortening, however the shortening holds the buttercream at room temperature longer and so you do not need to worry about refrigeration.

I hope you'll give this recipe a try and start a new holiday tradition with your family!

Wishing you and yours a wonderful Passover and Easter!     
 

Tuesday, April 1, 2014

Whole Grain Chocolate Chip Cookies

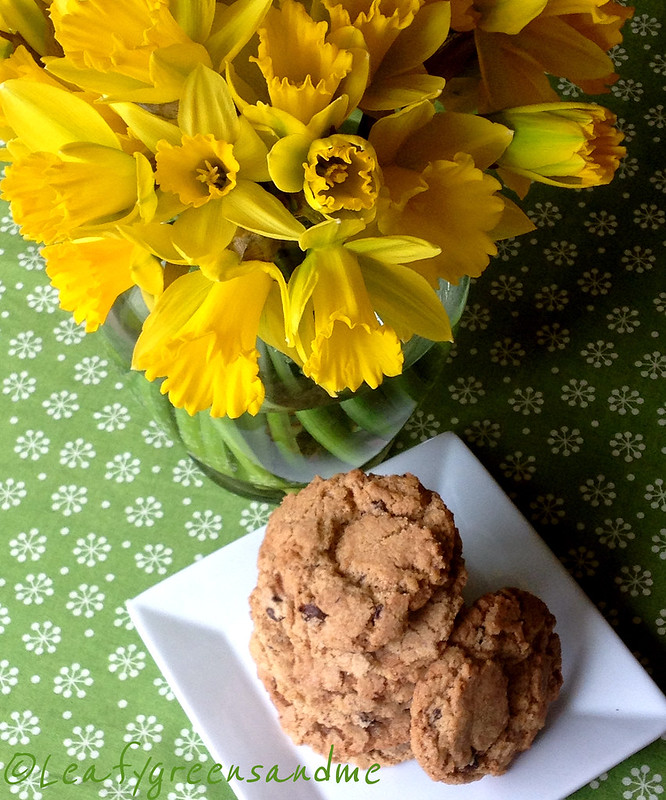
I've been bad...so bad...I'm still drinking fresh juices daily but it was rainy and chilly on Saturday and I just wanted to turn on the oven and bake something yummy.  The good thing about making chocolate chip cookies is that they can satisfy your sweet tooth within 30 minutes.  The bad thing is that it's hard to eat just one!  So I've had my fill over the past three days.  There's nothing like drinking healthy juice and eating cookies at the same time--my body is really confused!  The daffodils are just because they brighten up a gloomy day and are my second favorite flower to tulips!

https://farm4.staticflickr.com/3688/13571512393_b0e1a52775_c.jpg
 
So here's the recipe...not that you need another chocolate chip cookie recipe but I found these to be perfect.  Crunchy out the outside while moist on the inside and they were better the next day, and the next day...unfortunately. 

Ingredients
(Makes 2 dozen)

1 1/2 cups organic whole grain spelt flour
3/4 tsp baking powder
1/2 tsp baking soda
3/4 tsp kosher salt
1 stick Earth Balance Buttery Sticks (I used 6 Tbsp Earth Balance Buttery Sticks and 2 Tbsp Spectrum Organic All Vegetable Butter Flavor Shortening Non-Hydrogenated).  I like the crunch and airiness it gives the cookies--but using all Earth Balance is fine too.)
1/2 cup dark brown sugar
1/2 cup organic unbleached cane sugar
1 flax egg (1 Tbsp ground flaxmeal with 3 Tbsp room temperature filtered water, whisked)
1 tsp pure vanilla extract
1/2 cup vegan semisweet chocolate chips

https://farm4.staticflickr.com/3813/13571495143_db794ae3aa_c.jpg
Method
  • Preheat oven to 350 and position racks on upper and lower portion of oven.
  • In the bowl of an electric mixer place room temperature butter and sugar and mix on medium for about 3 minutes until creamy.  Add flax egg mixture and vanilla and mix until combined.
  • In another bowl, sift and whisk together dry ingredients (not including chocolate chips) and then add to butter-sugar mixture and mix until ingredients are just incorporated.  You don't want to over mix the flour and develop the gluten or your cookies will be tough.  Then with the motor running add the chocolate chips until combined.
  • Using a small ice cream scoop (about 1-1/2 Tbsp) place 12 evenly spaced scoops on two cookie trays and flatten slightly with your fingers.  Bake in the oven for 12-14 minutes (turning and switching the trays after 7 minutes) until golden brown around the edges, but tender in the center.  Remove from the oven and let cool for about 5 minutes before transferring them to a cooling rack.

https://farm3.staticflickr.com/2864/13571796064_9f341499ae_c.jpg

Hope you enjoy and stay tuned for more juicing recipes once the gloomy rain goes away!       


Sunday, January 12, 2014

The Perfect Start...to a Perfect Day!

So I thought that I would post something really healthy since it is the beginning of the New Year and we all are trying to keep our resolutions to eat healthy.  Actually, I really don't have any resolutions when it comes to food or diet.  Maybe I could be a little more patient, procrastinate less, or take time to smell the tulips more often, but pretty much everyday I have a healthy juice, or a smoothie and some days this is all that I drink!

http://farm6.staticflickr.com/5531/11911686916_06d02f05fa_b.jpg

I have never been able to go on a juice fast for more than 24 hours.  However, I do try to eliminate all solid food from my diet at least several of times a month.  I pick a Wednesday and drink only fresh vegetable juices and smoothies throughout the day, along with filtered water and herbal tea.   If you drink only pure vegetable juice then you are eliminating fiber from your diet and so I try to drink both while on my 24 hour cleanse.  Plus the smoothies keep you fuller longer. 

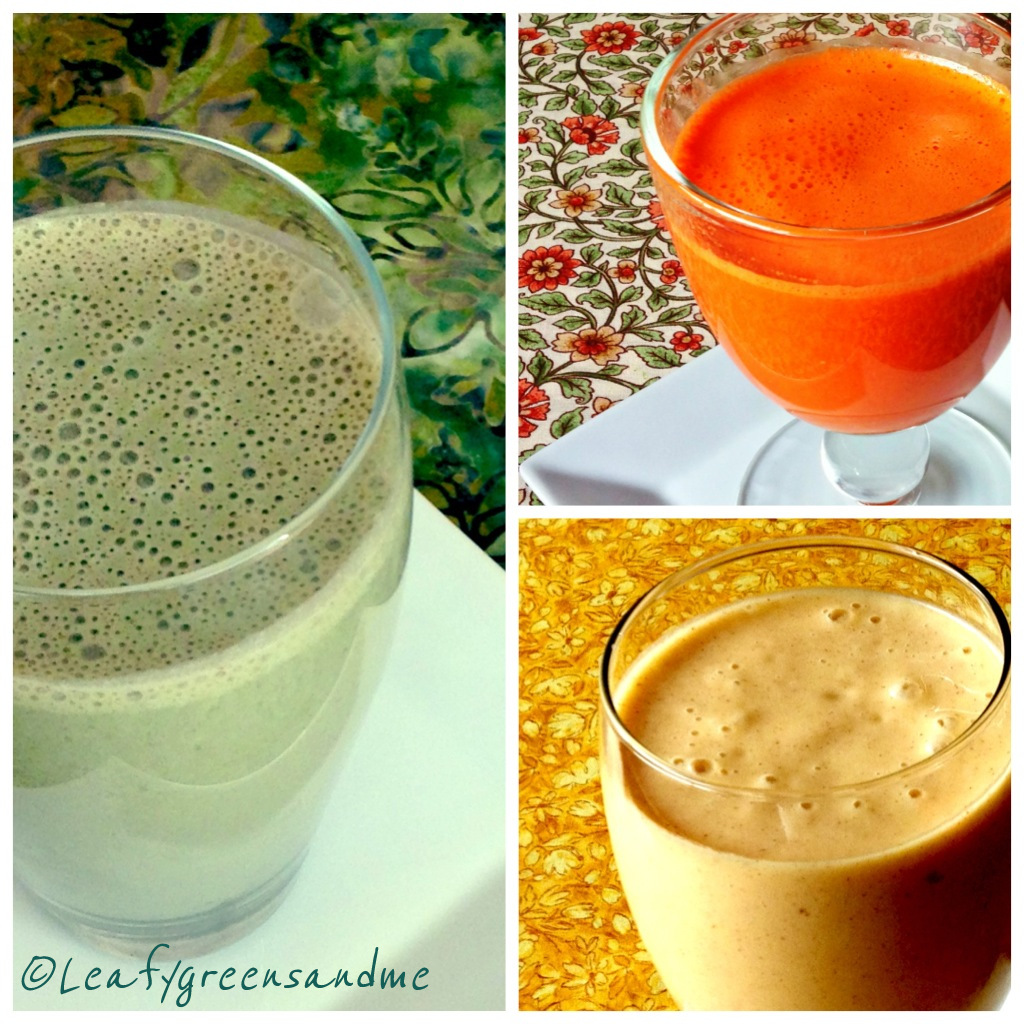
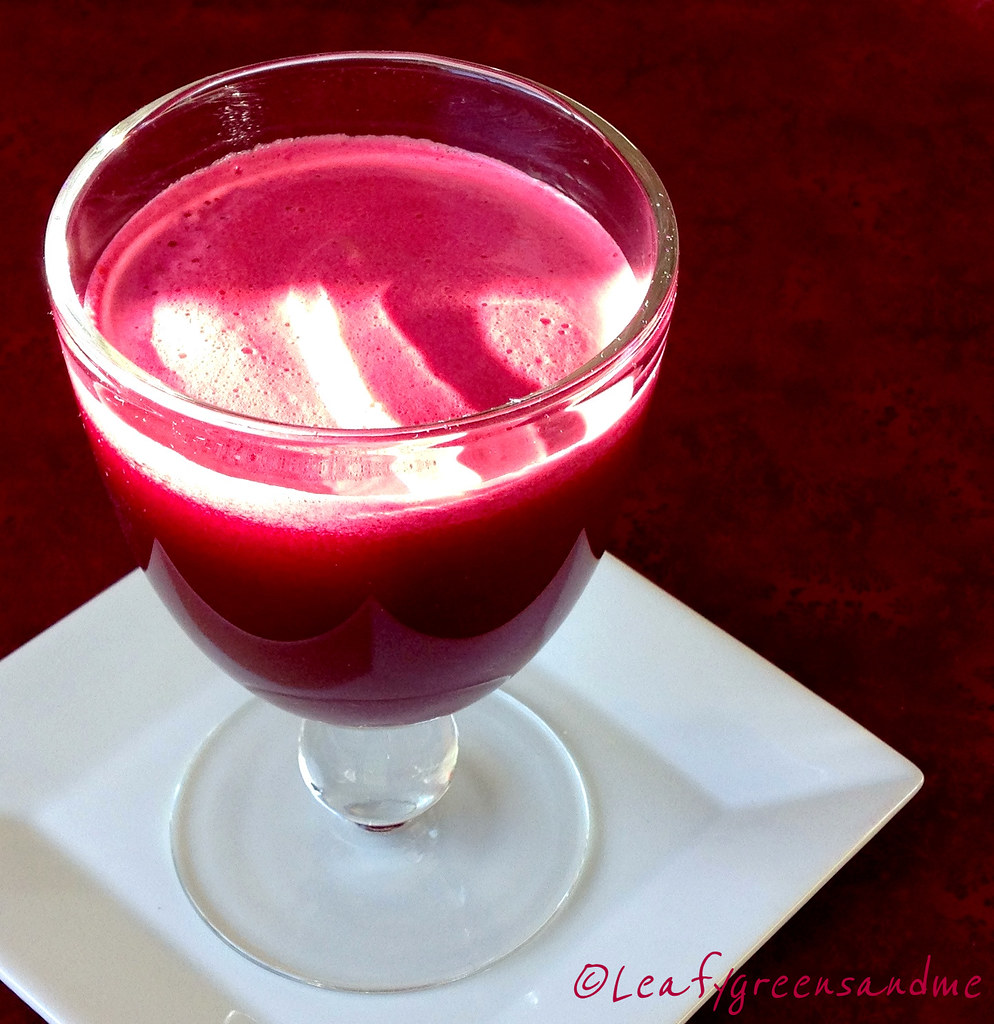
Here's a typical day:  6am (Herbal Tea with Lemon), 7am (Healthy Green Juice), 8am-11am (Herbal Tea and Water), 11am (Green Protein Power Smoothie) 12-2pm (Herbal Tea and Water), 2pm (Green Juice, Beet Blast or Crazy Carrot Juice), 3-5pm (Herbal Tea and Water) 6pm (Tropical Thunder Protein Smoothie), 7-9pm (Herbal Tea and Water).

The following day I wake up feeling refreshed, lighter and energized.  Perhaps just giving your digestive track a break from having to work so hard gives your body a needed lift.  I'm not a nutritionist and long-term fasting is not for me, but I do believe that I benefit from drinking fresh vegetable juice daily and following a 24 hour cleanse.  

http://farm3.staticflickr.com/2834/11911072893_d8e94c0102_b.jpg

I like experimenting and throwing a bunch of veggies in a juicer or blender and tasting the outcome.  Some come out horrible tasting but most are quite delicious.  Here are a few of my favorite drinks--just please make sure that you use all organic ingredients--you don't want to drink pesticides!
  • Healthy Green Juice--My Morning Cocktail
  • High Antioxidant Green Smoothie
  • Beet Blast:  1 medium beet, 2 medium carrots, 1 green apple, 1 small English cucumber, 1" piece fresh ginger root, juice from 1/2 lemon
  • Crazy Carrot:  1 large orange peeled, 2 large carrots, 1/4 cup pineapple, 1" piece fresh ginger root, 1/4 tsp turmeric, juice from 1/2 lemon
  • Green Protein Power Smoothie:  1 cup almond milk, 1 medium banana, 2 tbsp almond butter, 2 tbsp Warrior Force-Extreme Chocolate Plus Protein Powder, ice if banana isn't frozen
  • Tropical Thunder Power Smoothie:  1 cup coconut water, 1/2 banana, 1/2 cup frozen mango, 1/4 cup frozen pineapple, 2 tbsp soaked chia seeds.

http://farm3.staticflickr.com/2821/11911224214_29951eb38b_b.jpg

What Supplements to Add:

When drinking pure juice, I usually do not add any supplements, other than a 1 tsp of flax oil.  Or after juicing I will add the juice to the blender, add a 1/2 avocado or 2 tbsp hemp seeds and blend.  This adds fiber and protein to the juice and also gives it a creamy consistency.  

When drinking smoothies I add different supplements.  My favorite supplements are by Health Force Nutritionals.  I use their Warrior Food Protein Powder, VitaMineral Green, Earth, Maca, Vitamin C, and Spirulina.  All of their products are raw and I really like the taste--they do not taste gritty or gummy.  I pick and choose depending on what benefit I want.  I will also add soaked chia seeds or hemp seeds for protein/fiber and of course flaxmeal or flax oil.
     
Also, I prefer drinking juice over smoothies and green smoothies made with kale and mango over pure fruit smoothies.  I never drink smoothies made with strawberry or raspberry and prefer mango and peaches because they taste less sweet. To sweeten a smoothie I may also add soaked pitted dates, or pure maple syrup.  When making a green smoothie, the ratio of veggie to fruit should be 3:1.   

And of course, all of this is not possible without a good juicer and a high-speed blender.  I have a Breville Fountain Juicer and a VitaMix.  I use them daily.  It killed me to spend $400+ for a VitaMix and thought about owning one for years but it has been worth ever penny.  I use it every day and hardly ever pull out my food processor.

And one final note, I drink a shot of wheat grass daily, or try to at least a couple times per week.  I usually make my own during the summer but choose to buy it during the winter because it can get moldy because of moisture.  If you're interested in making your own this summer go to my link on "Growing Wheatgrass--My Liquid Sunshine"!  It's really fun to make...the taste not so much, but I do believe that it is good for me!

To your Health!


Sunday, December 29, 2013

Glazed Cinnamon Rolls

My cravings for Cinnamon Rolls started two weeks ago when my daughter-in-law posted a photo on Instagram of her homemade cinnamon buns.  I immediately liked the photo and commented that I wanted the recipe.  When she emailed me the recipe she said..."have fun with this one!"  The recipe she sent me was not Vegan and was basically like making a brioche dough with butter, egg yokes and whole milk.  But I was up for the challenge and for the past two weeks all I have been thinking about is making these darn buns!
http://farm6.staticflickr.com/5548/11638703123_eb89021512_b.jpg

If you're in a hurry to make any yeast dough, you might think about making something else.  These cinnamon rolls take about five hours from start to finish.  If you want them for a mid-morning breakfast, then I recommend that you start the dough in the evening, let them go through the first rise, punch down, cover and place in the refrigerator overnight.  In the morning you can then finish the rolls and bake them off.  I started these at 6am (I'm an early riser) and they were ready at 11am.  My husband slept in until 10am and he was surprised that they weren't ready.  But YUMMY things come to those who wait and have patience!

http://farm4.staticflickr.com/3709/11638816624_d078e4aabc_b.jpg

When kneading the dough you want to keep in mind that you are not making bread and you do not want to develop the gluten.  You want the dough to be soft, glossy and smooth and the finished buns to be light, fluffy and tender.  I kneaded my dough for about 5-7 minutes in my Kitchen Aid mixer--just enough for the dough to pull away from the sides of the bowl.  I also added just enough flour so that I could handle the dough without it being too sticky.  I added about 3 1/3 cups of flour but you may need to add more or less during the mixing-kneading process. 

Dough Ingredients:

1 packet Active Dry Yeast
1/4 cup warm water (100 degrees)
1/3 cup sugar 
4 ounces Earth Balance Buttery Sticks, melted
1 cup cashew milk, warmed (1/2 cup cashews blended with 1-1/2 cups water)
3-4 cups of all purpose flour (I used organic unbleached)
1 tsp kosher salt

Filling Ingredients: 

3/4 cup light brown sugar, packed
2-3 tbsp ground cinnamon (I used 2 tbsp)

Icing Ingredients:

8 ounces Follow Your Heart Sour Cream or Cream Cheese
1 1/2 cups powdered sugar
1-2 tbsp cashew milk
1 tsp vanilla extract
1 tsp grated orange zest

http://farm8.staticflickr.com/7357/11638675593_58c190ba86_b.jpg
Method:
  • Place warm water and yeast in a small bowl and mix together.  Let sit for 10 minutes until it starts to bubble.
  • In a small sauce pan, heat butter until melted, remove from heat and add 1 cup of cashew cream, 1/3 cup of sugar, whisk together and set aside.
  • In the bowl of a kitchen-aid mixer, place 3 cups of flour and 1 tsp kosher salt and whisk together.  Create a well in the center and add butter/milk mixture, along with water/yeast mixture.  Stir together with a spatula and then start mixing with the dough hook on medium speed.  Add enough flour (I added about 1/3 cup) extra flour so that the dough pulled away from the side of the pan and when you touch the dough it is not sticky and it can be handled easily.  Again, I kneaded my dough for about 7 minutes, you may need more or less.
  • Lightly oil a medium sized bowl and place dough in the bowl and cover with plastic wrap.  Let rise for about two hours until doubled in size.  If your house is warm, it will rise quicker.
  • Lightly punch down the dough and place on a lightly floured work surface and roll out to a 12-16 rectangle.
  • Sprinkle cinnamon sugar mixture evenly over dough, leaving a 1/2" border and roll the dough up tightly, moistening the end with water and sealing the roll.  
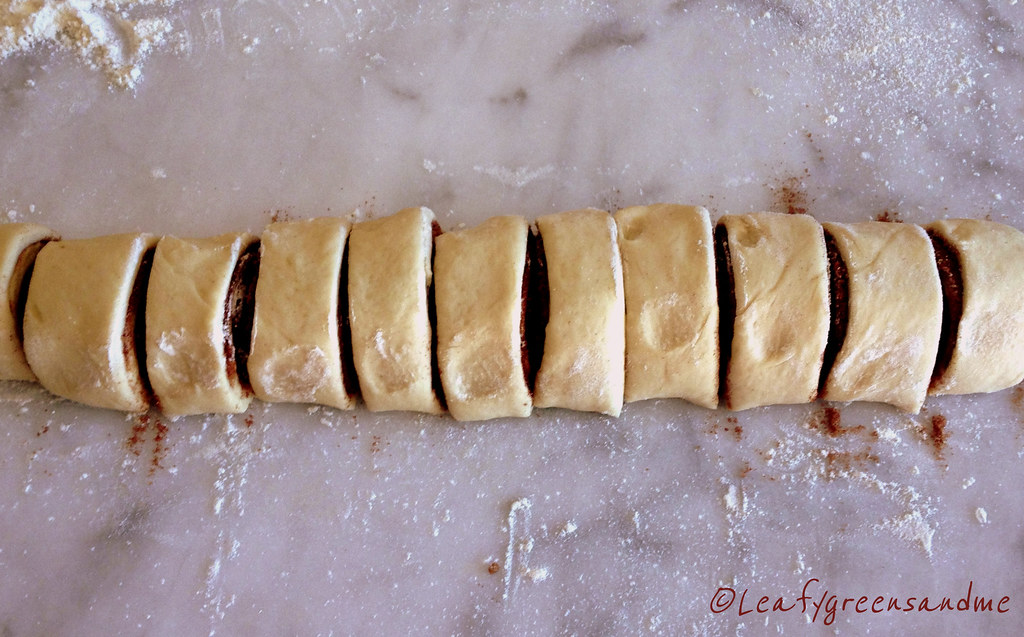
  • Place the seam side down and dust roll lightly with flour, along dusting a sharp knife with flour for every cut.  Cut the dough in half and then cut each half in half so that you have four equal pieces.  Cut each of these four pieces into three pieces so that you have 12 pieces.
  • Butter a 9x12 pan and place the cut side up.  Cover with plastic wrap and let rise for another 1-1/2 - 2 hours.
  • Preheat oven to 350 degrees and adjust the baking rack to the center of the oven.
  • Bake rolls for 25-30 minutes until golden brown, turning half way-through the cooking process.
  • Remove from the oven and turn out onto a cooling rack and let cool 10 minutes before separating and drizzling with icing.
  • While the rolls are baking, make the icing in a mixer and chill in the refrigerator until ready to use.

http://farm3.staticflickr.com/2884/11639178326_9b4c3a71a3_b.jpg

My husband and I ate quite a few of these today and we felt so guilty that we went for a long hike in the mountains.  We still have about seven left on the kitchen counter and they are screaming at us...Eat Me!  But we are being strong and the remaining rolls are going to work with me tomorrow for others to enjoy!  I hope that you enjoy them too!

Sunday, December 22, 2013

Baked Gingerbread Doughnuts

I grew up eating gingerbread--my mom's background was German-Pennsylvania Dutch and she always made gingerbread around Christmas. Come to think of it we always had gingersnaps in the house and she would use them to make German dishes like Sauerbraten with Dumplings.

http://farm6.staticflickr.com/5498/11507697415_25a69c61ff_b.jpg
 
Most people are not a big fan of gingerbread because they don't like the flavor of ginger--my husband included.  When I told him that I was making gingerbread doughnuts he was not jumping with joy.  His response to me was..."out of all the doughnut choices you're making gingerbread doughnuts?" But what would Christmas be without gingerbread and I'm not a big fan of gingerbread cookies...so gingerbread doughnuts it was!

This recipe makes 10-12 doughnuts and the batter is very thick.  It helps using a small spoon to spread the batter in the pan.  For the powdered ginger I used China Ginger from Penzeys Spices.  During Thanksgiving were up in Portland visiting family and we stopped by their retail store and purchased this ginger.  It has a clean flavor with a nice kick from the heat--truest to actual fresh grated ginger.

For the toppings have fun with it, but flavors that pair well with ginger are chocolate, dark berries and cinnamon.  I made a cashew milk chocolate-ganache, a white icing glaze mixed with wild blueberry preserves, and the old standby of cinnamon sugar.  My favorite flavor was the wild blueberry, but they all were delicious!

http://farm6.staticflickr.com/5510/11507797903_323a0997dd_b.jpg
Ingredients:

1 1/4 cup unbleached flour
1/4 cup packed brown sugar
1 tsp baking powder
1/4 tsp baking soda
1 1/2 tsp cinnamon
1 tsp ground ginger (more or less to taste)
1/2 tsp nutmeg
1/4 tsp allspice
1/4 tsp salt
2 tsp unsweetened cocoa powder
1/8-1/4 tsp cayenne pepper (optional)
1 1/2 tsp coffee extract
2 tbsp molasses
1/4 cup cashew milk or other non-dairy milk
1/2 cup organic applesauce
1 tbsp ground flaxmeal mixed with 3 tbsp warm water to make a flax-egg
1/4 cup vegetable oil (plus more for greasing the pan)

Directions:
  • Preheat oven to 350 degrees.  Grease doughnut tin and set aside.  
  • In a medium sized bowl, sift all dry ingredients together.
  • In a larger bowl, whisk all wet ingredients together.
  • Using a spatula add dry ingredients to wet ingredients and stir until just combined.  If batter seems too thick then add one tbsp cashew milk or non dairy substitute.
  • Spoon batter into doughnut tin and smooth with spoon.
  • Bake on the middle rack for 10-12 minutes.
  • Let cool for about two minutes before turning out on a cooling rack and repeat with remaining batter.
  • Let doughnuts cool completely before dipping in icing and decorating.
Enjoy and Happy Holidays to All!  


Thursday, December 22, 2011

"Drunken" Rum Balls

Just wanted to wish everyone Happy Holidays!  My husband and I will be heading down to San Diego for a week and we're looking forward to warmer weather and spending time at the beach.  I'll be back in the New Year with really healthy and nutritious recipes that will definitely help shed all the unwanted excess from the past two months!  Until then, I wish you and yours a safe and wonderful holiday, wherever your travels take you.


The reason why I call these rum balls "drunken" is because if you were to eat more than one and drive and a police officer pulled you over--you would probably fail a breathalyzer.  So not advisable.  

Rum balls are usually made with finely ground vanilla wafers, but I made a small batch of vegan snickerdoodle cookies and used them for the base.  Other ingredients that I used were the usual...dark rum, toasted pecans, unsweetened cocoa powder, confectioner's sugar, agave syrup (instead of corn syrup) and vanilla extract.  To garnish I rolled them in finely ground pistachios, powdered sugar and cocoa powder--but they are also good dipped in dark chocolate and sprinkled with toasted coconut!    

Saturday, November 19, 2011

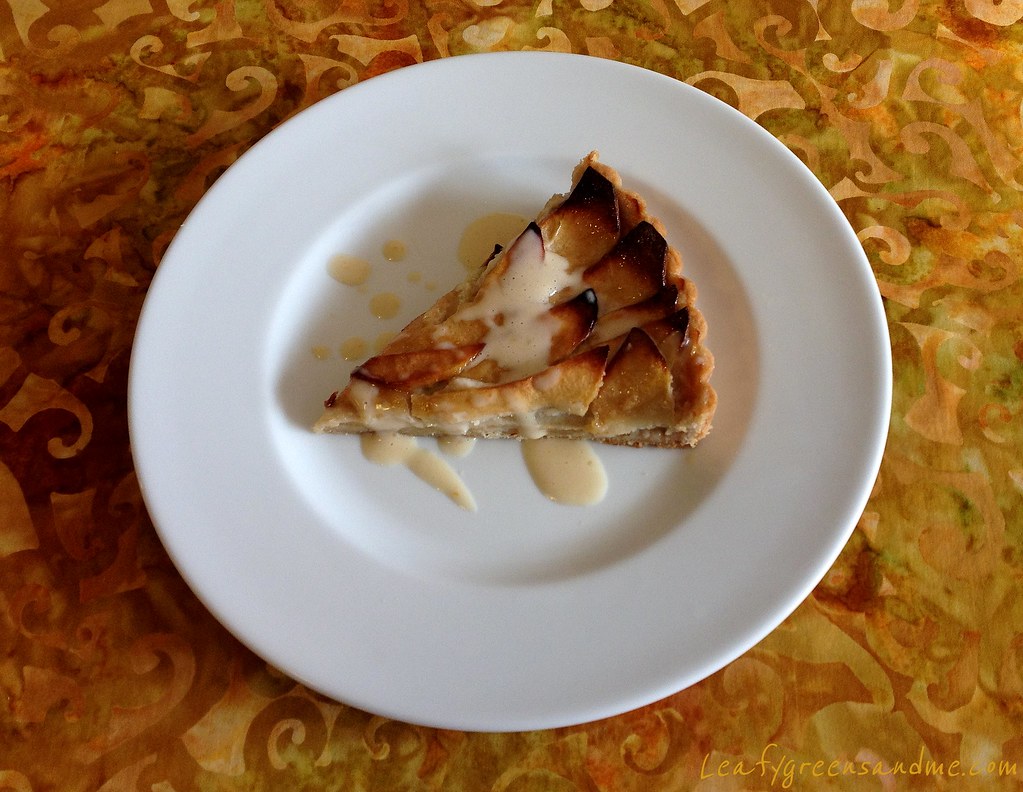
French Apple-Custard Tart

Today is my last post for my Thanksgiving Series.  When I mentioned my series back in late September I posted a photo for an Apple-Riesling Tart.  I did not post the recipe because I felt that it was too complicated.  And so I simplified the recipe by using a store-bought apricot jam and left out the Riesling reduction altogether.  The added cost for the Riesling really didn't provide much to the recipe--even though it sounded good.   I also experimented with a gluten-free version of the crust, but it was just too crumbly to hold up against the weight of the apples.  But I will continue experiment with a gluten-free crust for future posts, so stay tuned.

I still haven't decided what I'm going to serve on Thanksgiving, but I'll post my final menu next week.  Until then, thanks for following along with me and I wish you and yours a wonderful Thanksgiving Holiday!


Flaky Pastry Crust Ingredients:
(Makes enough for 2 9" Tart Pans)

1 1/4 cup whole wheat pastry flour
1 1/4 cup unbleached white flour
1 tsp kosher salt
1 tsp unfiltered sugar
12 tbsp or 1-1/2 sticks Earth Balance Vegan Buttery Sticks, cut into small cubes, frozen
4 tbsp or 1/2 stick Earth Balance Natural Shortening, cut into small cubes, frozen
1/4-1/2 cup cold filtered water

Method:

  • Add flour, salt, sugar to a food processor and pulse to combine.
  • Using the pulse mode add butter and shortening and pulse until the texture is crumbly and the fat resembles small peas.
  • While still in pulse mode, drizzle in water slowly until dough sticks together when pressed in your hand.
  • Remove dough from bowl and place on a cutting board.  Divide dough into two 1" high flat disk/circles.
  • Wrap in plastic wrap and chill for about an hour before rolling out.  If only making one tart, wrap the second disk in plastic wrap and aluminum foil and store in the freezer for up to three months.
Cashew Cream:
 
1 cup raw cashews, soaked overnight in filtered water
2 cups filtered water
 
Method:
  • Drain cashews and place in a blender and cover with 2 cups filtered water.
  • Blend on high for about 4 minutes until creamy.  You'll need to strain the cream if you don't have a high speed blender.
  • Measure out 1 cup for the custard and reserve the other cream for other uses.
Tart Filling:

3-4 large Granny Smith apples, peeled, cored, sliced in half and then thinly sliced
1 cup cashew cream
1/3 maple syrup
1 tsp vanilla extract
2 tsp cornstarch
1/4 cup apricot glaze (I used 100% pure fruit apricot jam, heated it and then strained it removing any solids) 
 
Method: 
  • Peel, core and slice apples and decorate top of tart shell.
  • In a blender mix together 1 cup cashew cream, maple syrup, vanilla extract and cornstarch.
  • Pour over top of tart/apples (see assembly instructions below).

Assembly:
  • Preheat oven to 375 degrees and position oven rack in the middle of the oven.
  • On a lightly floured cutting board, roll out the dough to 3/8" thick and line a 9" tart pan, pressing along the sides and removing excess from the edges.
  • With the prongs of a fork, prick the bottom of the dough several times and place in the freezer for 30 minutes to chill.
  • Remove tart from the freezer and place on a sheet tray.
  • Brush the bottom of the tart pan with a little apricot jam and then start overlapping apple slices starting at the top edge and working around to complete the circle.  You want the apple slices to cover the edge of the tart.  Follow the same pattern for the second and third layers, using any small apple slices to fill in the holes.  
  • You want the entire surface of the tart covered with apples.
  • Move the tart/sheet pan to the oven rack and then slowly pour in custard in a circular motion.
  • Carefully slide in oven rack and bake tart for about 1 hour and 15 minutes until golden brown and custard is set.  If apples start to brown too much you can drape tart with foil or turn oven down to 350 degrees, but you may need to adjust your cooking time with a lower temperature.
  • Remove tart from oven and let cool on rack for about 15 minutes before removing tart ring.
  • While tart is cooling, brush with warm apricot glaze.
  • Let tart cool for about 30 minutes before cutting and serve with your favorite vegan ice cream or sweetened cashew cream (see below).
Sweetened Cashew Cream:
 
1/2 cup cashew cream
1/4 cup apricot glaze
 
Method:
  • Mix ingredients together in a bowl and chill until ready to use.


Tuesday, November 15, 2011

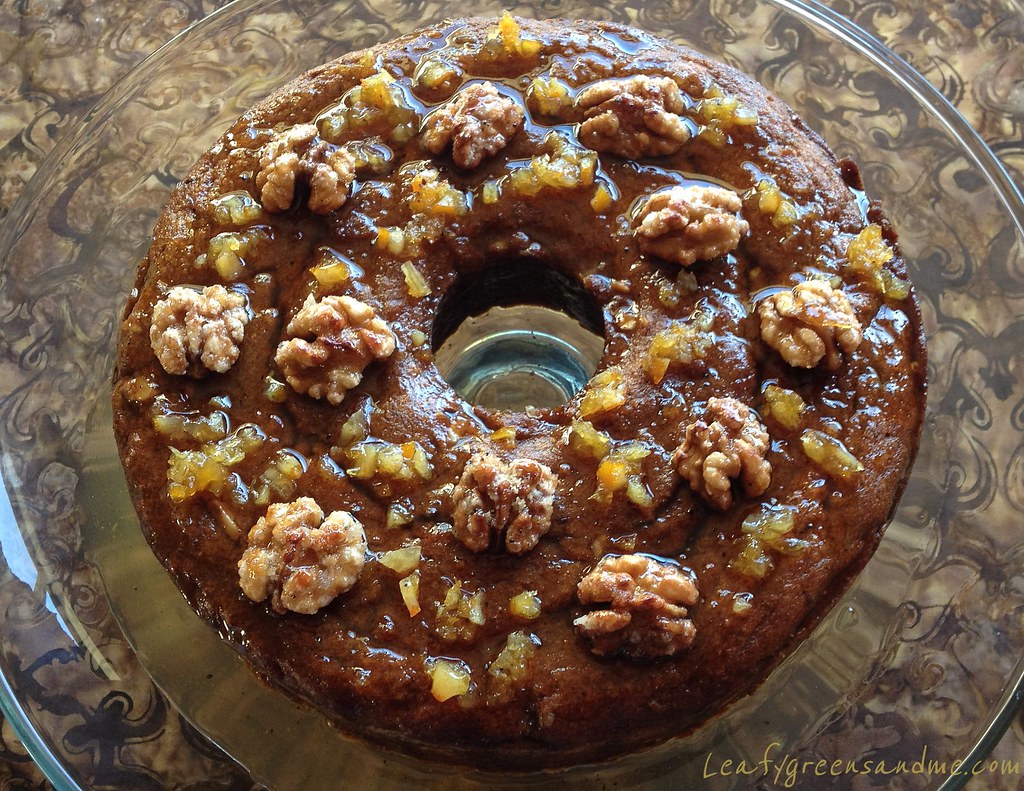
Pumpkin Walnut Cake with Candied Orange Syrup

I was flipping through my cookbooks trying to find a dessert recipe that would go well with a traditional Thanksgiving dinner, or potentially My Moroccan Thanksgiving and I came across a recipe for a Pumpkin Walnut Cake with Candied Orange Syrup.  This happens to be a perfect recipe for both because it uses pumpkin, but also uses spoon sweets (fruits cooked in syrup), which is a typical for dessert served in Middle Eastern countries.  So after veganizing the recipe, and also by adding cardamon spice to the syrup, I think that it turned out great and it is definitely a contender for this Thanksgiving!


Candied Orange Syrup:

2 cups unfiltered sugar
2 cups filtered water
1 large seedless orange, thinly sliced
1 tsp ground cardamon
5 black peppercorns
Note:  Kumquats would also work really well with this recipe; however they are very labor intensive because you need to remove all the seeds after slicing.

Method:
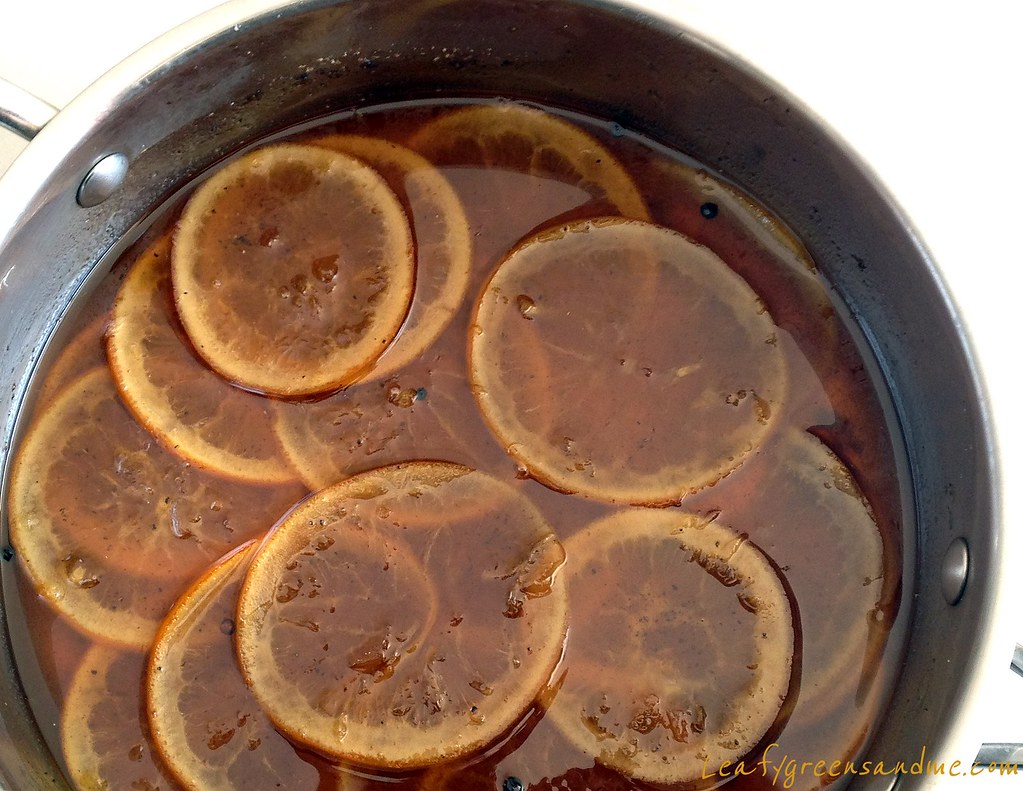
  • Add water, sugar, cardamon and peppercorns to a medium sauce pan and bring to a boil, stirring to dissolve sugar.
  • Add orange slices and stir to coat each slice.
  • Reduce heat to medium low, and cut out a piece of foil and place directly on top of oranges to slow the evaporation.  Cover pan with another piece of foil and slowly simmer for about 1 1/2 hours until syrup is the consistency of honey.
  • Remove from heat and let oranges cool in syrup before removing.
  • Once orange slices are cool enough to touch, strain syrup into another bowl, pressing the orange slices lightly to remove excess syrup and chop orange slices and set aside.  You'll need a 1/2 cup for the cake and 1/4 cup for garnish. 

Ingredients:

2 sticks softened Earth Balance Vegan Buttery Sticks, plus 1 tbsp for pan
2 1/2 cups whole wheat pastry flour, plus a little more for dusting pan
1 tsp baking soda
1 tsp baking powder
1/2 tsp kosher salt
1/2 tsp black pepper
1 tsp ground cinnamon
1/2 tsp ground cardamon
1/4 tsp ground ginger
1/8 tsp ground allspice
1 cup pure maple syrup
4 1/2 tsp Ener-g Egg Replacer, plus 3 tbsp filtered water
1 cup organic pumpkin puree
1 cup coarsely chopped walnuts
1/2 cup coarsely chopped candied orange slices

Method:
  • Preheat oven to 350 and position oven rack in the middle of oven.
  • Butter an angle food cake pan and dust lightly with flour and set aside.
  • In a medium bowl, add flour, baking soda, baking powder and spices and whisk until combined, set aside.
  • In a small bowl, whisk together egg replacer and water until frothy and set aside.
  • In a large bowl, using a mixer whip butter until fluffy.  Add maple syrup and mix again.  Next add egg replacer and pumpkin puree and mix until combined.
  • Slowly add flour to pumpkin mixture, and mix just until smooth.
  • Fold in chopped candied orange and walnuts.
  • Using a spatula, spoon cake batter into pan and smooth surface.
  • Bake for about 1 hour, turning half way through the cooking process.  Cake will be finished when a toothpick inserted in the center comes out clean.
  • Remove cake from oven and let cool on a baking rack for about 20 minutes.  Remove from cake pan and let cool further on rack, positioned over a sheet tray to catch syrup.
  • Spoon syrup over cake and then carefully lift cake to a serving platter or cake stand.
  • Garnish with candied walnuts, candied orange and additional syrup. 
Candied Walnuts:

10-12 whole raw walnut halves
2 tbsp powdered sugar

Method:
  • Bring a small pot of water to a boil and add walnuts.  Blanch for about 1 minute and then drain and toss in powdered sugar to coat evenly.
  • Place walnuts on a parchment lined baking sheet and bake for about 10 minutes until sugar has caramelized, turning nuts over half way through the cooking process.

Sunday, November 6, 2011

Sweet Potato Tart with Candied Pecans

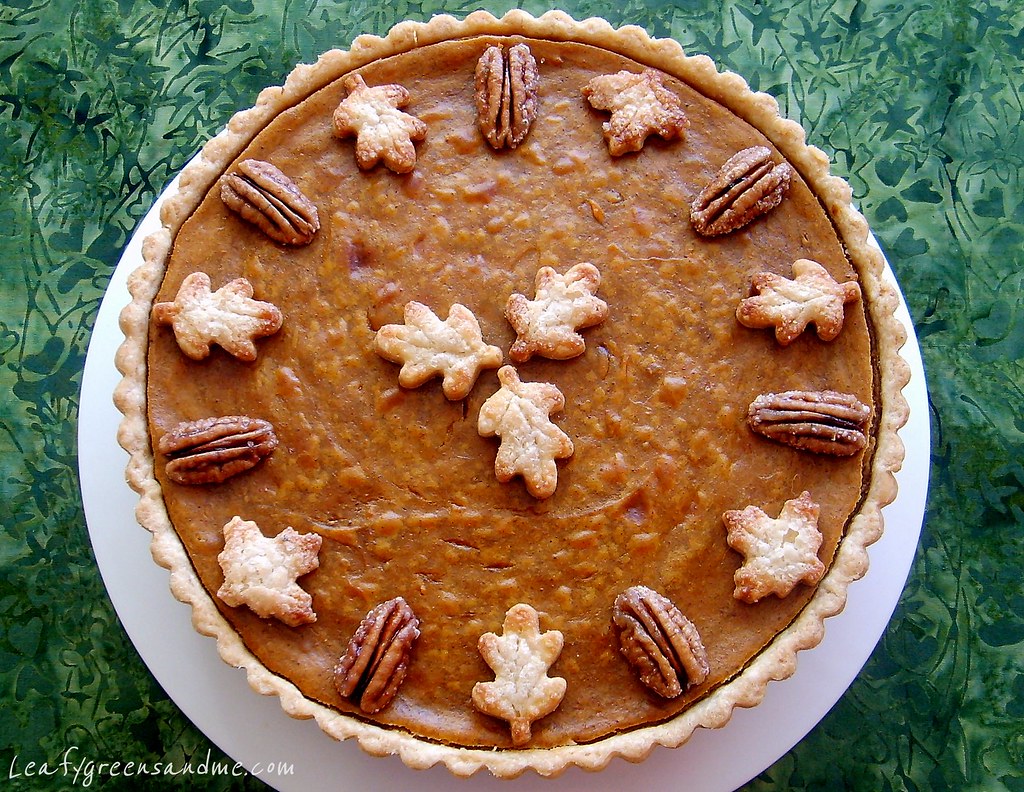
The filling for this tart is actually made with garnet yams, but calling the tart a Garnet Yam Tart doesn't have quite the same ring to it.  I prefer using yams over sweet potatoes or even pumpkin puree because of their natural sweetness and their deep orange color.  And because they are so sweet you can cut down on the sugar in the recipe and even use a natural sweetener such as maple syrup, which is what I used.  I also prefer serving tarts over pies.  I love the way they look with their perfect crimped edges and I prefer the filling to dough ratio.  If you don't have a tart pan, no problem, use your favorite pie pan and crimp the edges to your liking.  BTW, this is totally delish and I will definitely be serving this for dessert this Thanksgiving.
 

Flaky Pastry Crust Ingredients:

1 1/4 cup whole wheat pastry flour
1 1/4 cup unbleached white flour
1 tsp kosher salt
1 tsp unfiltered sugar
12 tbsp or 1-1/2 sticks Earth Balance Vegan Buttery Sticks, cut into small cubes, frozen
4 tbsp or 1/2 stick Earth Balance Natural Shortening, cut into small cubes, frozen
1/4-1/2 cup cold filtered water

Method:
  • Add flour, salt, sugar to a food processor and pulse to combine.
  • Using the pulse mode add butter and shortening and pulse until the texture is crumbly and the fat resembles small peas.
  • While still in pulse mode, drizzle in water slowly until dough sticks together when pressed in your hand.
  • Remove dough from bowl and place on a cutting board and form into a 1" high flat disk/circle.
  • Wrap in plastic wrap and chill for about an hour.
Yam Filling:

1 3/4 cup garnet or red yam puree, about two medium yams, baked, pureed
1 1/4 cup cashew cream, see recipe below
2 tbsp cornstarch
1/3 cup silken tofu
3/4 cup pure maple syrup
1 tbsp molasses
1 tsp vanilla extract
3/4 tsp ground cinnamon
1/2 tsp ground nutmeg
1/2 tsp ground ginger
1/8 tsp ground cloves
1/8 tsp kosher salt

Method:
  • Pre-heat oven to 375 degrees.
  • Wash yams and stick with a fork several times and place directly on the oven rack and bake for about an hour until soft.  Remove from oven to cool.  
  • Once yams are cooled, peel and place in a food processor and blend until smooth.
  • Measure out 1 3/4 cup puree and place back in food processor--you may not use all of the puree depending on the size of your yams.
  • In a small bowl whisk together cashew cream and corn starch and add to food processor along with all the other ingredients and blend until smooth.  Set aside until ready to use.
Assembly:
  • On a lightly floured cutting board, roll out the dough to 3/8" thick and line a 9" tart pan, pressing along the sides and removing excess from the edges.  Reserve excess dough to make leaves.  
  • With the prongs of a fork, prick the bottom of the dough several times and place in the freezer for 30 minutes to chill.
  • Remove tart from the freezer and place on a sheet tray and using a spatula, add filling and smooth the top surface.  If using a tart pan, you will have a little extra filling left over.
  • Position oven rack in the center of the oven and bake tart for 45-55 minutes, rotating tart/sheet pan half way through the cooking process.  When ready the tart will puff up, there will be no jiggle in the center of the tart and will be lightly golden brown.
  • Set tart on a cooling rack and let cool for about 15 minutes before removing the tart ring.
  • To remove the ring, position tart on a wide-rimmed can and let tart ring fall away from the bottom of the tart.
  • Carefully place tart on serving plate and let come to room temperature (about 3 hours before cutting).
  • Garnish with candied pecans and pastry leaves and serve with your favorite vegan whipped topping or ice cream.  Or add some maple syrup to the leftover cashew cream and drizzle over sliced tart.

Cashew Cream:

1 cup raw cashews, soaked overnight in filtered water
Enough water to cover in the blender

Method:
  • Drain cashews and place in the blender.  Add enough filtered water to cover and blend on high until smooth, about 4 minutes.  
  • If you do not have a high-speed blender like a vita mix, then strain the cashew cream to remove any solids.
  • Measure out 1 1/4 cup and set aside
Candied Pecans:

1/2 cup whole raw pecans
2 tbsp powdered sugar
Pinch of cayenne
Pinch of salt

Method:
  • Blanch pecans in boiling water for about 1 minute.
  • Drain and toss in powdered sugar to coat.
  • Cover a sheet tray with a silpat or parchment paper and bake pecans in a 350 degree oven for about 10 minutes, turning pecans over half way through the cooking process.
  • Remove from oven and let cool completely before using.
Sugared Pastry Leaves:
  • Roll out remaining dough to 3/8" thick and using a leaf cookie cutter, cut and then score the veins of the leaves with a small paring knife.
  • In a small bowl, whisk together 1 tbsp of cashew cream and 1 tbsp of filtered water.
  • Brush each leaf with cashew mixture and then sprinkle with unfiltered sugar to cover.
  • Place leaves on a sheet tray covered with a silpat or parchment paper and bake in the oven for about 10 minutes until golden brown around the edges. 
  • Remove from oven and place on a plate to cool.


ShareThis