Showing posts with label Gluten Free. Show all posts

Sunday, June 1, 2014

Gluten Free "Hostess" Cupcakes

My husband's birthday was a couple of weeks ago and I wanted to bake him a gluten-free cake from scratch, but I really didn't have time when I got home from work and so I made cupcakes using Pamela's Gluten Free Chocolate Cake Mix.  They were absolutely delicious...moist, rich and super chocolatey!  For the egg substitute, I used Bob's Red Mill Egg Replacer, but ground flax meal/water would work just as great.

https://farm3.staticflickr.com/2931/14321047731_2087b1719e_b.jpg

To be honest, my husband probably would of preferred if I made Hostess Twinkies instead of the cupcakes, but Twinkies are so boring...it's just a vanilla sponge cake with piped in frosting.  No creamy ganache icing or fun squiggly decoration on the top...just a boring sponge cake.  Anyway, he loved them and I think that I made a chocolate lover out of him!


For the filling I used the same buttercream recipe that I used for my Veggie Cupcakes, but only made half of the recipe and I added a little more cashew cream about 1 Tbsp to make the filling smoother.  Using a small plain piping tip and squeezed in enough frosting to cause the cupcake to puff up, but not to break.


For the ganache topping I used 1/2 cup Ghiradelli semi-sweet chocolate chips and about 3 Tbsp cashew cream.  I placed it in the microwave for about 30 seconds until melted and then stirred in 1 tsp Earth Balance Butter.  Before decorating the cupcakes, I let both the cupcakes and the ganache cool to room temperature and the iced the top of the cupcakes using a small off-set spatula. 


And for the squiggle design I used a 1/2 cup sifted confectioners sugar with 1 Tbsp cashew cream and stirred until smooth.  You want this to be really thick so that when you pipe the icing will hold its shape.  Also, let the ganache set-up completely for about 30 minutes before piping the squiggly design.  To speed up the process you can place the cupcakes in the fridge for about 10 minutes until the ganache sets.


Sunday, April 13, 2014

Gluten Free Cupcakes with Veggie Colored Frosting

Growing up as a kid my mom, sister and I would always dye eggs this time of year.  Our mom being the natural artist that she was would create the most beautiful designs. It was hard to compete, considering the only artistic ability I have is to draw stick people, but it was fun and I have great memories of sharing this tradition with my mom and sis.
 

https://farm4.staticflickr.com/3695/13831206343_abbc72702f_h.jpg 

I have never liked eating eggs and never understood how you could dye them, and then several days later peel and eat them.  The food coloring would seep through the shell and the white of the egg would be purple, blue or grey.  Luckily for me I got to skip that part and now since I am vegan, creating beautiful cupcakes is my new tradition.

My hubby wanted gluten-free cupcakes and so I purchased a bag of Wholesome Chow Vanilla Cake Mix.  I've tried making gluten-free products from scratch, but it is really expensive.  By the time you purchase all the starches, g-f flours, xantham gum, etc., you're looking at a substantial cost.  Of course if I had a gluten intolerance then this would be fine, but they end up sitting in my pantry and then I just throw them out.  Wholesome Chow has the best packaged gluten-free products on the market, at least in my opinion.  Another brand that is suitable for Passover because it doesn't contain leavener is Manischewitz Gluten-Free Yellow Cake Mix. It comes with a chocolate frosting but you can omit this and use the buttercream recipe below.  This product is not vegan but you could substitute flax eggs in the recipe.

So what to do about the food coloring and frosting the cupcakes?  There's no way I would ever use commercial food dyes and the organic/natural plant-derived dyes are too expensive. I did an internship at a bakery once and I watched how much food coloring they used in everything and I would never eat their cookies, cakes or cupcakes...especially their red velvet. 

https://farm4.staticflickr.com/3695/13831497744_63858e438d_h.jpg

So instead of spending a lot of money, I decided to use what was in my fridge and the buttercream turned out beautiful and delicious.  Yes it takes a little bit more work because you have to juice the vegetables first, but you can still obtain beautiful pastel colors or even vibrant hues using vegetables.  Plus everything was organic!  Here's what I did:

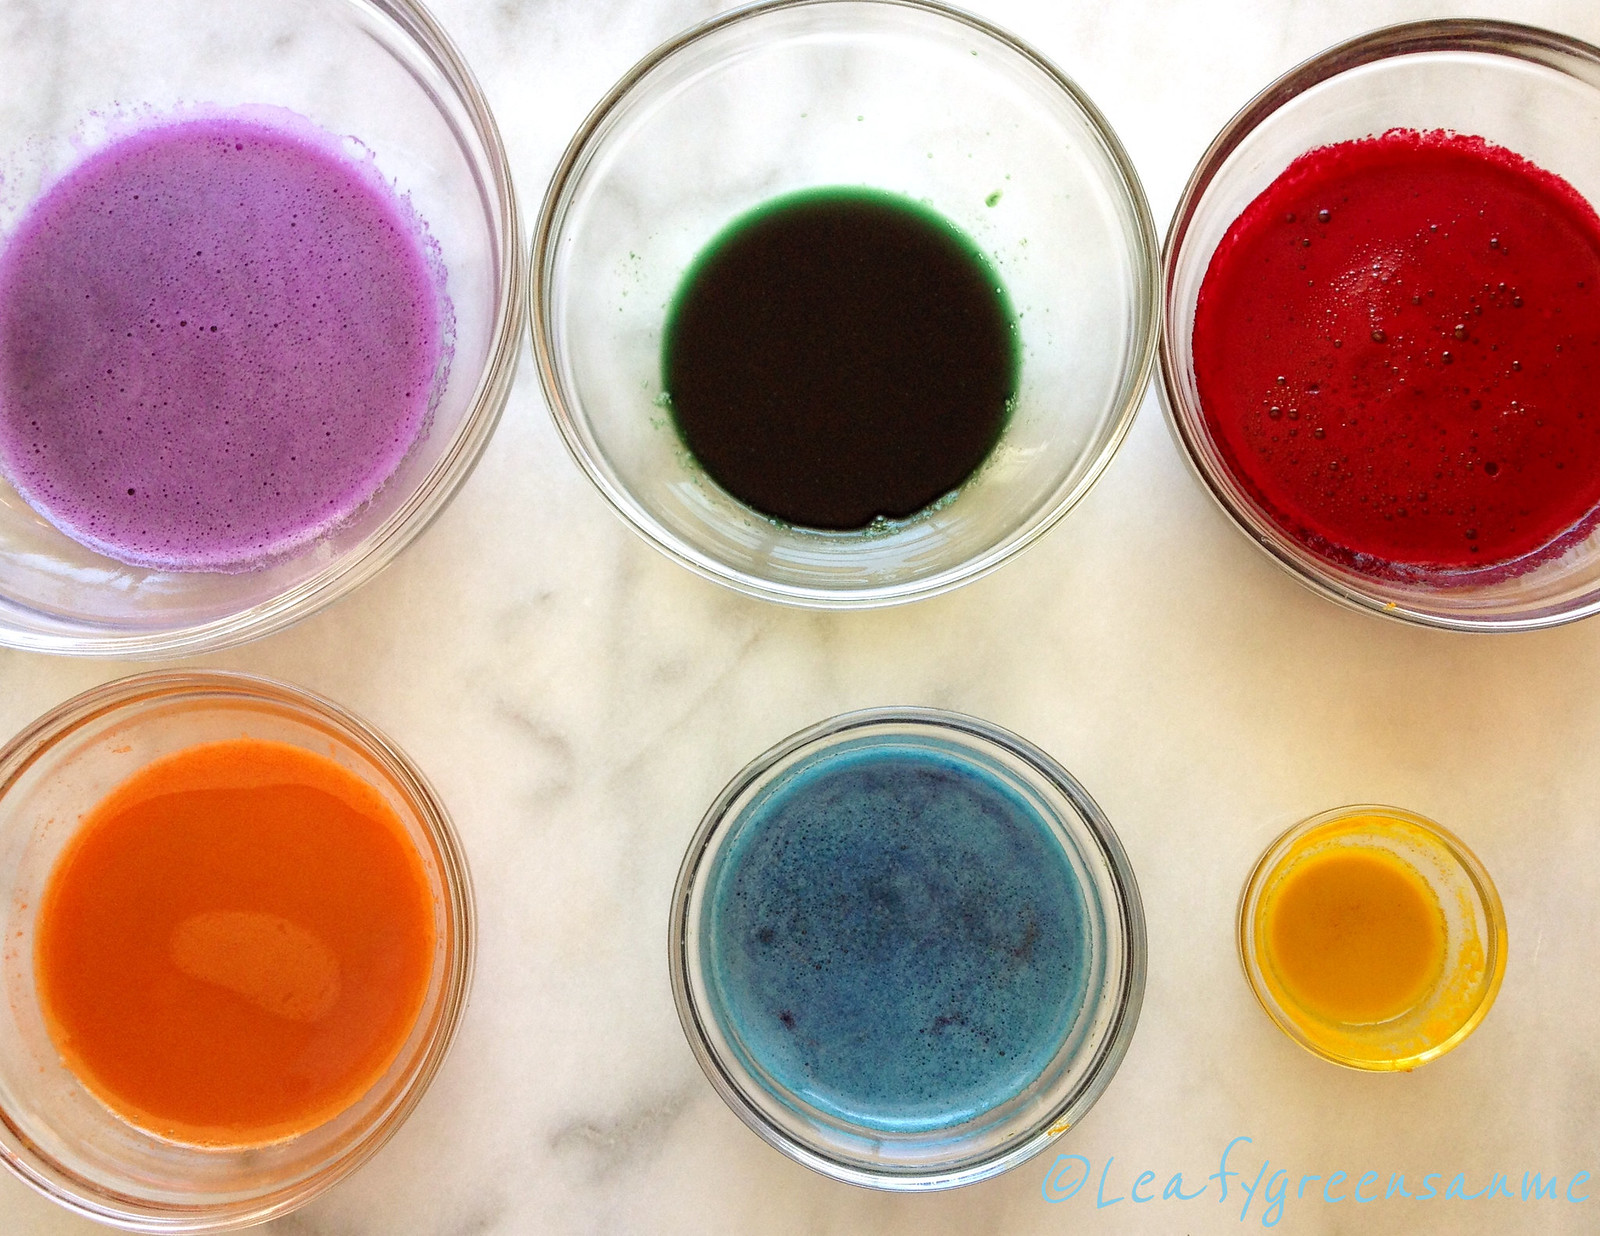
Purple:  Red Cabbage
Green:  Spinach with a pinch of spirulina (could of used more spirulina to get a darker green--be careful though so that it doesn't taste like the ocean)
Red:  Beet
Orange:  Carrot (I also reduced the carrot juice down to a puree to obtain a darker hue)
Blue:  Red Cabbage and a 1/4-1/2 tsp of baking soda
Yellow:  Turmeric (I used about 1/4 tsp with 1-2 tsp water to make a paste)

Now you would think that by using vegetables and spices that it would impart these flavors into the frosting, but it is ever so faint and when you combine it with the cupcake you can't even tell.  Kids would love eating these even if they helped you make them and knew that they were made with vegetable juice!

https://farm4.staticflickr.com/3790/13831456534_30430bcd64_h.jpg

Vanilla Buttercream Frosting
1 tsp pure vanilla extract
2 - 3 Tbsp almond milk (or more to obtain desired consistency)
3 cups sifted organic powdered sugar

In a mixer fitted with a paddle attachment, beat butter and shortening on medium speed until combined and creamy.  Add vanilla extract, almond milk and then with speed on low, add powdered sugar until combined.  Once combined, increase speed to medium and then whip until creamy and fluffy about four minutes.  Portion buttercream evenly into six bowls and then start out adding 1/2 tsp vegetable juice to each bowl and whip with a spatula until creamy.

Note:  Because of the acidity of the vegetable juice, it will look as if the buttercream will start to curdle.  This is why it is good to start with a small amount and add slowly and beat with a spatula until creamy.  For all of the above colors, I used no more than 1 tsp veggie juice to each to get the desired effect.  Also, you can use all Earth Balance and not the Spectrum Shortening, however the shortening holds the buttercream at room temperature longer and so you do not need to worry about refrigeration.

I hope you'll give this recipe a try and start a new holiday tradition with your family!

Wishing you and yours a wonderful Passover and Easter!     

 

Wednesday, January 29, 2014

Mexican Yuba Omelet

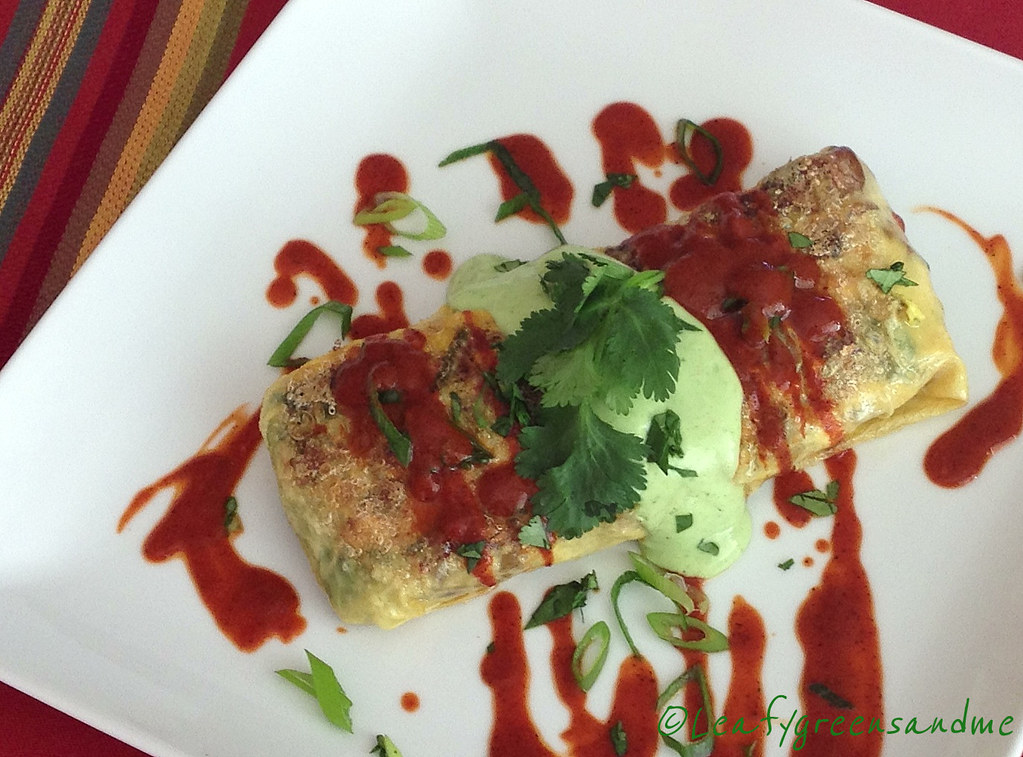
I love using yuba (tofu skins) because it is so versatile.  It's great for wrapping/stuffing, stir-fry's and soups.  You can purchase yuba at an Asian market, but I get mine freshly made at my local Sogo Tofu shop.  This yuba omelet tasted like the real deal because I also added shredded firm tofu, mixed with turmeric and black salt found at my local Indian market.  Black salt is an Indian spice that tastes like sulfur and imparts an "egg-like" flavor.  It is "rose" in color instead of black and a little goes a long way because it is very salty!   

http://farm4.staticflickr.com/3705/12214515663_f65ed4cc0b_b.jpg

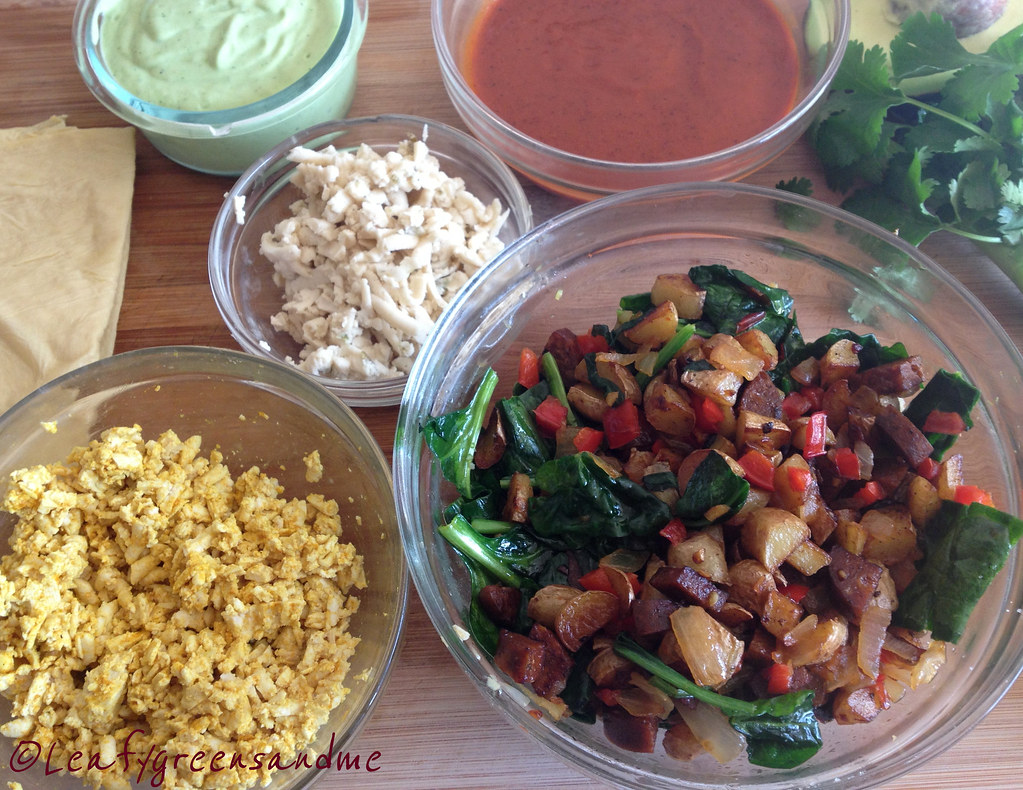
For the enchilada sauce, you can purchase store bought or make your own using my recipe.  I cut the recipe in half for this dish, but if you want to make the full batch, you can store it in the fridge for a couple of weeks and use it for another meal.  For my avocado emulsion I used:  1/2 large avocado, 1 cup water, 2 tbsp vegan sour cream, a handful of cilantro leaves, the juice from a 1/2 lemon or lime, and salt and pepper to taste--then blended until creamy.

http://farm4.staticflickr.com/3793/12214908636_49304eee69_b.jpg 

And now for the filling...the best part!  I used everything that I love in an omelet or burrito.  I pan roasted baby fingerling potatoes, and sauteed red bell pepper, onion and garlic.  I also sauteed one link of Artisan Tofurky Andouille Sausages (had this in my fridge and wanted to use it up), but sauteed cremini mushrooms would of been my first choice.  I then added fresh spinach, salt and pepper to the mix and cooked until just wilted.

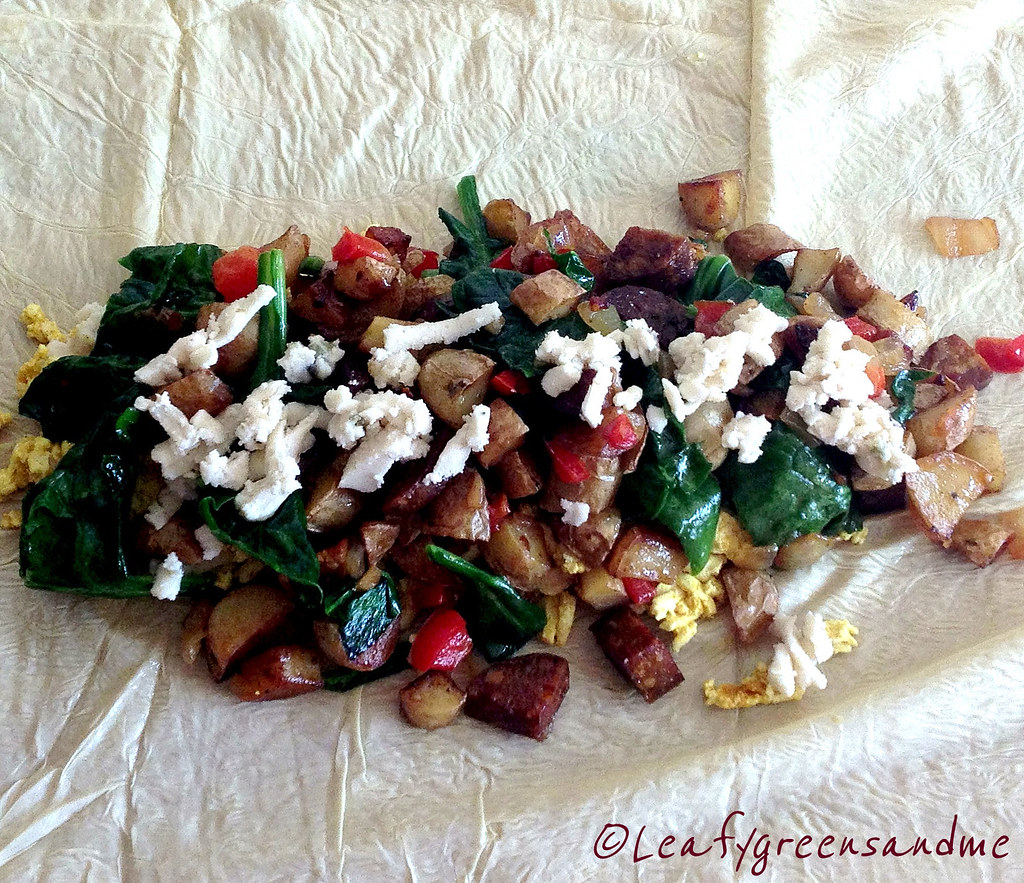
To assemble, I unwrapped the tofu skin.  Depending on the size you may need to cut the tofu skin, but since they are rather thin I like to leave them big so that when I stuff, roll and wrap, I get double the coverage.  I placed a layer of shredded Daiya Havarti Style Wedge on the bottom, followed by shredded tofu mixed with turmeric and black salt, followed by the potato/veggie mixture, topped with more cheese and wrapped it up like a burrito.  I then added a little olive oil to a saute pan and browned on both sides before placing in a 350 degree oven for about 5 minutes just to make sure that it heated all the way through and golden brown.

http://farm4.staticflickr.com/3730/12214497593_f9e76cd5fb_b.jpg

Remove from the oven and top with enchilada sauce, avocado emulsion, cilantro and finely sliced green onion.  Perfect for breakfast, lunch or dinner...I could eat these every day stuffed with a different combination of ingredients and sauces!  For my next one I'm going to stuff with a stir-fry mixture of fresh veggies, grilled teriyaki tofu and serve with Asian dipping sauces!  YUM!      

Friday, January 24, 2014

Roasted Wild Mushroom Pizza Blanco

I never got my oven fixed last week but when I turned it on the other night it worked perfectly.  I'm sure eventually I'll need to call in the repair guy, or get a new one, but until then it's nice not having to spend the $100 plus!  I'd rather spend the money on quality ingredients to make delicious food!

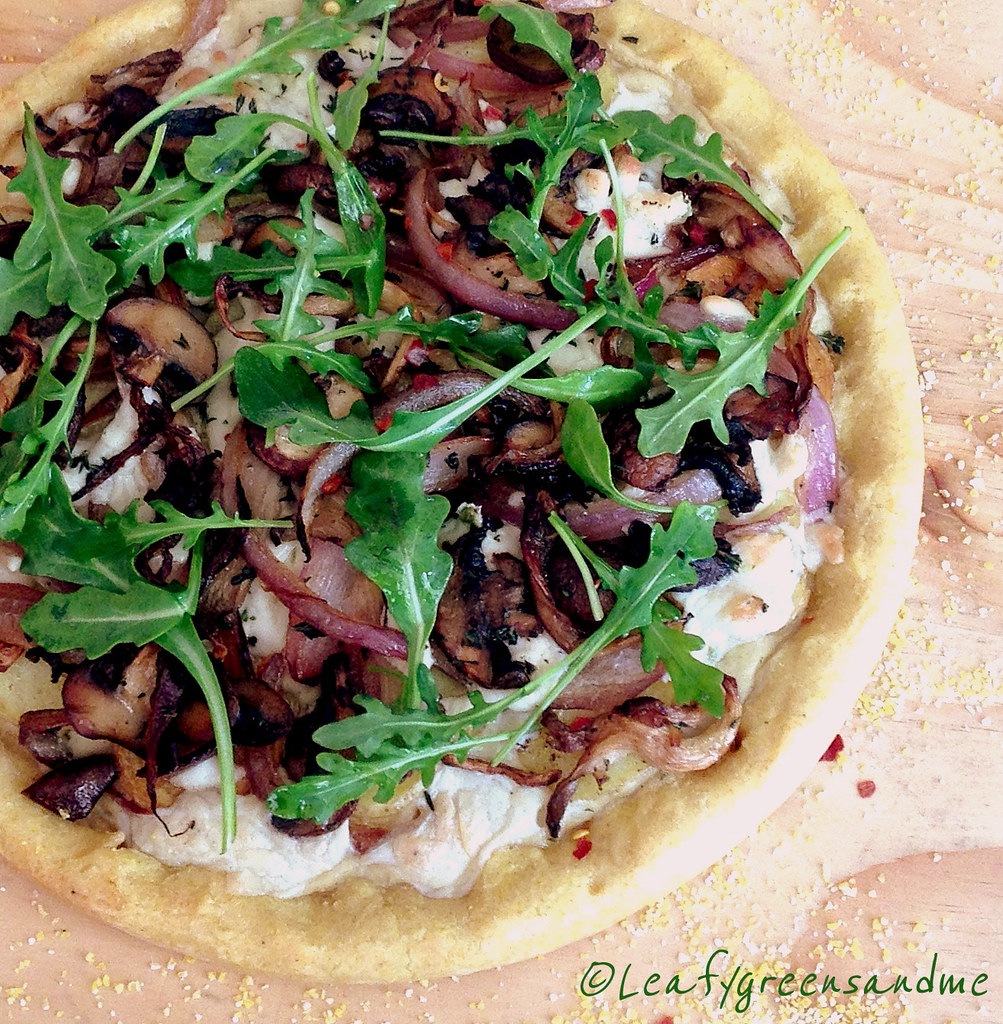
For this pizza I used a gluten free cornmeal crust.  I really didn't like the crust that much...it was chewy and didn't brown properly and I much prefer an extra-thin crispy crust for my pizza.  I do like using gluten free pizza crusts, but this was not one of them.  However, the toppings were amazing! Here's what I did:

http://farm8.staticflickr.com/7391/12125213085_838ce18314_b.jpg
  
I pan roasted both cremini and oyster mushrooms in olive oil, fresh thyme and salt and pepper until lightly golden brown.  While the mushrooms were roasting, I caramelized sliced red onions in olive oil and set aside.  I then sliced baby creamer potatoes about 1/8" thick and sauteed them in olive oil until golden brown.  

To assemble the pizza, I brushed the dough with extra virgin olive oil and then spooned about 1/3 cup of my homemade creamy pasta alfredo sauce on the bottom.  I topped the sauce with one cup of shredded Daiya Harvarti Style Cheese Wedge, followed by the roasted mushrooms and then the onions.  After baking the pizza I topped it with fresh arugula tossed in a little evoo, s&p, and finished with a sprinkle of crushed red pepper flakes.

If you make the alfredo sauce the day before and purchase a pre-made pizza crust, then this is an easy Friday night dinner after a long week at work!  And it was delicious!  Now I've got to figure out what I'm making for tonight...stay tuned...will post this weekend! 

Happy Friday! 

Sunday, January 12, 2014

The Perfect Start...to a Perfect Day!

So I thought that I would post something really healthy since it is the beginning of the New Year and we all are trying to keep our resolutions to eat healthy.  Actually, I really don't have any resolutions when it comes to food or diet.  Maybe I could be a little more patient, procrastinate less, or take time to smell the tulips more often, but pretty much everyday I have a healthy juice, or a smoothie and some days this is all that I drink!

http://farm6.staticflickr.com/5531/11911686916_06d02f05fa_b.jpg

I have never been able to go on a juice fast for more than 24 hours.  However, I do try to eliminate all solid food from my diet at least several of times a month.  I pick a Wednesday and drink only fresh vegetable juices and smoothies throughout the day, along with filtered water and herbal tea.   If you drink only pure vegetable juice then you are eliminating fiber from your diet and so I try to drink both while on my 24 hour cleanse.  Plus the smoothies keep you fuller longer. 

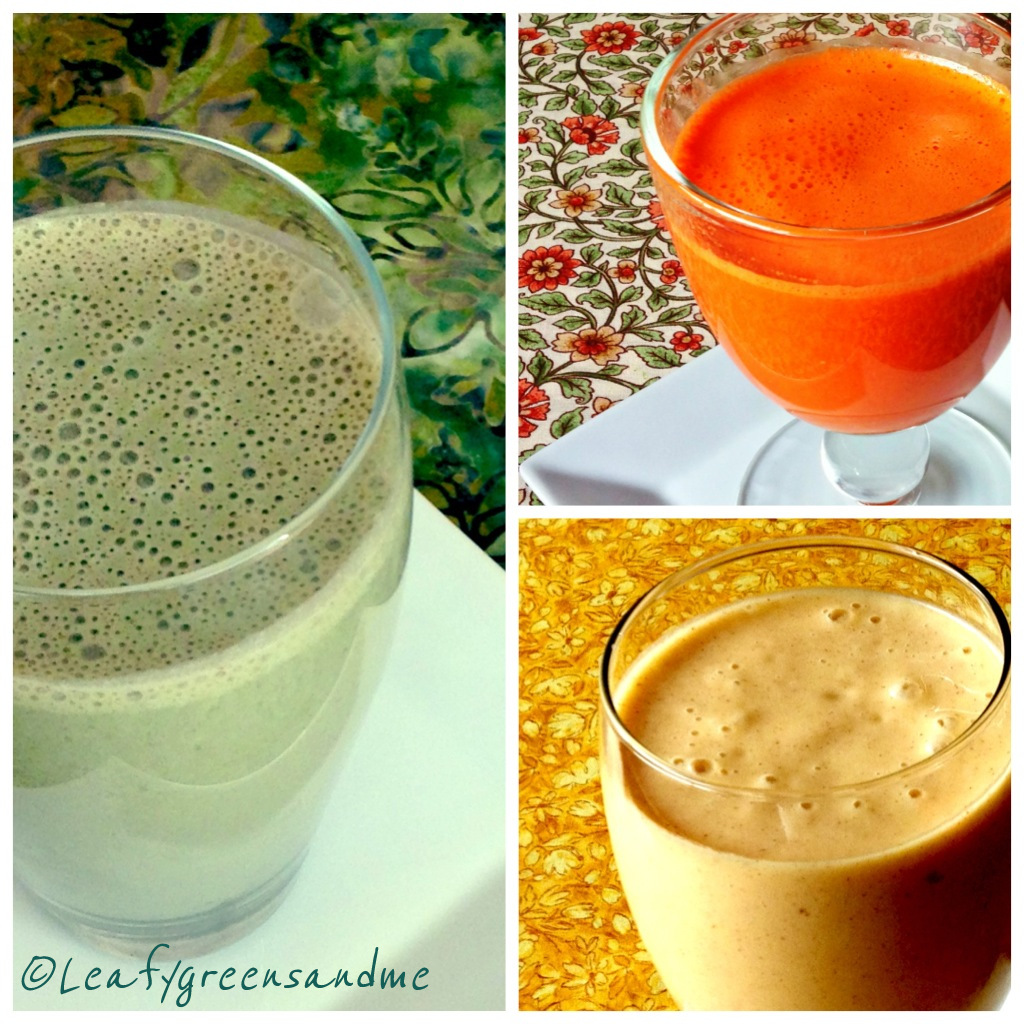
Here's a typical day:  6am (Herbal Tea with Lemon), 7am (Healthy Green Juice), 8am-11am (Herbal Tea and Water), 11am (Green Protein Power Smoothie) 12-2pm (Herbal Tea and Water), 2pm (Green Juice, Beet Blast or Crazy Carrot Juice), 3-5pm (Herbal Tea and Water) 6pm (Tropical Thunder Protein Smoothie), 7-9pm (Herbal Tea and Water).

The following day I wake up feeling refreshed, lighter and energized.  Perhaps just giving your digestive track a break from having to work so hard gives your body a needed lift.  I'm not a nutritionist and long-term fasting is not for me, but I do believe that I benefit from drinking fresh vegetable juice daily and following a 24 hour cleanse.  

http://farm3.staticflickr.com/2834/11911072893_d8e94c0102_b.jpg

I like experimenting and throwing a bunch of veggies in a juicer or blender and tasting the outcome.  Some come out horrible tasting but most are quite delicious.  Here are a few of my favorite drinks--just please make sure that you use all organic ingredients--you don't want to drink pesticides!
  • Healthy Green Juice--My Morning Cocktail
  • High Antioxidant Green Smoothie
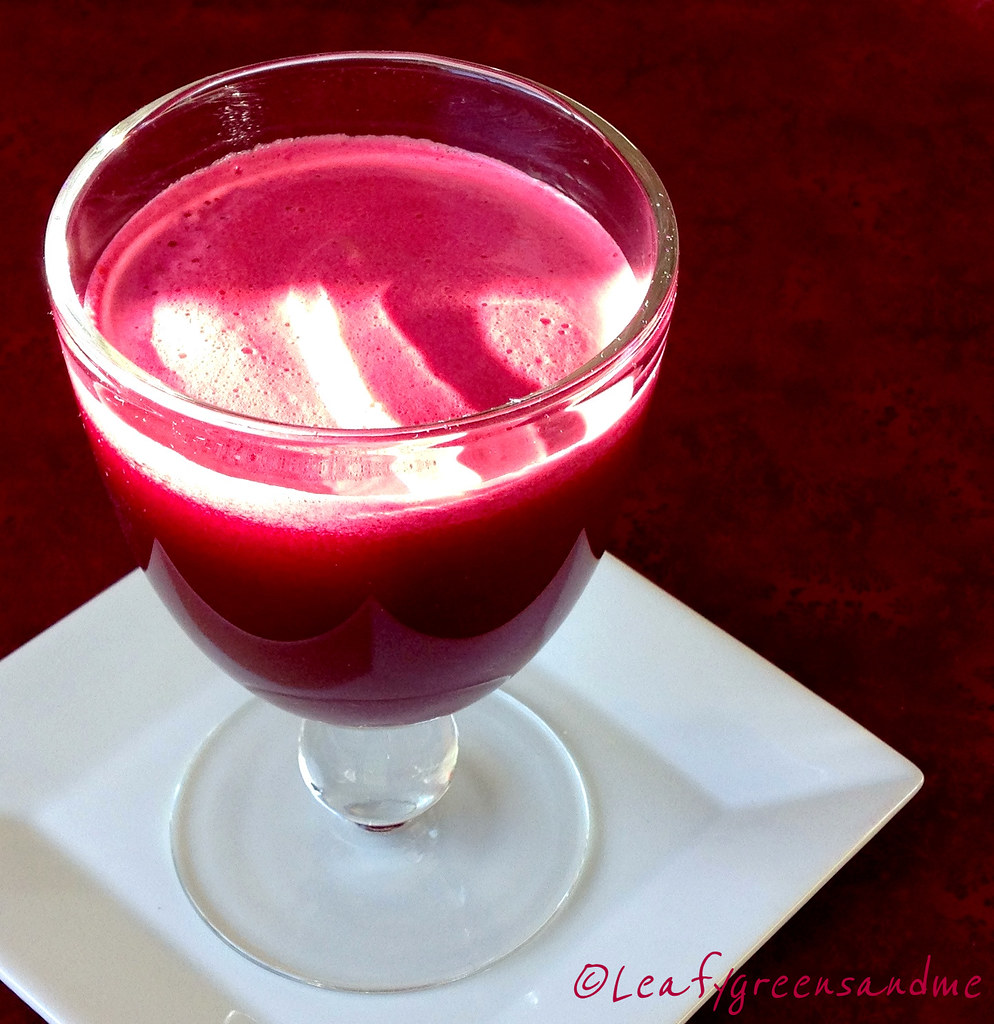
  • Beet Blast:  1 medium beet, 2 medium carrots, 1 green apple, 1 small English cucumber, 1" piece fresh ginger root, juice from 1/2 lemon
  • Crazy Carrot:  1 large orange peeled, 2 large carrots, 1/4 cup pineapple, 1" piece fresh ginger root, 1/4 tsp turmeric, juice from 1/2 lemon
  • Green Protein Power Smoothie:  1 cup almond milk, 1 medium banana, 2 tbsp almond butter, 2 tbsp Warrior Force-Extreme Chocolate Plus Protein Powder, ice if banana isn't frozen
  • Tropical Thunder Power Smoothie:  1 cup coconut water, 1/2 banana, 1/2 cup frozen mango, 1/4 cup frozen pineapple, 2 tbsp soaked chia seeds.

http://farm3.staticflickr.com/2821/11911224214_29951eb38b_b.jpg

What Supplements to Add:

When drinking pure juice, I usually do not add any supplements, other than a 1 tsp of flax oil.  Or after juicing I will add the juice to the blender, add a 1/2 avocado or 2 tbsp hemp seeds and blend.  This adds fiber and protein to the juice and also gives it a creamy consistency.  

When drinking smoothies I add different supplements.  My favorite supplements are by Health Force Nutritionals.  I use their Warrior Food Protein Powder, VitaMineral Green, Earth, Maca, Vitamin C, and Spirulina.  All of their products are raw and I really like the taste--they do not taste gritty or gummy.  I pick and choose depending on what benefit I want.  I will also add soaked chia seeds or hemp seeds for protein/fiber and of course flaxmeal or flax oil.
     
Also, I prefer drinking juice over smoothies and green smoothies made with kale and mango over pure fruit smoothies.  I never drink smoothies made with strawberry or raspberry and prefer mango and peaches because they taste less sweet. To sweeten a smoothie I may also add soaked pitted dates, or pure maple syrup.  When making a green smoothie, the ratio of veggie to fruit should be 3:1.   

And of course, all of this is not possible without a good juicer and a high-speed blender.  I have a Breville Fountain Juicer and a VitaMix.  I use them daily.  It killed me to spend $400+ for a VitaMix and thought about owning one for years but it has been worth ever penny.  I use it every day and hardly ever pull out my food processor.

And one final note, I drink a shot of wheat grass daily, or try to at least a couple times per week.  I usually make my own during the summer but choose to buy it during the winter because it can get moldy because of moisture.  If you're interested in making your own this summer go to my link on "Growing Wheatgrass--My Liquid Sunshine"!  It's really fun to make...the taste not so much, but I do believe that it is good for me!

To your Health!


Friday, November 23, 2012

Easy Thanksgiving Dinner

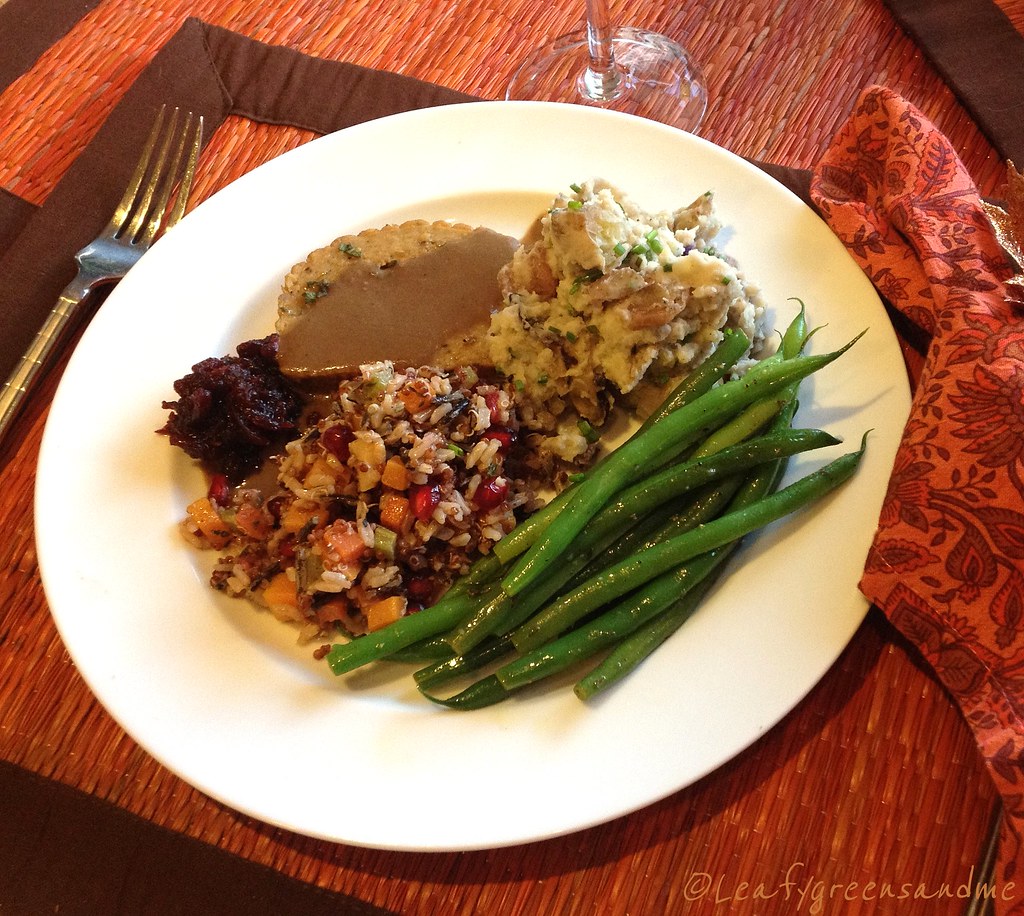
Yesterday was probably my easiest and best Thanksgiving ever.  I swore after last year that I would never spend all day (12 hours) in the kitchen...cooking and cleaning.  And as much as I love cooking--it's just not worth it.  My menu yesterday took 4 1/2 hours from start to finish (prep, cooking, eating and cleanup)!  So instead of starting to cook at 8:00am, I slept in, had a relaxing breakfast with my husband reading the paper, surfed the web, played games, went for a walk and then at 1:00pm I started my first prep!  So here's what I served:

  • Autumn Wild Rice Salad:  This salad is gluten free.  I used a combination of wild rice, brown basmati rice, red quinoa, diced butternut squash, carrots, celery, sage, thyme, pomegranate seeds and a pomegranate vinaigrette.  I made a similar salad last year using whole grain couscous.  This salad can be served at room temperature or chilled.
  • Blue Lake Green Beans with Lemon-Thyme Vinaigrette:  I blanched the green beans in salted boiling water for 1-1/2 minutes and then shocked in ice water, drained and set aside.  I then made a quick vinaigrette with minced garlic, shallots, thyme, whole grain mustard, freshly squeezed lemon juice, white balsamic, grapeseed oil and olive oil.  Just before serving I sauteed the beans with some of the vinaigrette to heat through.
  • Smashed Baby Fingerling Potatoes with Garlic & Chive Cream:  This couldn't be simpler--no potatoes to peel...I made a quick roasted garlic-cashew cream sauce (soaked cashews, water, 1 roasted garlic bulb, salt and pepper and blended it together).  I cooked the potatoes in salted boiling water, drained, smashed, added vegan butter, roasted garlic cream sauce and salt and pepper to taste. 
  • Roasted Shallot Gravy:  This is a delicious gravy made in 30 minutes using no cornstarch or butter.  I thinly sliced 5 large shallots (about 3 cups), along with 6 oz of sliced cremini mushrooms.  I sauteed them in olive oil for about 10 minutes until caramelized and then added minced garlic, fresh thyme and deglazed with ruby port wine.  I cooked the wine off and added 4 cups of vegetable stock and reduced for 20 minutes.  I blended everything together along with 3 tbsp nutritional yeast and salt and pepper to taste.  
  • Field Roast (Celebration): I braised the roast for about 35-40 minutes in a small casserole dish with vegetable stock, fresh sage, fresh thyme sprigs and olive oil.  I browned the top the last few minutes of cooking, sliced to desired thickness and poured remaining broth over top upon serving.
That's pretty much it except that I purchased freshly made cranberry-orange chutney and a vegan pumpkin pie from my work.  As much as I like baking and making pies--it takes too long.  Yes, it is a little bit more expensive, but the time savings is well worth it!  Oh and I can't forget the wine to round out the meal...I served Talbott Kali Hart 2010 Pinot Noir from Monterey.  It complimented the meal beautifully!  

And tonight is another easy cooking night...can't wait to eat the leftovers! Hope you had a wonderful Thanksgiving--I really did! 

Saturday, July 7, 2012

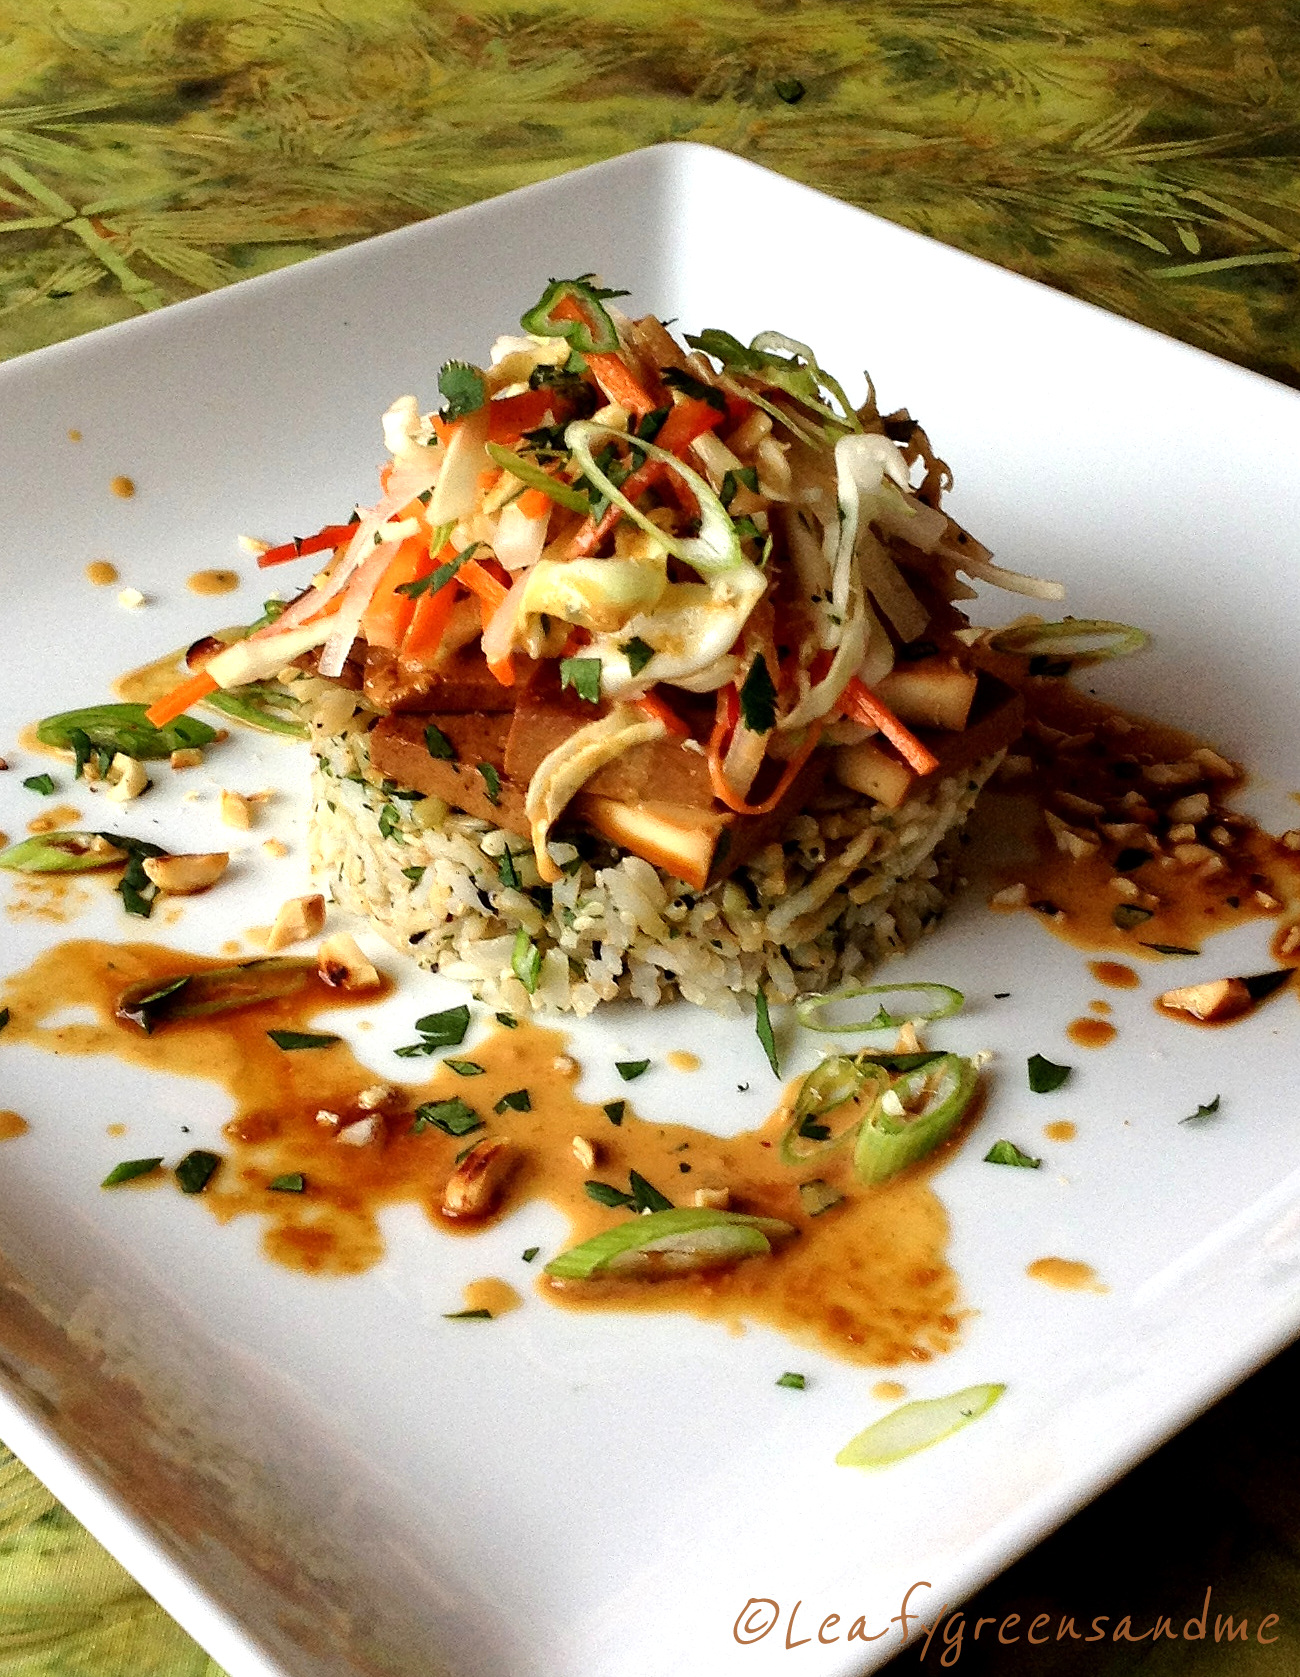
Thai Braised Tofu with Spicy Peanut Sauce

Thai food is one of my favorite cuisines.  I just love combining the flavors of spicy, sweet, sour and salty together to create a dish.  This dish is simple to prepare and light to enough to eat on a warm summer's evening.


For the tofu I marinated it with lemongrass, ginger, garlic, tamari, lime juice, and sriracha and braised it for a short period of time.  For the rice, I steamed brown basmati and tossed it with cilantro, toasted sesame seeds and lime juice.  To finish the dish, I topped it with a salad of shaved carrots, red bell pepper, green cabbage, green onions and tossed it with a spicy peanut-tamarind dressing.  Finally, I garnished the dish with toasted peanuts, and Thai basil.  

So beautiful and so delicious! 

Tuesday, January 31, 2012

Spicy Chickpea & Sweet Potato (Aloo)

You can tell that it's the end of the month and the end of my grocery budget.  Not that this dish couldn't be served and enjoyed anytime during the month, but it's a great dish to serve when you're cooking from your pantry.  I had all the ingredients (dried chickpeas, tomato puree, Indian spices, quinoa) in my pantry and so I only needed to purchase one large sweet potato, which cost me a whopping $1.70.  Normally I wouldn't be close to overspending for the month, but I traveled back east to visit my family and I always end up spending more trying to stock their pantry with healthy ingredients.  But just because this is a budget meal doesn't mean that it lacks flavor and certainly not nutrition.  One serving of this dish is packed with Vitamin C, Beta-Carotene, Lycopene, Potassium, Fiber and Protein!  I should be eating this more often--everyone should!  Good for the budget and good for your health!


I served the aloo over yellow quinoa, but brown basmati rice, or whole wheat couscous would also be good to soak up the flavorful sauce.  For the tomatoes, I used Pomi crushed tomatoes, but they are really expensive, but since they were already in my pantry I didn't need to spend the money.  If it were summer and the tomatoes were bright red and juicy I would just blanch them to remove the skins and grate them for the sauce.   Also, this is another oil-free dish--there's so much flavor that you don't any processed oils.

Ingredients:

1 tsp grated ginger
2 garlic cloves minced
1 tsp whole cumin seeds
1 tsp ground cumin
1 1/2 tsp ground coriander
3/4 tsp cayenne pepper (more or less depending on taste)
1/2 tsp turmeric powder
1 tbsp dried fenugreek leaves
1-2 small whole green Thai chilies, halved or quartered
2 cups tomato puree
2 1/2 cups filtered water, (more or less depending on consistency)
1 large sweet potato or yam, diced into 1/2-1" pieces (about 3 cups)
2 cups cooked and drained chickpeas or garbanzo beans
Kosher salt and black pepper to taste
1/4 cup minced cilantro leaves

Method:
  • Soak 3/4 cup of chickpeas overnight and then cook until tender.  Drain and set aside. 
  • In a large sauce pan, over medium-low heat, add whole cumin seeds and cook for about 1 minute until fragrant.  Add 1/4 cup water, grated ginger and garlic and cook for a couple of minutes until soft.
  • Stir in other spices and chilies and then add tomato puree and 2 cups of water.  Bring to a boil and then reduce to a simmer.
  • Next add the diced sweet potatoes and season to taste with salt and pepper.  Cook on medium-low heat until sweet potatoes are just tender, adding more water if necessary.
  • Finally add cooked chickpeas and heat through and season with salt and pepper if necessary. 
  • Garnish with minced cilantro and serve over grain of choice.


Monday, January 30, 2012

Spicy Black Bean Tacos with Chipotle Crema

These mini tacos are just too good!  My husband and I had like nine each for dinner on Friday night and then finished off the rest for lunch on Sunday.  I made the corn tortillas from scratch and you can really taste the freshness of the corn--so much better than the store bought version! 


For the spicy black beans and brown basmati rice, I cooked both the rice and the beans with an adobo spice blend.  I make all my own spice blends and I made this quite some time ago.  I don't remember the exact recipe ratio but it contained:  paprika, ancho chili powder, garlic powder, onion powder, coriander powder, cayenne pepper, dried oregano and salt and pepper.  If you don't want to go through the trouble of making your own spice blend then you can just use 1-2 tbsp chili powder or a taco seasoning blend.  Also Mexican markets carry an already pre-made adobo spice blend, but I find it to be a little bland.

I then made my own roasted tomato salsa, guacamole and a red and green cabbage salad with cilantro and lime juice.  I topped off the tacos with a cashew chipotle crema made with blended cashews, sun-dried tomato paste, paprika, garlic powder, chipotle powder, lime juice and salt and pepper.

I could eat these everyday--so healthy and delicious! 

Friday, January 27, 2012

Homemade Corn Tortillas & Roasted Tomato Salsa

I'm going to make this short and sweet because tonight is Mexican night and I absolutely can't wait to eat my mini tacos.  I made homemade corn tortillas (really simple and delish), as well as roasted tomato salsa.  I'll be serving my tacos topped with spicy Mexican rice, black beans, cabbage salad, guacamole, homemade salsa and chipotle crema!  I'll post photos and recipes tomorrow, along with my famous Pomegranate Margarita recipe.  Well at least it's famous in my household.  For the past two weeks I was away visiting my family in Maryland and my sister who doesn't drink alcohol at all was practically asking for margaritas every night...sorry Dana the truth is out!  And I think one is calling my name right now!


Roasted Tomato Salsa 


6-8 Roma tomatoes, roasted (see link)
3-4 Roma tomatoes, blanched, skins removed and grated
1 Jalapeno, roasted, skin and seeds removed
1 tsp garlic powder
1 tsp cumin powder
1 Jalapeno, seeds removed and finely minced (about 2 tbsp)
3 tbsp finely minced onion
1-2 tbsp minced cilantro
Juice of 1-2 limes (depending on size)
Kosher salt and black pepper to taste

Method
  • Preheat oven to 450 degrees, slice tomatoes, toss in a little olive oil and salt and pepper and roast for 1 hour until caramelized.  Remove from oven, let cool and remove skins.
  • During this time add the jalapeno and roast for 10 minutes.  Remove from oven and remove skin and seeds.
  • Place roasted tomatoes and jalapeno in a food processor and blend until smooth.  Place in a bowl.
  • Blanch remaining tomatoes for 1 minute, remove skins and grate on a box grater and add to roasted tomatoes.
  • Add remaining ingredients, season with salt and pepper to taste and chill until ready to use. 
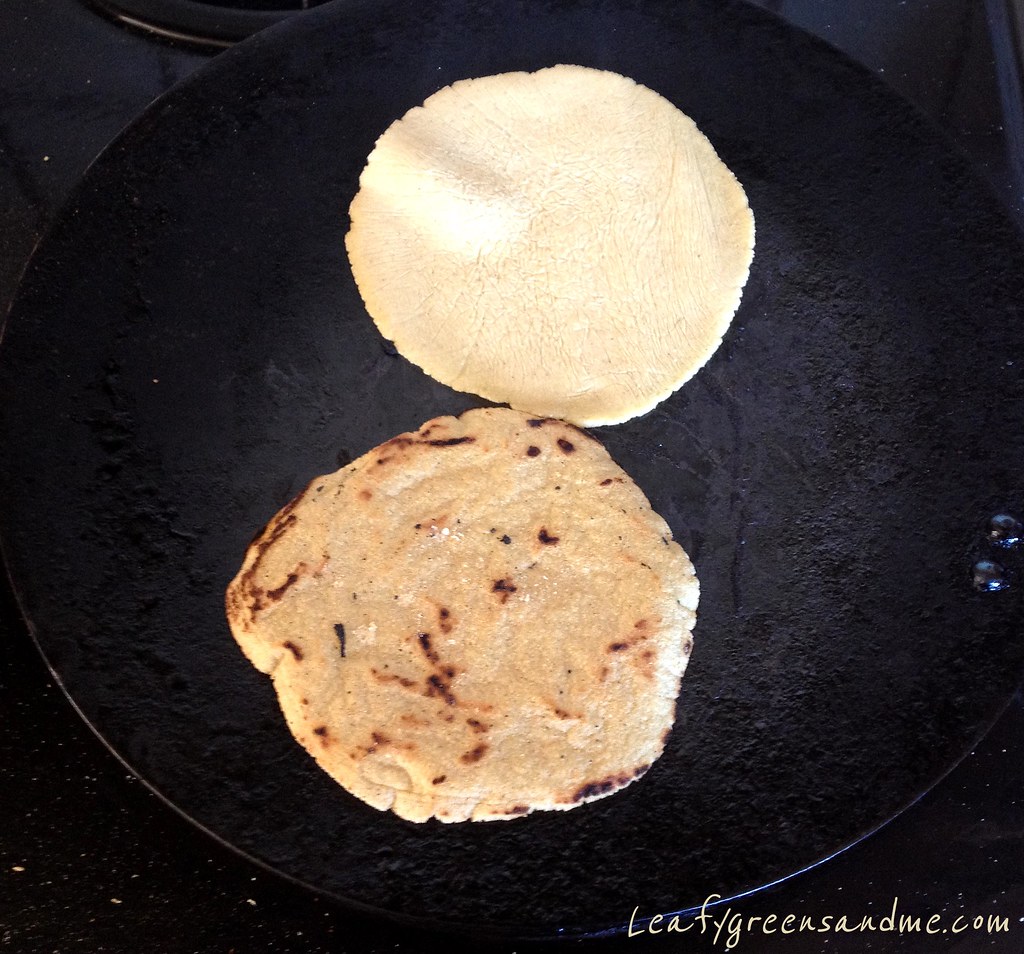
I don't know why I stopped making my own corn tortillas from scratch.  The texture and flavor is so much better than what you purchase at the store.  Yes, it takes about one hour from start to finish, depending on how many you make but it is so worth it.  This recipe made 24 small 5-6" tortillas.


I used 2 cups of masa and 1-1/3 cups of water.  You don't need a tortilla press--just a rolling pin and two sheets of plastic wrap coated with masa flour.  I also prefer smaller tortillas and so I used a small ice cream scoop to portion the masa.  The most important tip is to keep the masa covered with plastic while rolling out the tortillas.  Also, as you remove the cooked tortillas from the grill pan, wrap them in a kitchen towel to keep warm until all tortillas are done.


Also, no oil is needed in the pan.  Just make sure that you use a cast iron skillet or griddle because you need to cook them on medium-high heat and the more charred the better!  Cook them for about 1 minute per side and then wrap in a kitchen towel to keep warm.  Enjoy!


Wednesday, November 30, 2011

Creamy Minnesota Wild Rice Soup

I've been on a soup kick ever since Thanksgiving.  This past week I've made Minnesota Wild Rice, a Tunisian Vegetable-Garbanzo Bean with Spicy Harissa, and a New Orleans Farro Gumbo.  But wild rice soup is definitely one of my favorites.  I just love the texture and the nutty flavor.  Plus it's gluten-free and packed full of nutrients such as B vitamins niacin, riboflavin and thiamine, as well as potassium and phosphorus. It is also considered a complete protein, containing all of the essential amino acids.  Unfortunately, most stores sell a cultivated-hybrid version of wild rice, which is what I used.  But I'm definitely going to seek out the real deal even though it's more expensive so that I can do a comparison.  Either way--it's definitely a grain that you want to keep in your pantry and use often!

Ingredients:
(Serves 4)

1 cup small diced carrots
1 cup small diced celery
1 large leek, white and light green parts only, small diced and washed
1 tbsp finely minced garlic
1 tbsp finely minced fresh thyme
1/4 cup pale dry sherry
8 cups low-sodium vegetable stock (I used Rapunzel)
1/4 cup vegan "chicken" flavored seasoning (found in the bulk section of Whole Foods), optional
3/4 cup organic wild rice
2 tbsp cornstarch
3/4 cup cashew cream or soy milk (if you use soy milk you may want to add a little more cornstarch to thicken to your liking)
1/4 cup minced chives
Kosher salt and black pepper

Method:
  • In a large dutch oven or stock pot, heat olive oil and add leeks, garlic and thyme and cook until leeks are soft, about five minutes.
  • Add dry sherry and reduce for a couple of minutes and then add vegetable stock, along with flavored seasoning (if using).
  • Bring broth to a boil and stir in brown rice along with celery and carrots and salt and pepper to taste.
  • Reduce to a simmer and cook until rice is tender about 45 minutes.
  • Five minutes before serving, whisk together cashew cream or soy milk with cornstarch and add to soup, stirring slowing for about 3-4 minutes until soup thickens.
  • Check for seasonings and add more salt and pepper to taste.
  • Garnish with minced chives.
Cashew Cream:

1/4 cup raw cashews, soaked for at least four hours, drained
1/2 cup filtered water

Method:
  • Drain cashews and place in a blender along with filtered water and blend on high for about 4 minutes until creamy.  
  • Strain mixture.  You should have about 3/4 cup of cream.  If less, add additional water.


Saturday, October 15, 2011

Roasted Chanterelle Barley Pilaf

Do you ever get tired of serving the same side dishes on Thanksgiving--a tried and true recipe that always ends up on your table?  I'm not saying that this is a bad thing because Thanksgiving day is not a good time experiment with a recipe you've never tried before, especially when you have a houseful of hungry people.  So what I like doing is making the recipe a couple of weeks before to see if I want to serve it to my guests on the big day.  After you make a recipe once, you're then able to refine it, add your own personal touches, and make it your own.  It takes all the pressure off and makes your cooking experience much more enjoyable.     


I like this recipe because it's very easy to change up the ingredients.  If you are gluten intolerant then you can substitute brown basmati rice instead of hulled barley.  If you don't like radicchio then use another type of winter lettuce, cabbage, or leafy green.  And if you're not a big fan of hazelnuts then try adding roasted chestnuts or toasted walnuts.  Whatever you decide to do, this recipe will make a beautiful addition to your holiday table.

Pilaf Ingredients:
(Serves 6)

1 1/2 cups hulled barley, soaked overnight
8 oz chanterelle mushrooms, torn into 1/2" strips, roasted
8 oz oyster mushrooms, torn into 1/2" strips, roasted
2 tbsp finely minced thyme, divided
1 head radicchio, quartered, marinated, grilled and chopped (see below)
1 leek, white and light green parts only, quartered, washed
1 tbsp finely minced garlic
1/2 cup white wine
1/2 cup vegetable stock
3-4 tbsp extra virgin olive oil
1/3 cup roughly chopped toasted hazelnuts, skins removed
Kosher salt and black pepper to taste
2 tbsp finely minced parsley, divided
Lemon wedges
Note:  I used a combination of chanterelle and oyster mushrooms to save money.  Chanterelle's are $15/pound and oyster's are $6/pound. 

Method:
  • Drain and rinse barley, place in a 5 quart sauce pan and cover with plenty of filtered water.  Add 1 tsp kosher salt, bring to a boil and reduce heat to medium-low.  Cook for about one hour until kernels are tender and have puffed open.  Drain and rinse really well under cool water.  Shake to remove excess liquid and set aside.
  • Cut radicchio into quarters or eighths leaving the core intact.  Place radicchio wedges in a casserole dish and drizzle with 1/3 cup balsamic vinegar and 2-3 tbsp extra virgin olive, salt and pepper.  Turn to coat wedges on all sides and let marinate for about 15 minutes.
  • Heat a grill pan or saute pan medium-high and cook radicchio until lightly charred and caramelized.  Remove from pan, let cool, cut off core and chop into 1-2" pieces.  Set aside.  
  • Pre-heat oven to 450 degrees.
  • Using a damp paper towel remove any dirt from mushrooms and shred into pieces.  
  • Toss mushrooms with 1 1/2 tbsp olive oil, 1 tbsp thyme and salt and pepper to taste.  Roast in the oven for about five minutes until soft and lightly golden brown.  Remove from the oven and set aside.
Assembly:
  • Heat a large saute pan on medium-low heat, and add 1 1/2 tbsp olive oil, leeks, minced garlic, thyme and salt and pepper.  Cook for about 4 minutes until leeks are soft, stirring to prevent garlic from burning.  
  • Deglaze with white wine and vegetable stock and cook until almost all liquid is reduced.
  • Add cooked barley, roasted mushrooms, grilled radicchio, 1 tbsp minced parsley, and salt and pepper to taste.  
  • Cook for about 3 minutes, stirring to combine, until the ingredients are heated through and fully combined.
  • Just before serving toss in toasted hazelnuts and finish with a squeeze of fresh lemon juice.  
  • Place in a serving bowl and garnish with fresh parsley.


Wednesday, September 28, 2011

Potato, Spinach & Cheddar Cheese Gratin

I mentioned in a previous post that for the entire month of October I will be posting my Vegan Thanksgiving Series which will include:  appetizers, soups, salads, main entrees, side dishes and desserts.  Actually, my posts will probably extend into November as well because I will be out of town the week of October 10th and the week of October 24th.  Anyway, my goal is to post about 25-30 recipes during this time.  

One of the recipes that I'm planning to share with you during my Thanksgiving Series is a Sweet Potato Gratin with Candied Maple Pecans.  So the other night I decided to make a Potato, Spinach & Cheddar Cheese Gratin because I wanted to experiment with the recipe for the sauce.  Actually, this sauce is really versatile and can be used for a number of different applications by just changing up a couple of the ingredients.  I have used a version of this sauce for making lasagna, manicotti, moussaka, mac and cheese, quiche, tarts and for basic cream sauces. 


The gratin came out really wonderful.  The flavors and textures were really great.  You can also add roasted wild mushrooms to this recipe for a more complete entree, or serve this as a side dish with your favorite protein or roasted vegetables for a complete meal.  This would also be a great dish to serve with your Thanksgiving dinner.

It helps if you have a high-speed blender so you don't have to strain the cashew cream and the texture of the sauce holds up better under high heat.  If not, no worries, just leave your blender running on high for about four minutes and then strain it before adding the other ingredients.

Cashew Cheddar Sauce:

1 cup raw cashews, soaked overnight in filtered water, drained
1 head of garlic, roasted until soft
1 large yellow onion, thinly sliced
3 garlic cloves, minced
1 tbsp minced fresh thyme
1/8-1/4 tsp cayenne pepper, depending on taste
1 cup Daiya Cheddar Style Shreds
1 1/4 cup filtered water
Kosher salt and black pepper to taste
1 tbsp extra virgin olive oil
Note:  You may have cashew cream left over depending on the size of the casserole dish you use.  Place it in a container and freeze for up to three months.  To use, thaw in the fridge and blend before using.

Method:
  • Cover cashews with filtered water and soak for up to 8 hours or overnight.  Drain cashews and place in a blender with 1 1/4 cups filtered water.  Blend on high until creamy for about 4 minutes.  Strain mixture if you do not have a high speed blender like a Vita-Mix.
  • Pre-heat oven to 350 degrees.  Slice the top off the garlic head, drizzle with olive oil, salt and pepper, wrap in foil and bake until soft about 45-60 minutes.  Let garlic cool and squeeze out soft garlic cloves and set aside.
  • Heat a large saute pan on medium heat.  Add olive oil, onions, minced garlic, and fresh thyme and cook until onions are soft, about 5-7 minutes.  
  • Add cashew cream, roasted garlic, onion mixture, cayenne pepper, Daiya Cheese, filtered water and salt and pepper to taste and blend until smooth and creamy.  It should be thicker than heavy cream, more like the consistency of a loose custard.  And if too thick add a little more water.
Gratin Ingredients:

2 1/2-3 lbs medium sized Yukon Gold potatoes, washed, peeled, sliced
1 lb baby spinach, sauteed, drained
1 tbsp minced garlic
1 tbsp extra virgin olive oil
1 cup Daiya Cheddar Style Shreds
1-1 1/2 cups Cashew cheddar cream sauce
1 bunch chopped chives
Kosher salt and black pepper to taste
Herb-panko crust (see recipe below)
Note:  I used a 9x9" casserole dish for the gratin which made 6 servings.  You may want to use a larger casserole dish.  If so, increase the amount of potatoes and spinach that you purchase.  You will have plenty of the cashew cheddar cream and Daiya cheese for the gratin.

Method:
  • Heat a large saute pan on medium-low, add olive oil, minced garlic and baby spinach, salt and pepper.  Saute for about 2-3 minutes until spinach is wilted.  Place in a strainer over a bowl and set aside.  Before using, press out any remaining liquid with the back of a spoon.
  • Wash, peel and slice potatoes thinly (1/16-1/32") on a mandolin, set aside.
  • Place about 1/3 cup cashew cheese sauce on the bottom of the casserole dish or enough to cover the entire surface with a nice coating.
  • Layer potatoes overlapping slightly to cover the entire surface.  Repeat layering the potatoes two more times.  
  • Add another 1/3 cup of cashew cheese sauce over potatoes, making sure to cover the potatoes.  Top with half of the drained, sauteed spinach and sprinkle with Daiya cheese and chives.  Season with kosher salt and black pepper.
  • For the second layer, repeat the same as the first with layering the potatoes (3 layers), then adding cheese sauce, spinach, Daiya cheese, chives, salt and pepper.
  • For the final and top layer, just add potatoes (3 layers), cheese sauce and salt and pepper.  
  • Cover casserole dish with foil and bake in the oven for 1 hour to 30-45  minutes.  Turn gratin after 30 minutes and check after 1 hour by inserting a toothpick in the center of the gratin.  If there is any resistance, then cook longer, checking every 15 minutes until done.
  • Remove gratin from oven, remove foil and top with another 1/3 cup of cheese cause and sprinkle liberally with herb-panko crust.
  • Cover with foil and let gratin rest for about 10 minutes before cutting.
  • Serve with additional warmed cashew cheese sauce.
Herb Panko:

1 1/2 cups panko (Japanese) bread crumbs
2 tsp minced fresh thyme
1 tbsp minced chives
Kosher salt and black pepper to taste
1-2 tbsp extra virgin olive oil

Method:
  • In a small saute pan, heat olive oil, add bread crumbs, herbs, salt and pepper and cook on low until panko is lightly golden brown.  Stir frequently and be careful not to burn.  When finished do not leave in hot pan, transfer to a bowl and then sprinkle on gratin.


Saturday, September 24, 2011

Portobello Mushroom Fajitas with Spicy Mojo Sauce

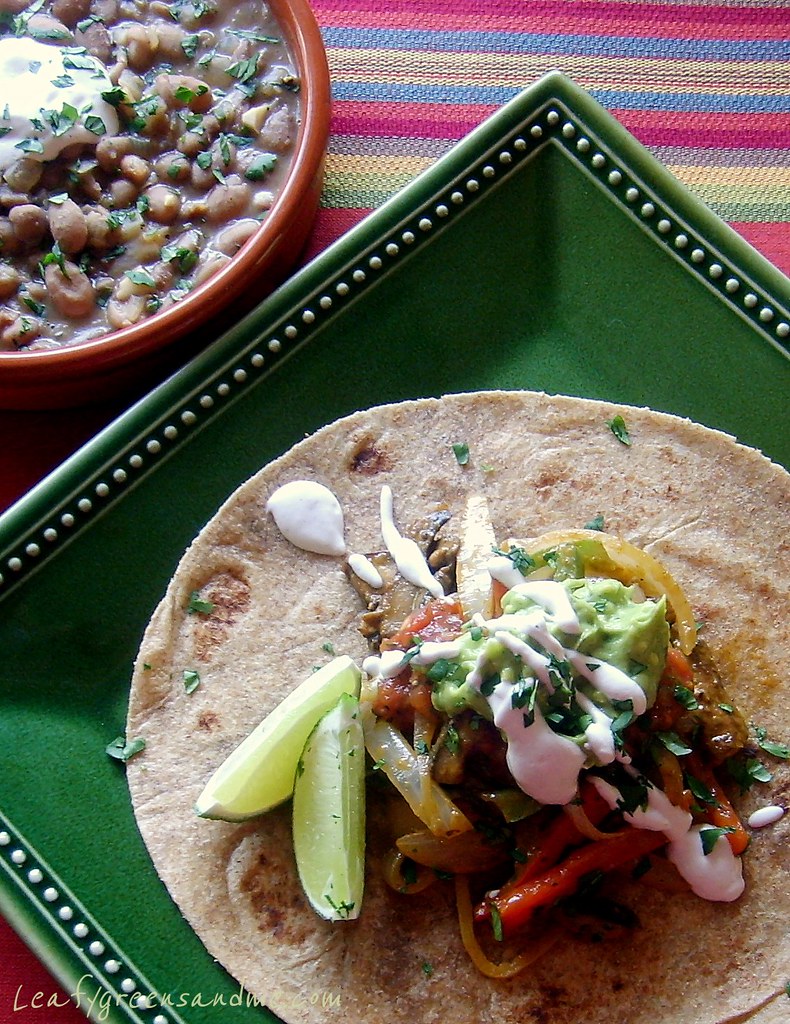
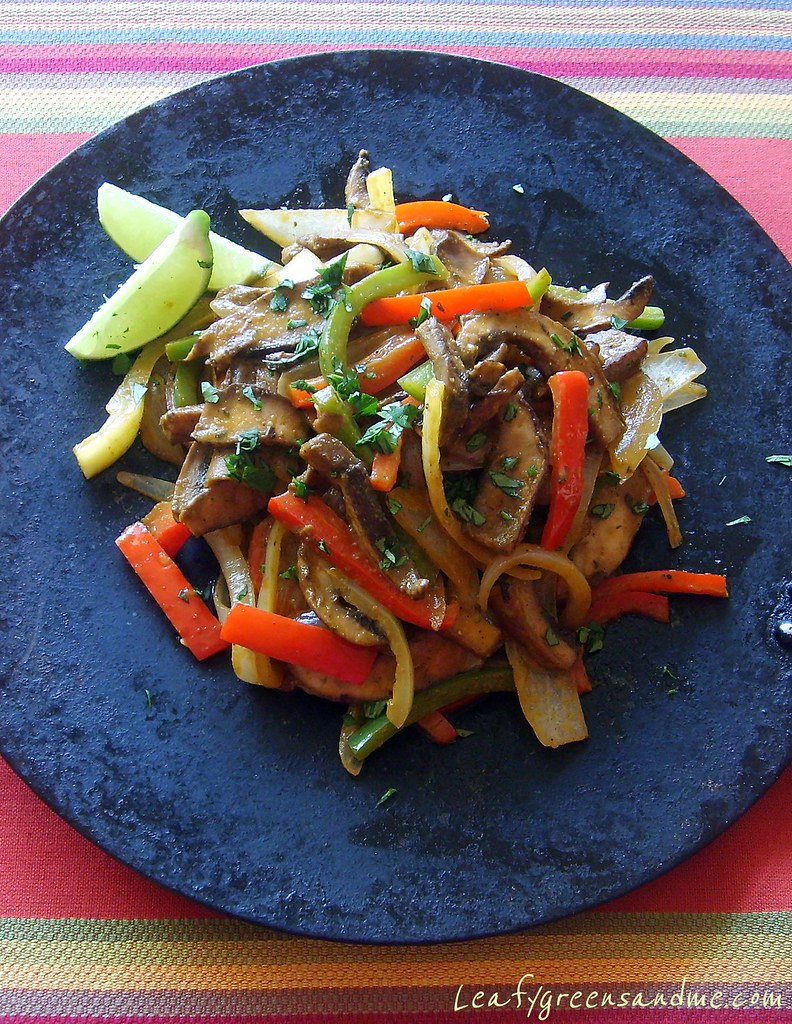
Mojo sauce first originated in the Canary Islands and migrated to the Caribbean Islands, Cuba and the Southern region of the United States.  There are a lot of different flavored Mojo sauces--some are red, seasoned with paprika, others are green due to the large amounts of cilantro and parsley, but I prefer the Cuban version made with sour orange and lime juices.  The high acidity of the sauce pairs really well with the earthiness of the portobello mushrooms.  In addition to the freshly squeezed orange and lime juices, I added minced garlic, cumin, cilantro, olive oil and chipotle adobo sauce for a smokey flavor and a spicy kick.


I garnished my fajitas with charred roasted tomato salsa, guacamole and cashew sour cream.  For a side dish I made re-fried pinto beans seasoned with minced onion, jalapeno, chili powder, cumin and cilantro.  


These portobello fajitas were probably the best fajitas I've ever eaten.  The combination of flavors and textures were amazing!


ShareThis