Showing posts with label Entertaining. Show all posts

Tuesday, May 27, 2014

Deviled Goodness (Vegan Deviled Eggs)

You can't have a holiday weekend without serving Vegan Deviled Eggs.   Seriously these are amazing!  My husband could not get over how much they tasted like the real deal, texture and everything.  As I mentioned in previous posts, I have never liked eggs (no matter how they were prepared)...but with one exception...my Mom's Deviled Eggs.  Everything she made tasted great and I think that she would love these too!

https://farm6.staticflickr.com/5160/14283368091_faaf1cbc15_b.jpg

This recipe is so simple, but you'll need a mold to create the cashew-agar base to hold the piped tofu mousse.  I used a ceramic deviled egg holder that I had in cabinet, but it was a little shallow.  I'm going to look on line and see if I can find a deeper base, but other than that they were absolutely perfect...beautiful and delicious.


This recipe makes about 36 portions so you will need more than one mold because the agar will solidify if you don't work quickly.  Or you can cut the tofu mouse recipe in half and pipe less.

Cashew Cream-Agar Egg Base:

1/2 cup cashew cream, (1/2 cup cashews blended in a high speed blender with 1-1/4 cup water.  If you don't have a high-speed blender then you will need to soak the cashews for about 4 hours and then strain through cheesecloth or a fine strainer.  You will not use all the cashew cream but it will keep in the refrigerator covered for up to five days.)
3/4 warm water
1 tsp Agar-Agar powder (I purchased my powder at an Asian market, for $2.99, but Whole Foods carries the agar flakes, but it will cost you about $9.00.  Also, if you use the flakes then you'll need to increase the amount to 1 Tbsp and boil it a little longer.
1/4-1/2 tsp Black Salt (found in an Indian or Asian market--it's actually pink and very salty.)

Method:  
  • Lightly oil mold with vegetable oil and set aside.  
  • Blend cashews with water and measure out a 1/2 cup of cashew cream.  Whisk in black salt and set aside.
  • Pour 3/4 cup water into a measuring cup and warm in the microwave for 30-40 seconds.  Whisk in agar-agar powder and then place back in the microwave for 1-2 minutes and let it boil.  
  • Place cashew cream into microwave for 30-40 seconds to warm and then whisk mixture into hot agar water making sure there are no lumps.
  • Skim off any bubbles off the top before pouring into mold, or pop bubbles with a toothpick.
  • Let mold sit on the counter for about 15 minutes before moving and placing in the refrigerator to chill for about one hour to harden completely.


Once hardened, using a small pairing knife, remove cashew-agar base and place on a plate.  Then using a small melon baller or spoon, scoop out a small portion of the base without breaking through the bottom.  Then pipe in the tofu mousse and chill for about an hour before serving.  Also, the agar will not melt or soften if these are left out for a little while at room temperature, but they are better served chilled.  So if you are serving a lot of people, I would serve a dozen at a time and keep the others chilled.

Tofu Mousse:
(You can cut the recipe in half if you are making less portions)

7.5 oz organic sprouted extra firm tofu (I used Wildwood--it comes it two sealed pouches, 7.5 oz each).
1/4 cup Follow Your Heart original organic Vegenaise
2 tsp spicy brown mustard
1 tsp turmeric powder
1/2 - 3/4 tsp black salt
1 tsp apple cider, or white wine vinegar

Method:
  • Drain tofu and press dry with paper towels and place in a food processor.
  • Add all ingredients except for black salt and blend until smooth and creamy.  You may need to add a little more Vegenaise to get the right texture.
  • Add black salt to taste and then pipe or spoon mousse into base.
  • Garnish with paprika and chives and chill for about one hour before serving.


Sunday, May 18, 2014

Verde (Tomatillo-Poblano) Chilaquiles

I learned how to make Chilaquiles as a line cook working at a restaurant.  At least once a week while we were prepping for service Noel and Bernardo (my amigos) would take turns making them for our family meal.  They were always made with a red sauce, somewhat spicy and super delicious.  Noel would always give me a hard time because I never made Chilaquiles for them.  So one day I came in a little early and I made Verde Chilaquiles and they loved them...I felt so great that the pressure was finally off.  But one can only produce the best dish when one learns from the best...and Noel and Bernie were truly the best!

https://farm6.staticflickr.com/5501/14030273539_8ba7191bd9_b.jpg

Verde Sauce:

3 Tomatillos, skins removed
1 Poblano pepper
1 Jalapeno pepper
1 Onion sliced (skin on)
3-4 Garlic cloves (skin on)
1/3-1/2 cup vegetable broth
1/3-1/2 cup cashew cream (1/2 cup cashews, blended with 1 cup water)
1/4 cup cilantro (optional)
Kosher salt and black pepper to taste

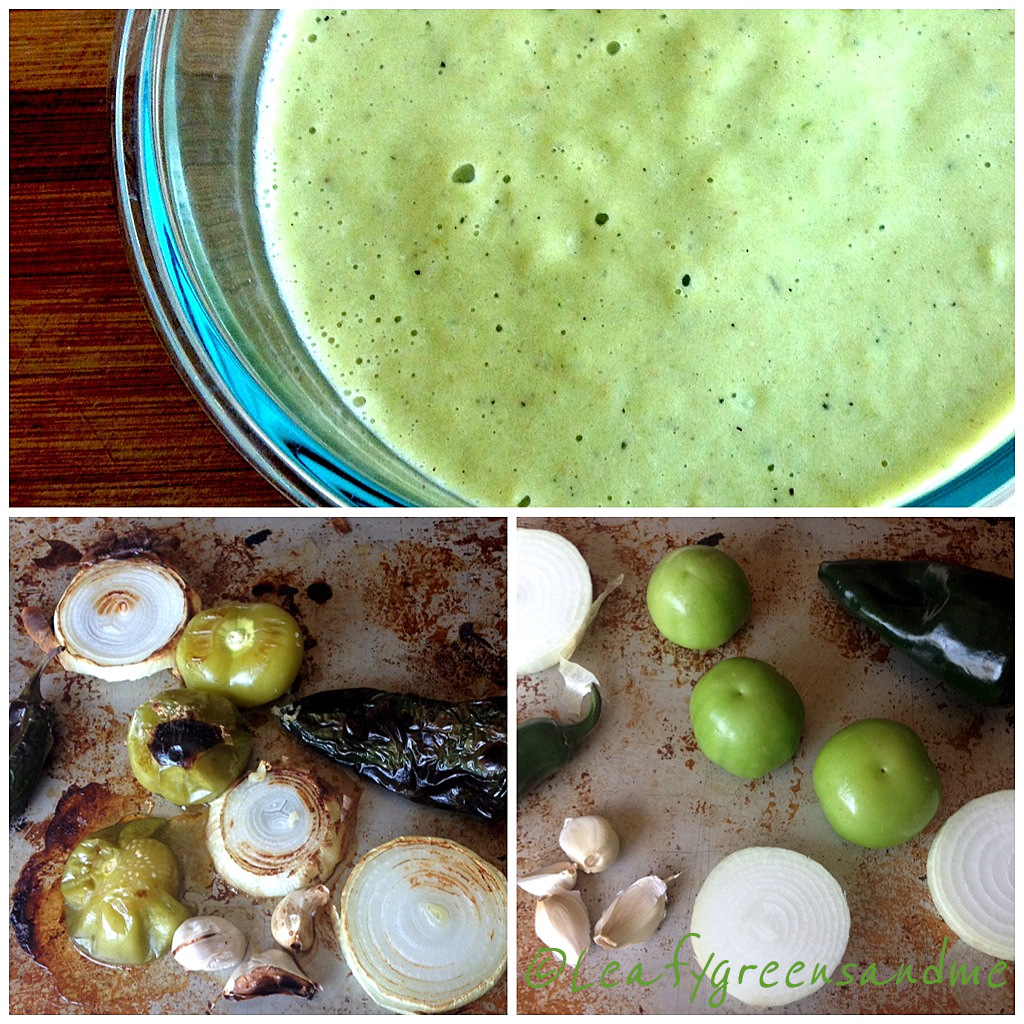
Method:  Preheat oven to 400 degrees.  Place all ingredients on a sheet tray and roast for 10-15 minutes until charred.  You may need to need to remove the garlic first so that it doesn't burn.  Let cool and peel and seed peppers.  Place in a blender and blend until smooth.  I did not add cilantro to my sauce because I added it to the pico de gallo and guacamole. 

https://farm6.staticflickr.com/5492/14214529622_c7cafe6790_b.jpg

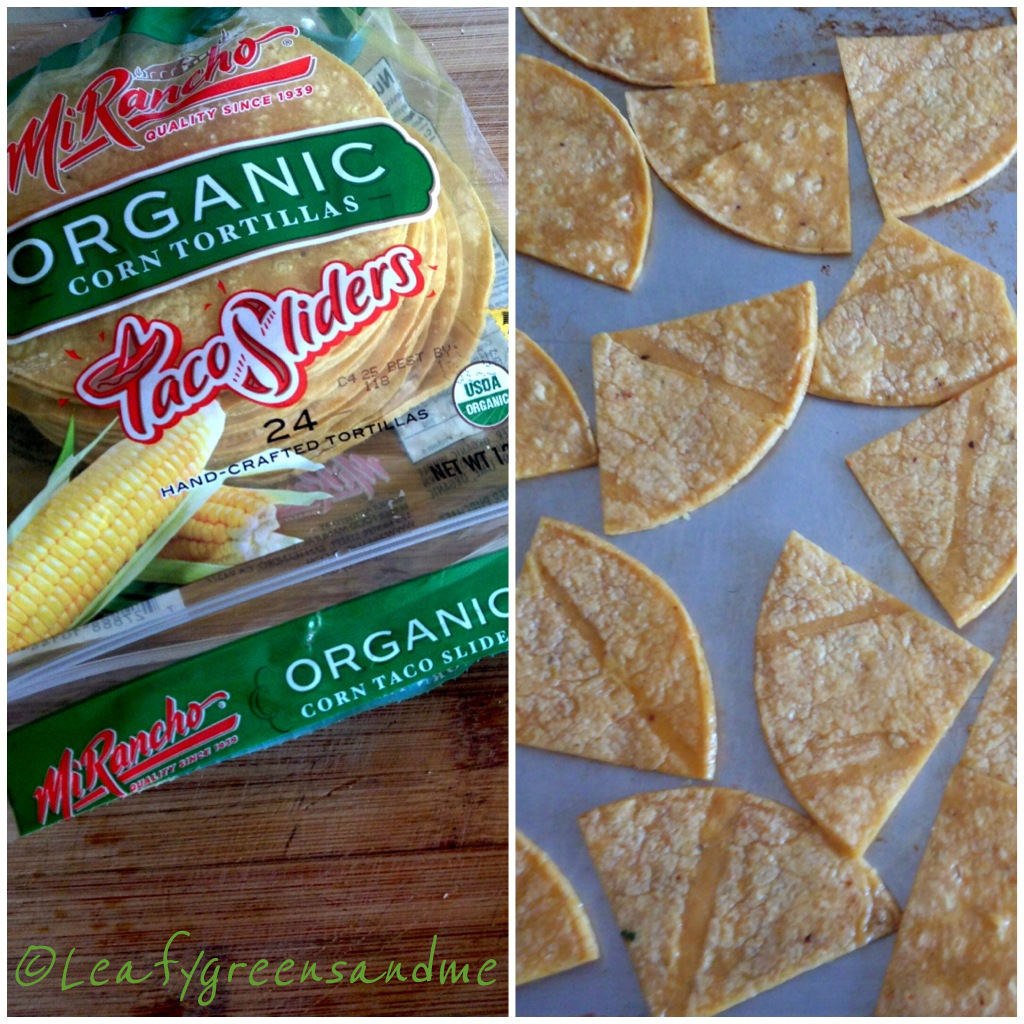
After you make the sauce, turn the oven down to 325 degrees to toast the tortilla chips.  Normally, the tortilla chips are fried but you don't need to do this.  Baking produces the same end result without all the fat and calories.  When purchasing the corn tortillas I usually look for a heartier brand that will hold up to the weight of the sauce and cheese without becoming too soggy, but soggy is good too!  I like using the sliders because they cut perfectly into 4ths.  

Method:  Spray a sheet pan with vegetable spray and then spray the top of the tortillas lightly and sprinkle with salt.  Bake in the oven for about 12-14 minutes until crisp and lightly golden brown.  Turn chips over half way through the baking and keep an eye on them so they don't burn.


https://farm3.staticflickr.com/2897/14030298430_70816638ac_b.jpg

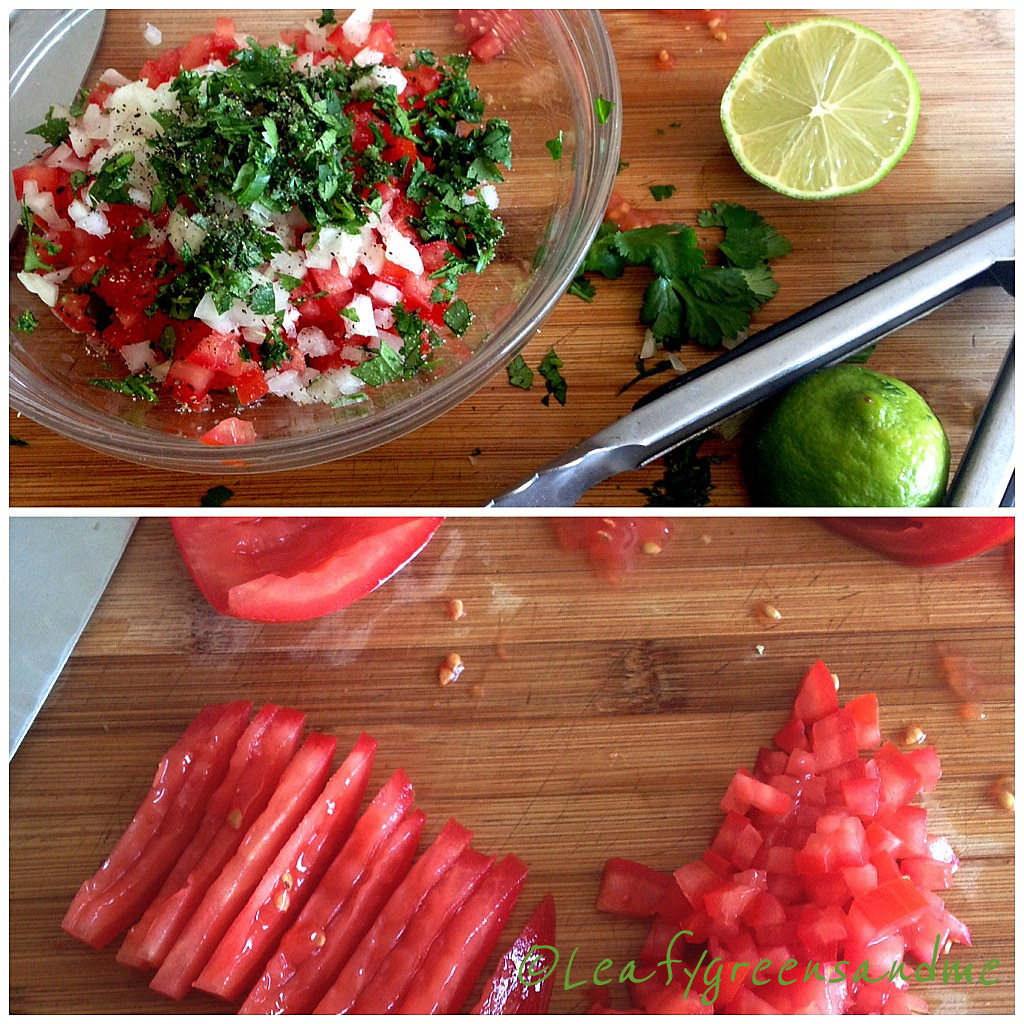
You have no idea how many gallons of pico de gallo I have made in my lifetime!  It is so easy and I prefer homemade salsa over store bought any day!  There is really no recipe for fresh salsa.  If you don't like white onion, add red onion and if you like it super spicy then add the whole jalapeno or leave in the seeds.  The most important thing is to dice and mince the tomatoes/vegetables perfectly...it's all about uniformity!... :-)

Pico de Gallo:

5 organic Roma tomatoes, seeded, julienned and diced
1/4 cup finely diced white onion
1/2 jalapeno, seeds removed and finely diced 
1/4 cup chopped cilantro
Juice of 1 lime
Kosher salt and black pepper to taste

https://farm6.staticflickr.com/5198/14030228459_1dd6c89818_b.jpg

Assembly:
I  like using individual cazuelas to serve my Chilaquiles.  (Serves 2) 

Baked Tortilla Chips
2 - 3 cups Verde Sauce
1 package Daiya Havarti-Jalapeno Style Cheese, shredded
Kosher salt and black pepper to taste

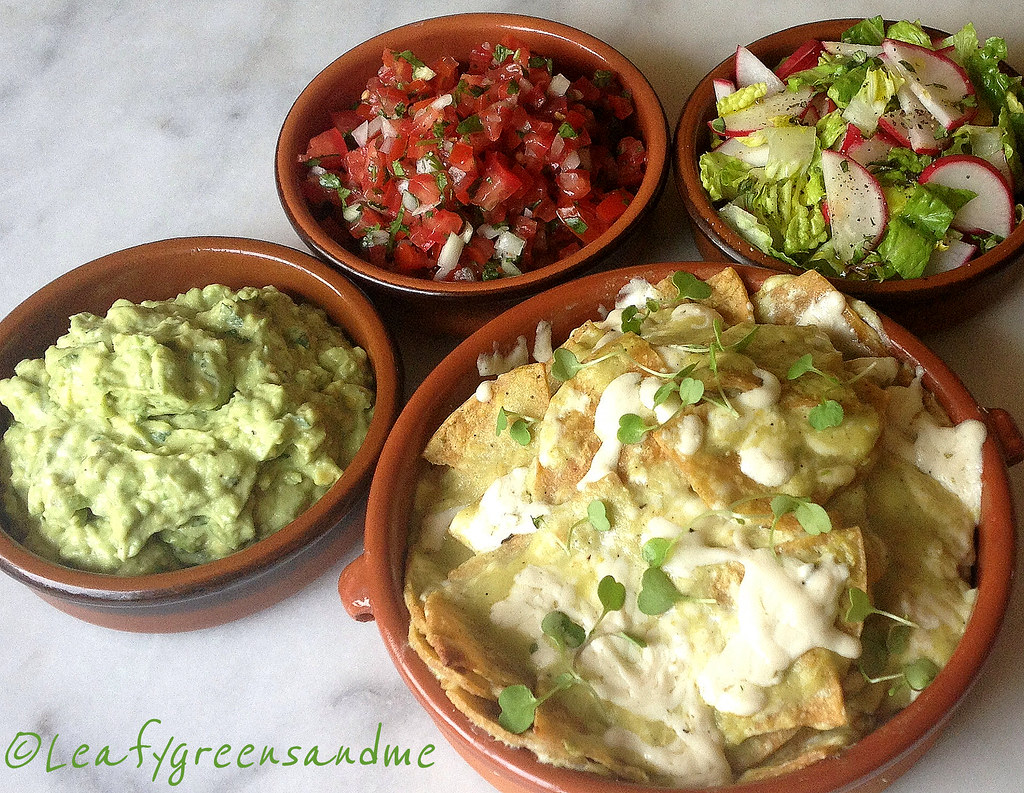
Method:  Preheat oven to 350 degrees.  Add chips to a large bowl, along with 1/2 of the shredded cheese.  Heat sauce on the stove, adding additional veg stock if the sauce is too thick.  Pour sauce over chips and toss evenly to coat.  Divide mixture evenly between cazuelas or ramekins and top with additional cheese.  Bake in the oven for 10-15 minutes on a sheet tray until mixture is bubbly.  Remove from oven and serve immediately garnished with cilantro and green onions.

And now for the toppings.  At the restaurant we would always serve our Chilaquiles topped with pico, guacamole (avocado, cilantro, green onion, Vegenaise, lime juice, salt and pepper) and salad made with romaine lettuce, radish, jalapeno, tossed with a red wine-oregano vinaigrette.  It doesn't get any better than this.  To my friends...Noel & Bernardo...thank you for everything you taught me in the kitchen!   

https://farm3.staticflickr.com/2930/14030229078_2b1fc65e00_b.jpg

Sunday, May 4, 2014

Classic Cuban Sandwich with Citrus-Mojo Sauce

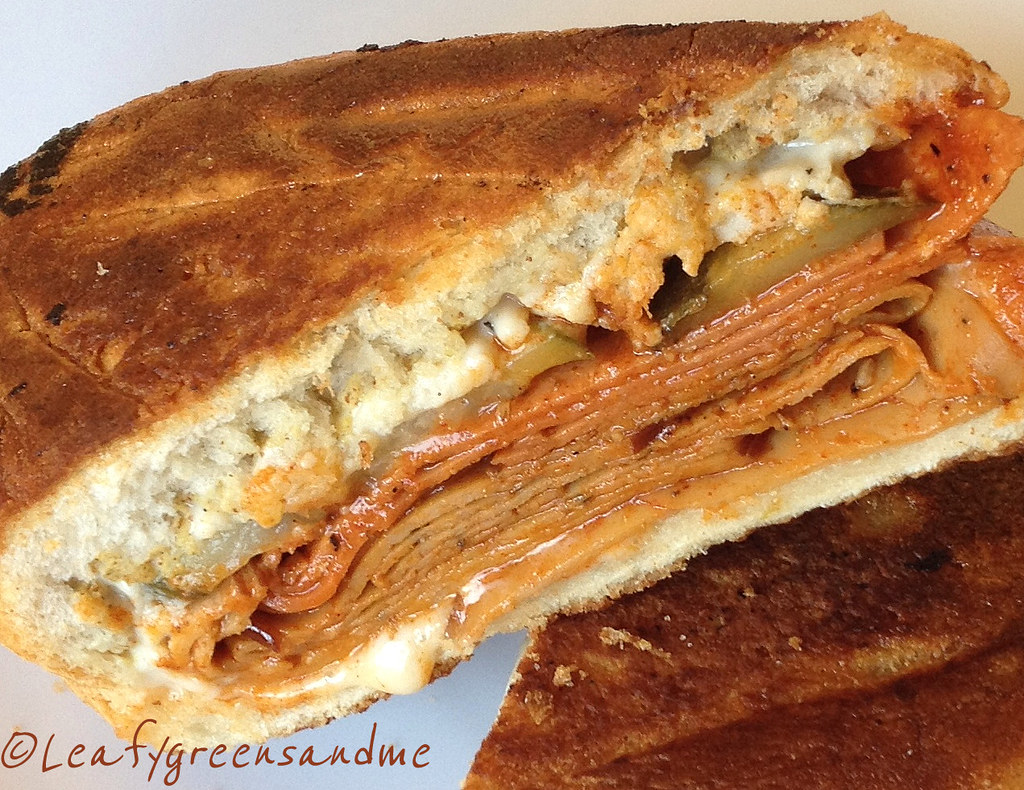
Miami and Tampa you've got nothing on this sandwich and I challenge anyone who loves Cuban sandwiches to tell me that this isn't the best sandwich they've ever eaten...even though it's 100% vegan!

https://farm3.staticflickr.com/2930/13920808128_ee891b39ee_b.jpg

It all starts with the bread and then goes from there.  Since I couldn't go to my local market and purchase traditional Cuban bread, I went to Le Boulangerie and purchased two freshly baked French rolls--super crispy crust with a soft interior.  Hoagie or sub rolls that you purchase in the grocery store will not hold up to the pressing or substantial ingredients so make sure you search around and find the best rolls.


For a traditional Cuban sandwich the pork is braised and so I wanted to create a mojo braising liquid for the three seitan deli cuts that I used:  Tofurky Smoked, Tofurky Peppered and Yves Ham.  I made the mojo sauce, poured it into a saute pan and then added four slices of each of the deli cuts to heat through and reduce the sauce.  That's 12 slices for one sandwich!

Citrus-Mojo Sauce
1 large Valencia Orange
1/2 lemon
1 1/2 limes
1 TBSP paprika
1 tsp ground cumin
2 tsp finely minced fresh garlic
1 TBSP extra virgin olive oil
Salt and pepper to taste


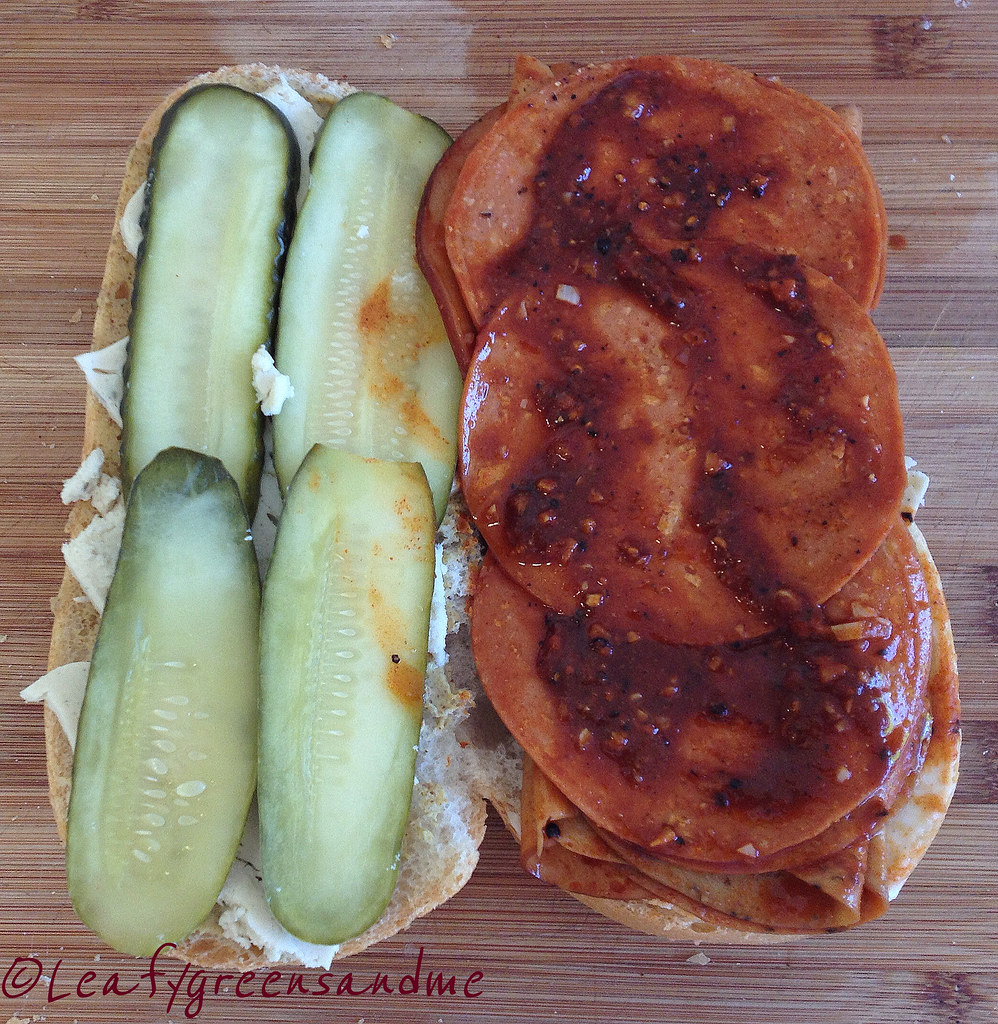
And now for the assembling...Cuban sandwiches use Swiss cheese, but I don't like the flavor of Daiya Swiss or Provolone and so I used my normal standby, which I love...Daiya Havarti Wedge, thinly sliced.  On one side of the bread I placed a generous slather of spicy brown mustard and the other side Vegenaise.  I then added cheese to both sides, dill pickle slices on one side and then layered on the deli cuts and topped with the reduced sauce and freshly black ground pepper and kosher salt.
 

This is a substantial sandwich folks...enough for two with a side salad or fries, but we each had our own and were stuffed!
 
https://farm6.staticflickr.com/5496/14084233486_4e34579a35_b.jpg 

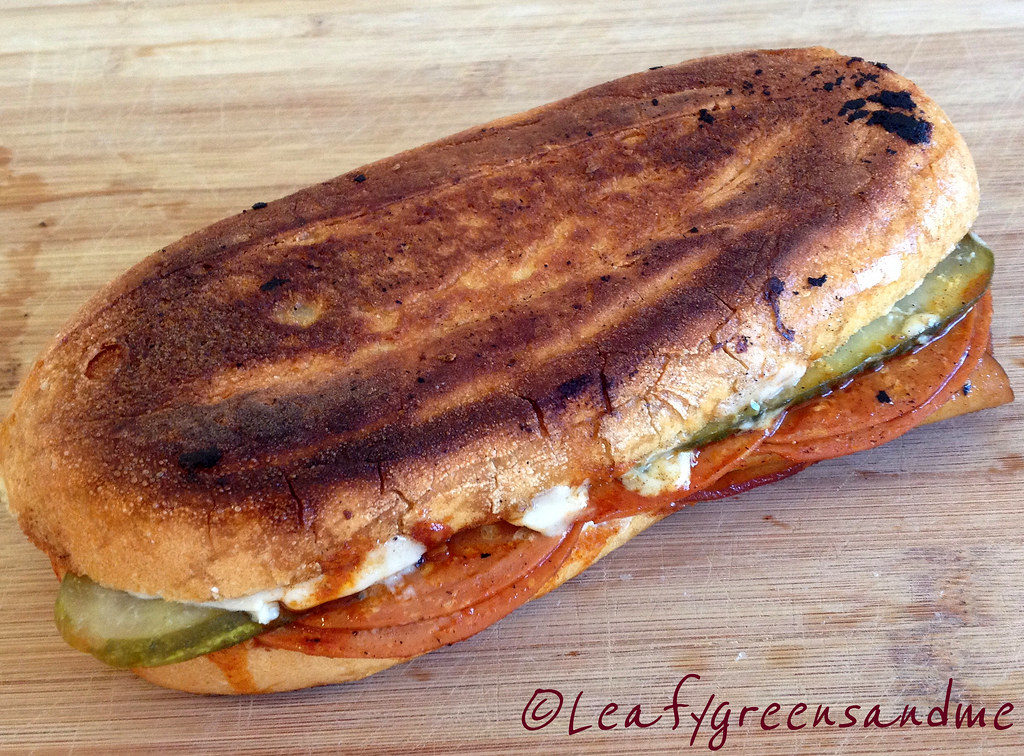
A panini press with grill marks is not traditional and will not do, unless that's all you've got.  I used my trusty cast iron skillet, along with my cast iron Indian bread pan, which provided a perfect weight to press the bread without flattening to a pancake.  I added Earth Balance Butter to pan and cooked the sandwich on medium-low for three minutes, added more butter and flipped and cooked on the other side for three minutes.
  
https://farm8.staticflickr.com/7299/14107359435_57b0ed47af_b.jpg

Fantástico! and Delicioso!  Need I say more?
 
https://farm8.staticflickr.com/7327/14127411283_aeffbdaab7_b.jpg

Sunday, April 13, 2014

Gluten Free Cupcakes with Veggie Colored Frosting

Growing up as a kid my mom, sister and I would always dye eggs this time of year.  Our mom being the natural artist that she was would create the most beautiful designs. It was hard to compete, considering the only artistic ability I have is to draw stick people, but it was fun and I have great memories of sharing this tradition with my mom and sis.
 

https://farm4.staticflickr.com/3695/13831206343_abbc72702f_h.jpg 

I have never liked eating eggs and never understood how you could dye them, and then several days later peel and eat them.  The food coloring would seep through the shell and the white of the egg would be purple, blue or grey.  Luckily for me I got to skip that part and now since I am vegan, creating beautiful cupcakes is my new tradition.

My hubby wanted gluten-free cupcakes and so I purchased a bag of Wholesome Chow Vanilla Cake Mix.  I've tried making gluten-free products from scratch, but it is really expensive.  By the time you purchase all the starches, g-f flours, xantham gum, etc., you're looking at a substantial cost.  Of course if I had a gluten intolerance then this would be fine, but they end up sitting in my pantry and then I just throw them out.  Wholesome Chow has the best packaged gluten-free products on the market, at least in my opinion.  Another brand that is suitable for Passover because it doesn't contain leavener is Manischewitz Gluten-Free Yellow Cake Mix. It comes with a chocolate frosting but you can omit this and use the buttercream recipe below.  This product is not vegan but you could substitute flax eggs in the recipe.

So what to do about the food coloring and frosting the cupcakes?  There's no way I would ever use commercial food dyes and the organic/natural plant-derived dyes are too expensive. I did an internship at a bakery once and I watched how much food coloring they used in everything and I would never eat their cookies, cakes or cupcakes...especially their red velvet. 

https://farm4.staticflickr.com/3695/13831497744_63858e438d_h.jpg

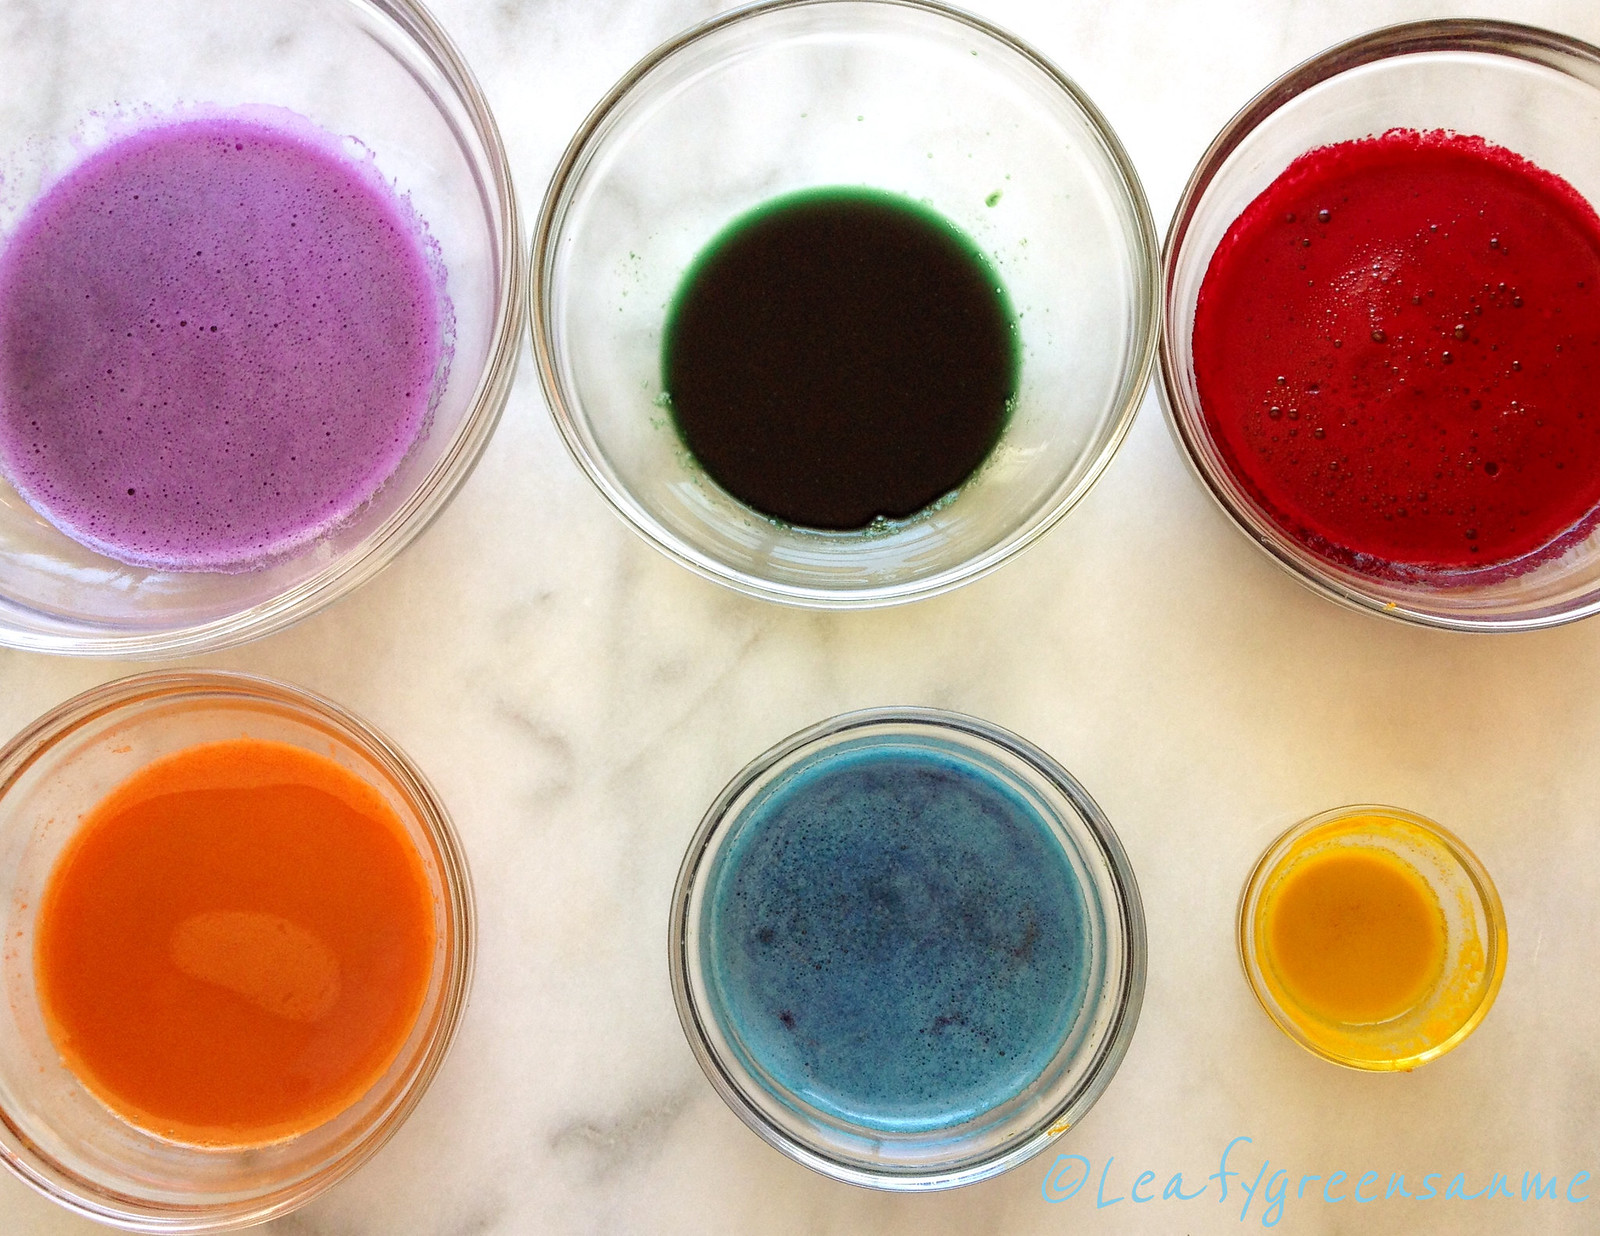
So instead of spending a lot of money, I decided to use what was in my fridge and the buttercream turned out beautiful and delicious.  Yes it takes a little bit more work because you have to juice the vegetables first, but you can still obtain beautiful pastel colors or even vibrant hues using vegetables.  Plus everything was organic!  Here's what I did:

Purple:  Red Cabbage
Green:  Spinach with a pinch of spirulina (could of used more spirulina to get a darker green--be careful though so that it doesn't taste like the ocean)
Red:  Beet
Orange:  Carrot (I also reduced the carrot juice down to a puree to obtain a darker hue)
Blue:  Red Cabbage and a 1/4-1/2 tsp of baking soda
Yellow:  Turmeric (I used about 1/4 tsp with 1-2 tsp water to make a paste)

Now you would think that by using vegetables and spices that it would impart these flavors into the frosting, but it is ever so faint and when you combine it with the cupcake you can't even tell.  Kids would love eating these even if they helped you make them and knew that they were made with vegetable juice!

https://farm4.staticflickr.com/3790/13831456534_30430bcd64_h.jpg

Vanilla Buttercream Frosting
1 tsp pure vanilla extract
2 - 3 Tbsp almond milk (or more to obtain desired consistency)
3 cups sifted organic powdered sugar

In a mixer fitted with a paddle attachment, beat butter and shortening on medium speed until combined and creamy.  Add vanilla extract, almond milk and then with speed on low, add powdered sugar until combined.  Once combined, increase speed to medium and then whip until creamy and fluffy about four minutes.  Portion buttercream evenly into six bowls and then start out adding 1/2 tsp vegetable juice to each bowl and whip with a spatula until creamy.

Note:  Because of the acidity of the vegetable juice, it will look as if the buttercream will start to curdle.  This is why it is good to start with a small amount and add slowly and beat with a spatula until creamy.  For all of the above colors, I used no more than 1 tsp veggie juice to each to get the desired effect.  Also, you can use all Earth Balance and not the Spectrum Shortening, however the shortening holds the buttercream at room temperature longer and so you do not need to worry about refrigeration.

I hope you'll give this recipe a try and start a new holiday tradition with your family!

Wishing you and yours a wonderful Passover and Easter!     
 

Tuesday, April 1, 2014

Whole Grain Chocolate Chip Cookies

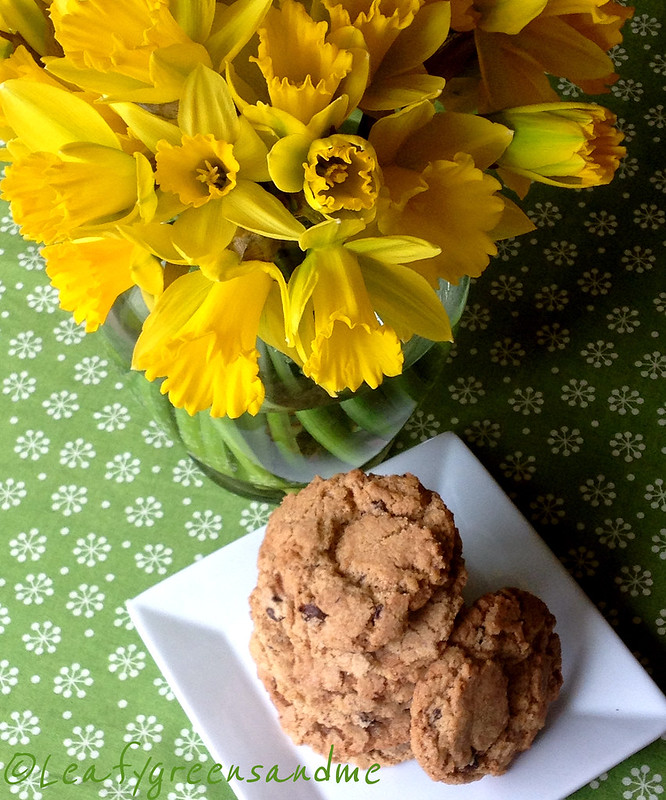
I've been bad...so bad...I'm still drinking fresh juices daily but it was rainy and chilly on Saturday and I just wanted to turn on the oven and bake something yummy.  The good thing about making chocolate chip cookies is that they can satisfy your sweet tooth within 30 minutes.  The bad thing is that it's hard to eat just one!  So I've had my fill over the past three days.  There's nothing like drinking healthy juice and eating cookies at the same time--my body is really confused!  The daffodils are just because they brighten up a gloomy day and are my second favorite flower to tulips!

https://farm4.staticflickr.com/3688/13571512393_b0e1a52775_c.jpg
 
So here's the recipe...not that you need another chocolate chip cookie recipe but I found these to be perfect.  Crunchy out the outside while moist on the inside and they were better the next day, and the next day...unfortunately. 

Ingredients
(Makes 2 dozen)

1 1/2 cups organic whole grain spelt flour
3/4 tsp baking powder
1/2 tsp baking soda
3/4 tsp kosher salt
1 stick Earth Balance Buttery Sticks (I used 6 Tbsp Earth Balance Buttery Sticks and 2 Tbsp Spectrum Organic All Vegetable Butter Flavor Shortening Non-Hydrogenated).  I like the crunch and airiness it gives the cookies--but using all Earth Balance is fine too.)
1/2 cup dark brown sugar
1/2 cup organic unbleached cane sugar
1 flax egg (1 Tbsp ground flaxmeal with 3 Tbsp room temperature filtered water, whisked)
1 tsp pure vanilla extract
1/2 cup vegan semisweet chocolate chips

https://farm4.staticflickr.com/3813/13571495143_db794ae3aa_c.jpg
Method
  • Preheat oven to 350 and position racks on upper and lower portion of oven.
  • In the bowl of an electric mixer place room temperature butter and sugar and mix on medium for about 3 minutes until creamy.  Add flax egg mixture and vanilla and mix until combined.
  • In another bowl, sift and whisk together dry ingredients (not including chocolate chips) and then add to butter-sugar mixture and mix until ingredients are just incorporated.  You don't want to over mix the flour and develop the gluten or your cookies will be tough.  Then with the motor running add the chocolate chips until combined.
  • Using a small ice cream scoop (about 1-1/2 Tbsp) place 12 evenly spaced scoops on two cookie trays and flatten slightly with your fingers.  Bake in the oven for 12-14 minutes (turning and switching the trays after 7 minutes) until golden brown around the edges, but tender in the center.  Remove from the oven and let cool for about 5 minutes before transferring them to a cooling rack.

https://farm3.staticflickr.com/2864/13571796064_9f341499ae_c.jpg

Hope you enjoy and stay tuned for more juicing recipes once the gloomy rain goes away!       


Friday, January 24, 2014

Roasted Wild Mushroom Pizza Blanco

I never got my oven fixed last week but when I turned it on the other night it worked perfectly.  I'm sure eventually I'll need to call in the repair guy, or get a new one, but until then it's nice not having to spend the $100 plus!  I'd rather spend the money on quality ingredients to make delicious food!

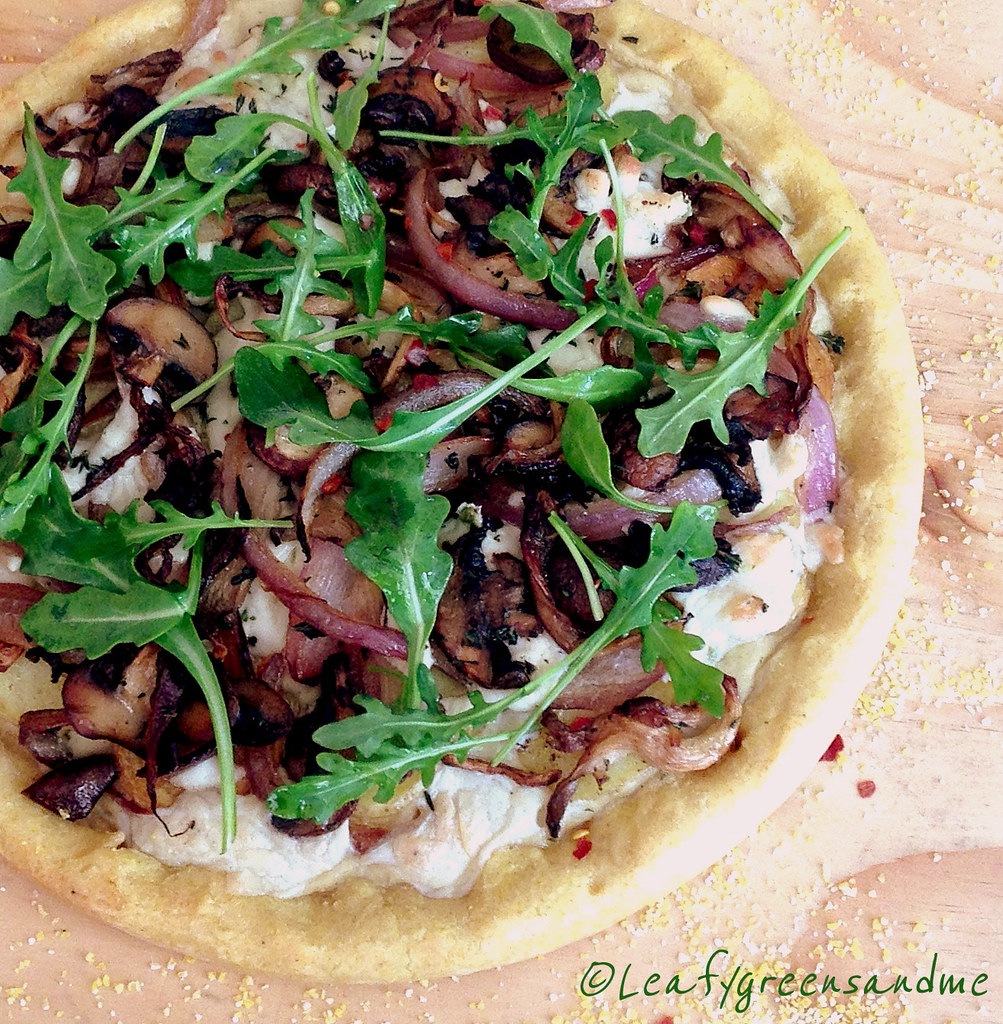
For this pizza I used a gluten free cornmeal crust.  I really didn't like the crust that much...it was chewy and didn't brown properly and I much prefer an extra-thin crispy crust for my pizza.  I do like using gluten free pizza crusts, but this was not one of them.  However, the toppings were amazing! Here's what I did:

http://farm8.staticflickr.com/7391/12125213085_838ce18314_b.jpg
  
I pan roasted both cremini and oyster mushrooms in olive oil, fresh thyme and salt and pepper until lightly golden brown.  While the mushrooms were roasting, I caramelized sliced red onions in olive oil and set aside.  I then sliced baby creamer potatoes about 1/8" thick and sauteed them in olive oil until golden brown.  

To assemble the pizza, I brushed the dough with extra virgin olive oil and then spooned about 1/3 cup of my homemade creamy pasta alfredo sauce on the bottom.  I topped the sauce with one cup of shredded Daiya Harvarti Style Cheese Wedge, followed by the roasted mushrooms and then the onions.  After baking the pizza I topped it with fresh arugula tossed in a little evoo, s&p, and finished with a sprinkle of crushed red pepper flakes.

If you make the alfredo sauce the day before and purchase a pre-made pizza crust, then this is an easy Friday night dinner after a long week at work!  And it was delicious!  Now I've got to figure out what I'm making for tonight...stay tuned...will post this weekend! 

Happy Friday! 

Monday, January 20, 2014

Beet Sliders with Dill Aioli and Crispy Onion Strings

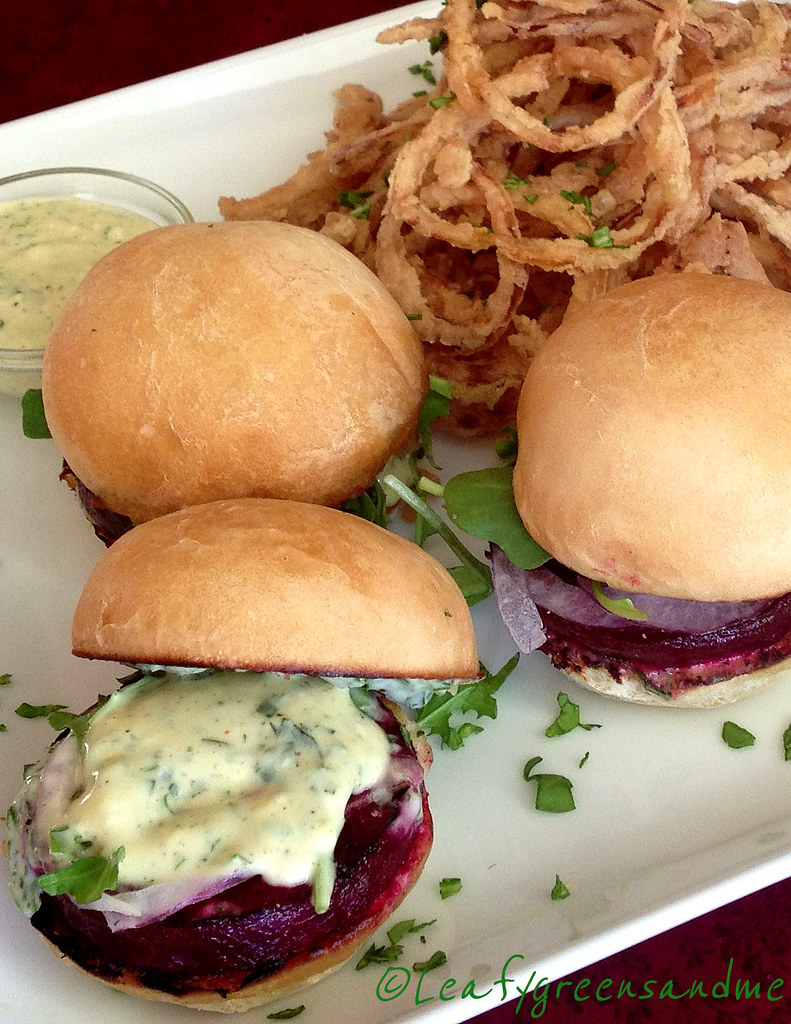
I have made vegan burgers with just about every ingredient combination you can imagine (beans, mushrooms, rice, lentils, tempeh, TSP, nuts/seeds, gluten, etc.) and the texture is always off.  They are very flavorful but they tend to be either mushy, gummy, crumbly, or dry and so when I saw these Beet Sliders featured on Diner's, Drive-In's and Dives the other day, I knew that I had to make them for the 49ers vs. Seahawks game yesterday.  (Just a side note--bummed that the 9ers lost...:-(, but go Denver--I like Payton Manning--he's a classy guy!)  Did you happen to notice that my sliders are the same colors as the 49ers uniforms...:-)!

http://farm4.staticflickr.com/3782/12061100395_21b6a17888_b.jpg

Anyway, back to the sliders.  I served these with two sauces:  a Dill-Green Goddess Aioli and a Tarragon-Spicy Mustard Aioli.  The dill aioli was the favorite, but the tarragon-mustard was a close second--such a classic combination.  To make the aioli dressings I used 1/2 cup Vegenaise and a 1/4 cup sour cream in each bowl.  I then added finely minced dill, green onion and parsley to one bowl, and finely minced tarragon and spicy brown mustard to the other bowl.  I added fresh lemon juice, salt and pepper to each and whisked until smooth.

For the sliders, I purchased beets that were about 3" in diameter, all about the same size and I poached them in a liquid made up of:  water, diced onion, carrots, celery, garlic cloves, fresh dill, fresh thyme, bay leaf, coriander seed, caraway seed, black peppercorns, and salt.  I simmered them for about 1-1/2 hours until tender, let them cool, peeled them and with a 2-1/2" cookie cutter cut them the same size 1/4" thick.  Before serving, I seared them in olive oil, salt and pepper, which gave them a great texture.

The most difficult part about these sliders was locating the perfect size and textured bun.  I went to Whole Foods, Trader Joes, Safeway and Lucky's and I purchased three different bags of buns, which are now taking up my freezer.  I wanted them the exact size of my beets, but I didn't want the bread to be too dense.  It all worked out and the beet to bun ratio was perfect! 

Finally, I shaved red onion very thin on a mandolin and topped each slider with onion, arugula and aioli of choice.  I was thinking about serving them with fries but went with the crispy onion stings.  I used one large sweet Maui onion (serves 2-3 people), shaved thinly on a mandolin and set up a dredging station (wet:  2 cups almond milk with 1/4 cup hot sauce, dry:  2 cups flour, 1/4 cup cornstarch, salt and pepper).  Using a candy thermometer, I heated 1 qt canola oil to 380 degrees and deep fried the onion strings until golden brown, drained on paper towels and sprinkled with sea salt!

These were so yummy and so easy to make that I will probably never go back to making burgers the other way!    


Friday, January 10, 2014

Tuscan White Bean Quesadilla with Balsamic Glaze

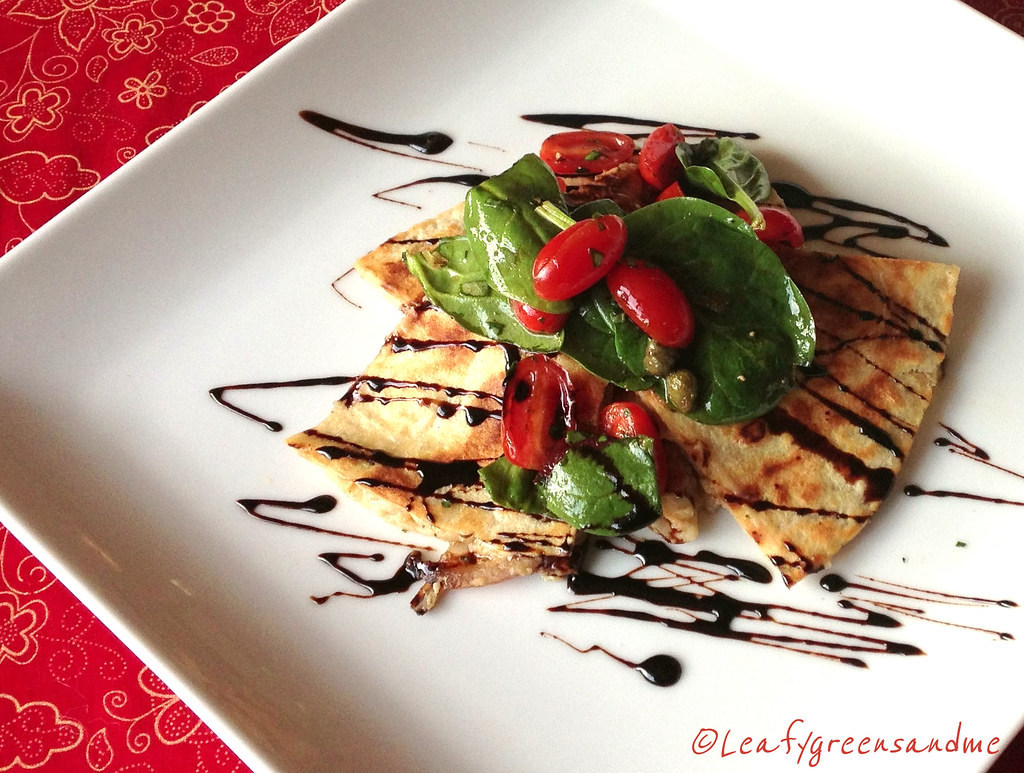
On Friday I'm always looking for a quick and easy dinner and this couldn't be simpler.  You can make the white bean spread from scratch or doctor up your favorite white bean hummus.  The key to this quesadilla is to make sure that the bean mixture is firm so that it is easy to cut.  

http://farm6.staticflickr.com/5522/11881189676_26a0294e60_b.jpg 

Top with a marinated salad of cherry tomatoes, arugula, capers and kalamata olives or eggplant capanata and drizzle with balsamic glaze. 

Ingredients:

1 can cannellini beans, rinsed, drained and dried really well with a towel
1 tbsp extra virgin olive oil
1 large onion, diced small
3 cloves garlic, minced
1 tsp dried Italian seasoning, or 2 tsp fresh herbs (rosemary, thyme, oregano, fennel), minced
Pinch crushed red pepper flakes
1/2-1 tsp grated lemon zest
Kosher salt and pepper to taste
Whole wheat tortillas
1 package Daiya Havarti Wedge Cheese, shredded
Balsamic Glaze
Tomato-Caper-Olive Arugula Salad

Method:
  • Saute onion, garlic and Italian seasoning and red pepper flakes until soft.
  • In a food processor, process beans until mostly smooth, adding 1 tbsp of bean fluid or water.
  • Remove bean mixture place in a bowl and stir in onion mixture and season with salt and pepper to taste.
  • Add shredded cheese, bean mixture to tortilla and saute until golden brown. 
  • Cut into wedges and garnish with balsamic glaze and salad.
Happy Friday!  


Sunday, December 29, 2013

Glazed Cinnamon Rolls

My cravings for Cinnamon Rolls started two weeks ago when my daughter-in-law posted a photo on Instagram of her homemade cinnamon buns.  I immediately liked the photo and commented that I wanted the recipe.  When she emailed me the recipe she said..."have fun with this one!"  The recipe she sent me was not Vegan and was basically like making a brioche dough with butter, egg yokes and whole milk.  But I was up for the challenge and for the past two weeks all I have been thinking about is making these darn buns!
http://farm6.staticflickr.com/5548/11638703123_eb89021512_b.jpg

If you're in a hurry to make any yeast dough, you might think about making something else.  These cinnamon rolls take about five hours from start to finish.  If you want them for a mid-morning breakfast, then I recommend that you start the dough in the evening, let them go through the first rise, punch down, cover and place in the refrigerator overnight.  In the morning you can then finish the rolls and bake them off.  I started these at 6am (I'm an early riser) and they were ready at 11am.  My husband slept in until 10am and he was surprised that they weren't ready.  But YUMMY things come to those who wait and have patience!

http://farm4.staticflickr.com/3709/11638816624_d078e4aabc_b.jpg

When kneading the dough you want to keep in mind that you are not making bread and you do not want to develop the gluten.  You want the dough to be soft, glossy and smooth and the finished buns to be light, fluffy and tender.  I kneaded my dough for about 5-7 minutes in my Kitchen Aid mixer--just enough for the dough to pull away from the sides of the bowl.  I also added just enough flour so that I could handle the dough without it being too sticky.  I added about 3 1/3 cups of flour but you may need to add more or less during the mixing-kneading process. 

Dough Ingredients:

1 packet Active Dry Yeast
1/4 cup warm water (100 degrees)
1/3 cup sugar 
4 ounces Earth Balance Buttery Sticks, melted
1 cup cashew milk, warmed (1/2 cup cashews blended with 1-1/2 cups water)
3-4 cups of all purpose flour (I used organic unbleached)
1 tsp kosher salt

Filling Ingredients

3/4 cup light brown sugar, packed
2-3 tbsp ground cinnamon (I used 2 tbsp)

Icing Ingredients:

8 ounces Follow Your Heart Sour Cream or Cream Cheese
1 1/2 cups powdered sugar
1-2 tbsp cashew milk
1 tsp vanilla extract
1 tsp grated orange zest

http://farm8.staticflickr.com/7357/11638675593_58c190ba86_b.jpg
Method:
  • Place warm water and yeast in a small bowl and mix together.  Let sit for 10 minutes until it starts to bubble.
  • In a small sauce pan, heat butter until melted, remove from heat and add 1 cup of cashew cream, 1/3 cup of sugar, whisk together and set aside.
  • In the bowl of a kitchen-aid mixer, place 3 cups of flour and 1 tsp kosher salt and whisk together.  Create a well in the center and add butter/milk mixture, along with water/yeast mixture.  Stir together with a spatula and then start mixing with the dough hook on medium speed.  Add enough flour (I added about 1/3 cup) extra flour so that the dough pulled away from the side of the pan and when you touch the dough it is not sticky and it can be handled easily.  Again, I kneaded my dough for about 7 minutes, you may need more or less.
  • Lightly oil a medium sized bowl and place dough in the bowl and cover with plastic wrap.  Let rise for about two hours until doubled in size.  If your house is warm, it will rise quicker.
  • Lightly punch down the dough and place on a lightly floured work surface and roll out to a 12-16 rectangle.
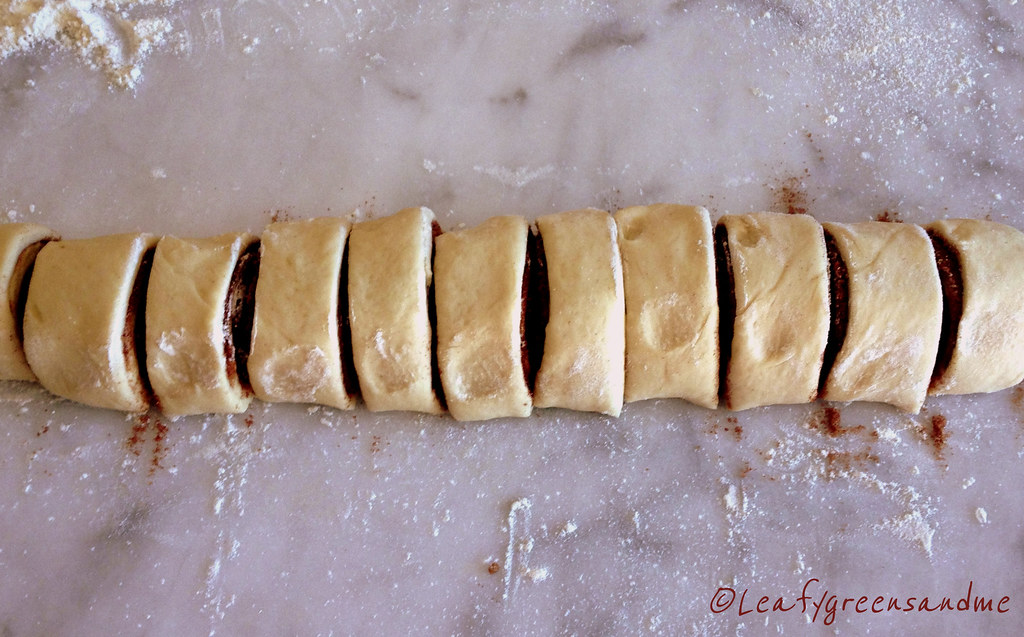
  • Sprinkle cinnamon sugar mixture evenly over dough, leaving a 1/2" border and roll the dough up tightly, moistening the end with water and sealing the roll.  
  • Place the seam side down and dust roll lightly with flour, along dusting a sharp knife with flour for every cut.  Cut the dough in half and then cut each half in half so that you have four equal pieces.  Cut each of these four pieces into three pieces so that you have 12 pieces.
  • Butter a 9x12 pan and place the cut side up.  Cover with plastic wrap and let rise for another 1-1/2 - 2 hours.
  • Preheat oven to 350 degrees and adjust the baking rack to the center of the oven.
  • Bake rolls for 25-30 minutes until golden brown, turning half way-through the cooking process.
  • Remove from the oven and turn out onto a cooling rack and let cool 10 minutes before separating and drizzling with icing.
  • While the rolls are baking, make the icing in a mixer and chill in the refrigerator until ready to use.

http://farm3.staticflickr.com/2884/11639178326_9b4c3a71a3_b.jpg

My husband and I ate quite a few of these today and we felt so guilty that we went for a long hike in the mountains.  We still have about seven left on the kitchen counter and they are screaming at us...Eat Me!  But we are being strong and the remaining rolls are going to work with me tomorrow for others to enjoy!  I hope that you enjoy them too!

Wednesday, December 25, 2013

Simple...Elegant Christmas Dinner

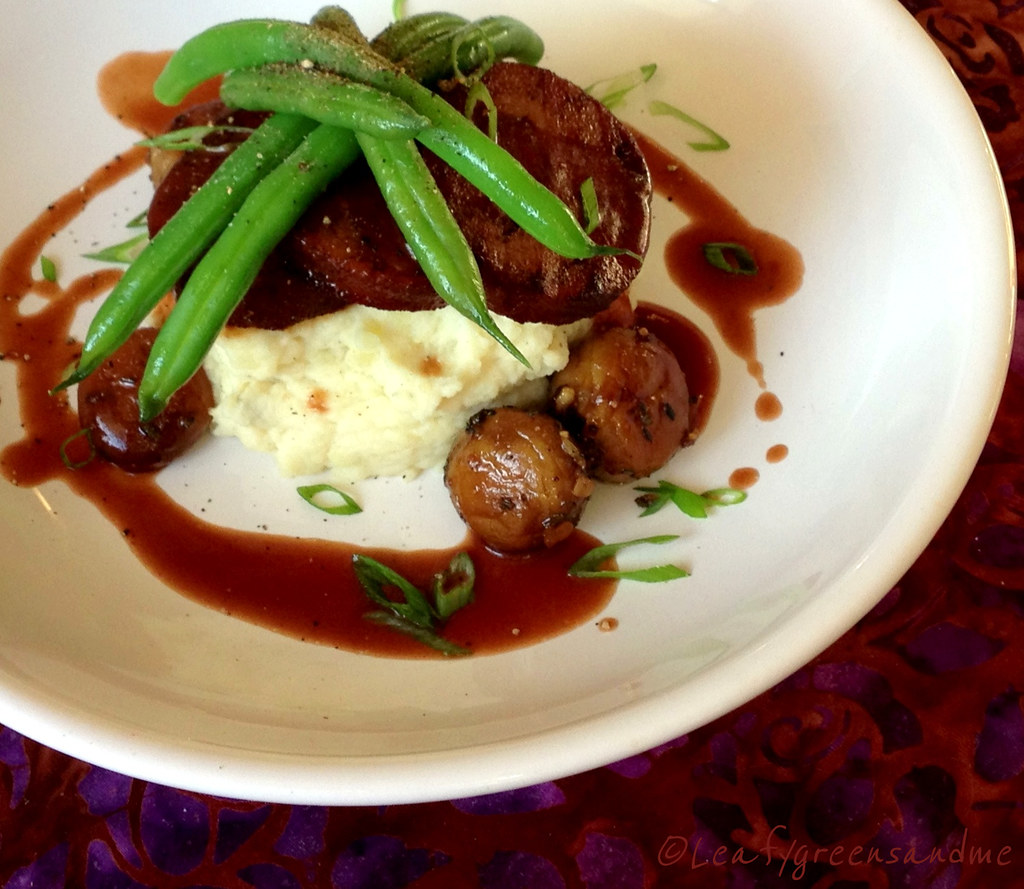
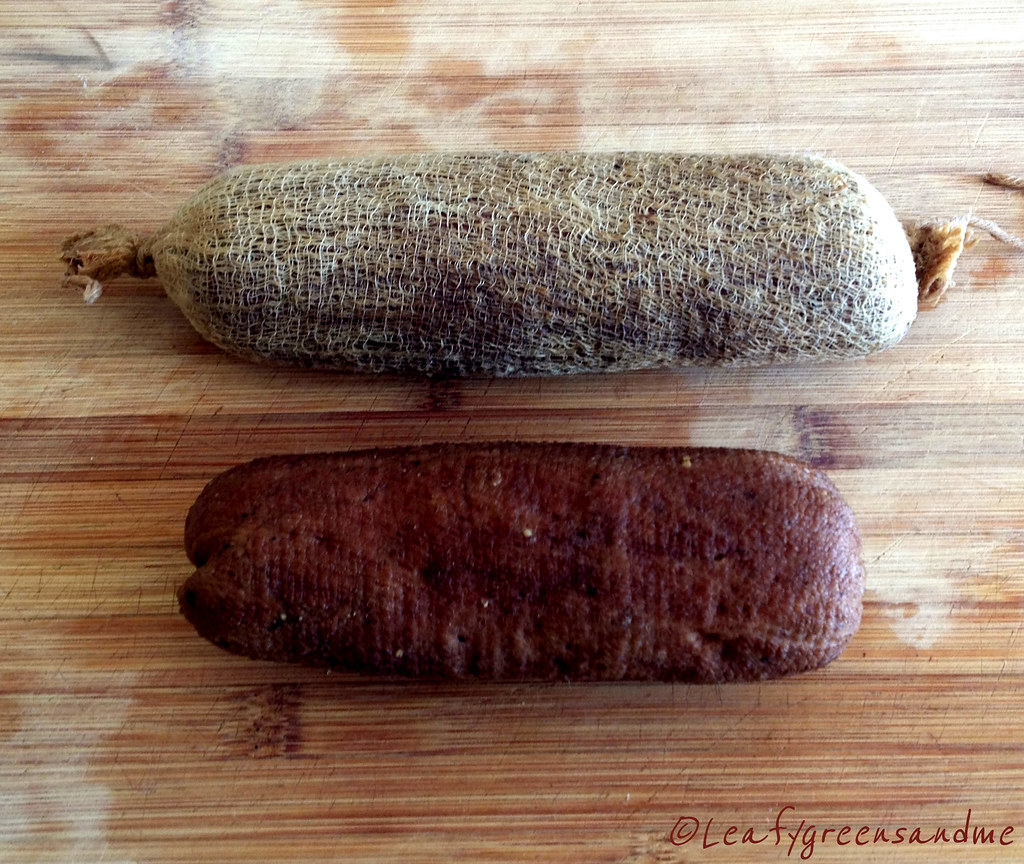
I have never made homemade seitan before--well not the kneading, resting, rinsing, kneading, rinsing...rinsing, rinsing, etc., type of seitan.  It is very laborious and I'm not certain if it is worth it or not.  The seitan was very flavorful and would be great sliced for sandwiches or served with a fruit and cheese platter, but sliced into medallions the texture was somewhat chewy.  So the "Simple" in my title references all of the other components of the dish, but not the seitan.  It took about 3.5 hours to make the seitan from start to finish!

http://farm6.staticflickr.com/5540/11558273356_415c411f35_b.jpg
 
Demi Glace:  Is a classic French brown sauce--one of the mother sauces that I learned to make in Culinary School years ago.  Obviously the French make the sauce with meat bones, but my recipe uses only homemade vegetable stock and it is rich, glossy and delicious.  To make the sauce I added a couple tbsp of olive oil to a sauce pan, along with one cup sliced white button mushrooms and one cup sliced onion.  I cooked these until brown and caramelized and then added several cloves of crushed whole garlic.  I deglazed the pan with about a cup of red wine and added one tbsp tomato paste.  I reduced this down until almost all the wine was evaporated and then added four cups of homemade vegetable stock, along with a sprig of fresh time, a tsp of fresh rosemary leaves, one bay leaf, and a 1/4 tsp of black peppercorns.  I brought the sauce to a boil and reduced the heat to low and simmered until reduced by half.  I then strained the sauce through a fine strainer, pressing on the solids, returned the sauce to a smaller pan and then whisked in a beurre manie (equal parts butter and flour) to thicken the sauce.  Finally, I seasoned with sea salt and freshly ground pepper.   

Sherry Glazed Button Mushrooms:  I used one pound of white button mushrooms, cleaned them with a damp cloth and trimmed the stems. I heated a cast iron skillet and added a couple tbsp of olive oil and sauteed with the tops face down without stirring until golden brown.  I then turned them over and browned the other side.  Once brown I added chopped fresh thyme, rosemary and minced garlic, along with salt and pepper.  I then deglazed the pan with one cup of pale dry sherry and reduced until the mushrooms were coated and all the liquid was evaporated.  If you don't have sherry, any fortified wine will taste great:  Madeira, Marsala or Ruby Port.  

Roasted Garlic Mashed Potatoes:  I used Yukon Gold potatoes, peeled and cut into two inch chunks.  I made a cashew cream with one cup raw cashews and two cups of water blended in a VitaMix until smooth and creamy.  I roasted two whole garlic heads in the oven for about an hour until soft and caramelized.  I squeezed out the flesh of the garlic and added it to the cashew cream and blended again.  I drained the potatoes, mashed, added earth balance butter and added enough garlic cashew cream to create a smooth consistency, along with sea salt and freshly ground black pepper.

Homemade Peppered Seitan:  Back to the kitchen to tweak this recipe further.  Again, sliced thinly and tossed with a BBQ sauce and piled high on a sandwich would be great, but still needs some refinement.

http://farm4.staticflickr.com/3736/11558260673_d55462fb99_b.jpg
 
I hope that you and yours had a wonderful Holiday!  Until my next post...enjoy!


Sunday, December 22, 2013

Baked Gingerbread Doughnuts

I grew up eating gingerbread--my mom's background was German-Pennsylvania Dutch and she always made gingerbread around Christmas. Come to think of it we always had gingersnaps in the house and she would use them to make German dishes like Sauerbraten with Dumplings.

http://farm6.staticflickr.com/5498/11507697415_25a69c61ff_b.jpg
 
Most people are not a big fan of gingerbread because they don't like the flavor of ginger--my husband included.  When I told him that I was making gingerbread doughnuts he was not jumping with joy.  His response to me was..."out of all the doughnut choices you're making gingerbread doughnuts?" But what would Christmas be without gingerbread and I'm not a big fan of gingerbread cookies...so gingerbread doughnuts it was!

This recipe makes 10-12 doughnuts and the batter is very thick.  It helps using a small spoon to spread the batter in the pan.  For the powdered ginger I used China Ginger from Penzeys Spices.  During Thanksgiving were up in Portland visiting family and we stopped by their retail store and purchased this ginger.  It has a clean flavor with a nice kick from the heat--truest to actual fresh grated ginger.

For the toppings have fun with it, but flavors that pair well with ginger are chocolate, dark berries and cinnamon.  I made a cashew milk chocolate-ganache, a white icing glaze mixed with wild blueberry preserves, and the old standby of cinnamon sugar.  My favorite flavor was the wild blueberry, but they all were delicious!

http://farm6.staticflickr.com/5510/11507797903_323a0997dd_b.jpg
Ingredients:

1 1/4 cup unbleached flour
1/4 cup packed brown sugar
1 tsp baking powder
1/4 tsp baking soda
1 1/2 tsp cinnamon
1 tsp ground ginger (more or less to taste)
1/2 tsp nutmeg
1/4 tsp allspice
1/4 tsp salt
2 tsp unsweetened cocoa powder
1/8-1/4 tsp cayenne pepper (optional)
1 1/2 tsp coffee extract
2 tbsp molasses
1/4 cup cashew milk or other non-dairy milk
1/2 cup organic applesauce
1 tbsp ground flaxmeal mixed with 3 tbsp warm water to make a flax-egg
1/4 cup vegetable oil (plus more for greasing the pan)

Directions:
  • Preheat oven to 350 degrees.  Grease doughnut tin and set aside.  
  • In a medium sized bowl, sift all dry ingredients together.
  • In a larger bowl, whisk all wet ingredients together.
  • Using a spatula add dry ingredients to wet ingredients and stir until just combined.  If batter seems too thick then add one tbsp cashew milk or non dairy substitute.
  • Spoon batter into doughnut tin and smooth with spoon.
  • Bake on the middle rack for 10-12 minutes.
  • Let cool for about two minutes before turning out on a cooling rack and repeat with remaining batter.
  • Let doughnuts cool completely before dipping in icing and decorating.
Enjoy and Happy Holidays to All!  


Friday, November 23, 2012

Easy Thanksgiving Dinner

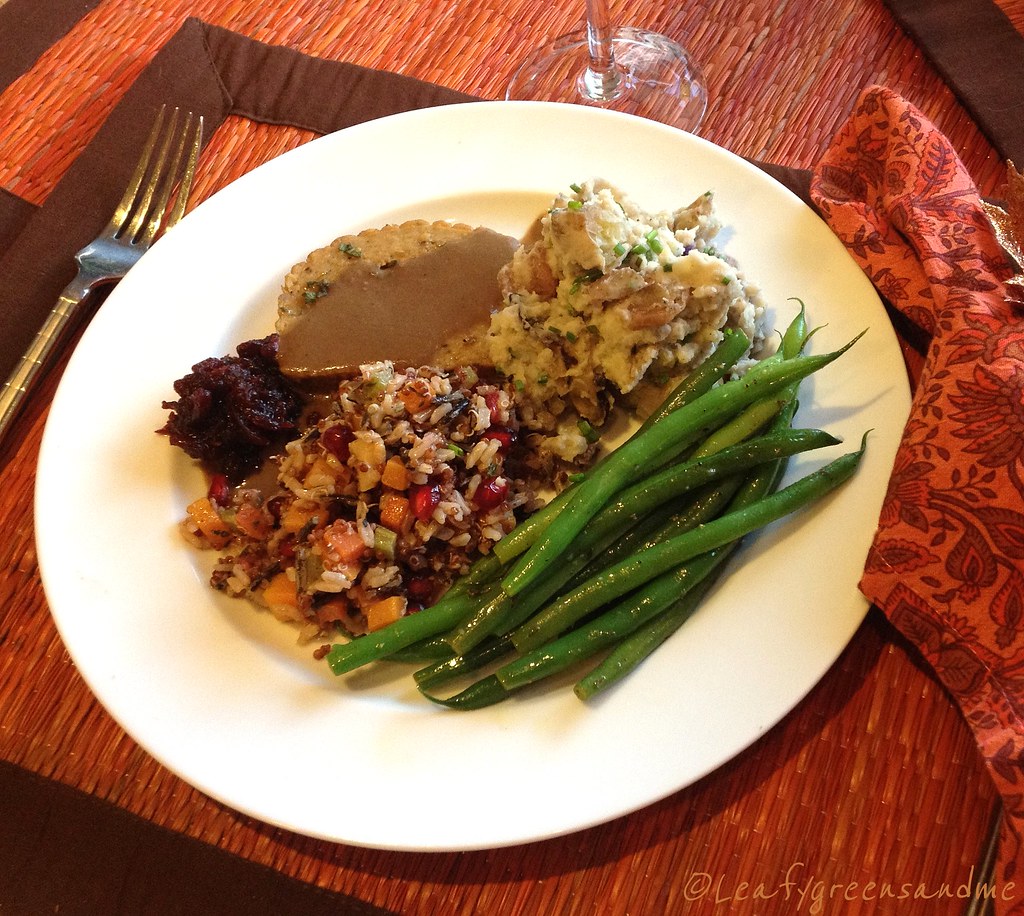
Yesterday was probably my easiest and best Thanksgiving ever.  I swore after last year that I would never spend all day (12 hours) in the kitchen...cooking and cleaning.  And as much as I love cooking--it's just not worth it.  My menu yesterday took 4 1/2 hours from start to finish (prep, cooking, eating and cleanup)!  So instead of starting to cook at 8:00am, I slept in, had a relaxing breakfast with my husband reading the paper, surfed the web, played games, went for a walk and then at 1:00pm I started my first prep!  So here's what I served:

  • Autumn Wild Rice Salad:  This salad is gluten free.  I used a combination of wild rice, brown basmati rice, red quinoa, diced butternut squash, carrots, celery, sage, thyme, pomegranate seeds and a pomegranate vinaigrette.  I made a similar salad last year using whole grain couscous.  This salad can be served at room temperature or chilled.
  • Blue Lake Green Beans with Lemon-Thyme Vinaigrette:  I blanched the green beans in salted boiling water for 1-1/2 minutes and then shocked in ice water, drained and set aside.  I then made a quick vinaigrette with minced garlic, shallots, thyme, whole grain mustard, freshly squeezed lemon juice, white balsamic, grapeseed oil and olive oil.  Just before serving I sauteed the beans with some of the vinaigrette to heat through.
  • Smashed Baby Fingerling Potatoes with Garlic & Chive Cream:  This couldn't be simpler--no potatoes to peel...I made a quick roasted garlic-cashew cream sauce (soaked cashews, water, 1 roasted garlic bulb, salt and pepper and blended it together).  I cooked the potatoes in salted boiling water, drained, smashed, added vegan butter, roasted garlic cream sauce and salt and pepper to taste. 
  • Roasted Shallot GravyThis is a delicious gravy made in 30 minutes using no cornstarch or butter.  I thinly sliced 5 large shallots (about 3 cups), along with 6 oz of sliced cremini mushrooms.  I sauteed them in olive oil for about 10 minutes until caramelized and then added minced garlic, fresh thyme and deglazed with ruby port wine.  I cooked the wine off and added 4 cups of vegetable stock and reduced for 20 minutes.  I blended everything together along with 3 tbsp nutritional yeast and salt and pepper to taste.  
  • Field Roast (Celebration): I braised the roast for about 35-40 minutes in a small casserole dish with vegetable stock, fresh sage, fresh thyme sprigs and olive oil.  I browned the top the last few minutes of cooking, sliced to desired thickness and poured remaining broth over top upon serving.

That's pretty much it except that I purchased freshly made cranberry-orange chutney and a vegan pumpkin pie from my work.  As much as I like baking and making pies--it takes too long.  Yes, it is a little bit more expensive, but the time savings is well worth it!  Oh and I can't forget the wine to round out the meal...I served Talbott Kali Hart 2010 Pinot Noir from Monterey.  It complimented the meal beautifully!  

And tonight is another easy cooking night...can't wait to eat the leftovers! Hope you had a wonderful Thanksgiving--I really did! 

ShareThis