Showing posts with label Brunch. Show all posts

Sunday, June 1, 2014

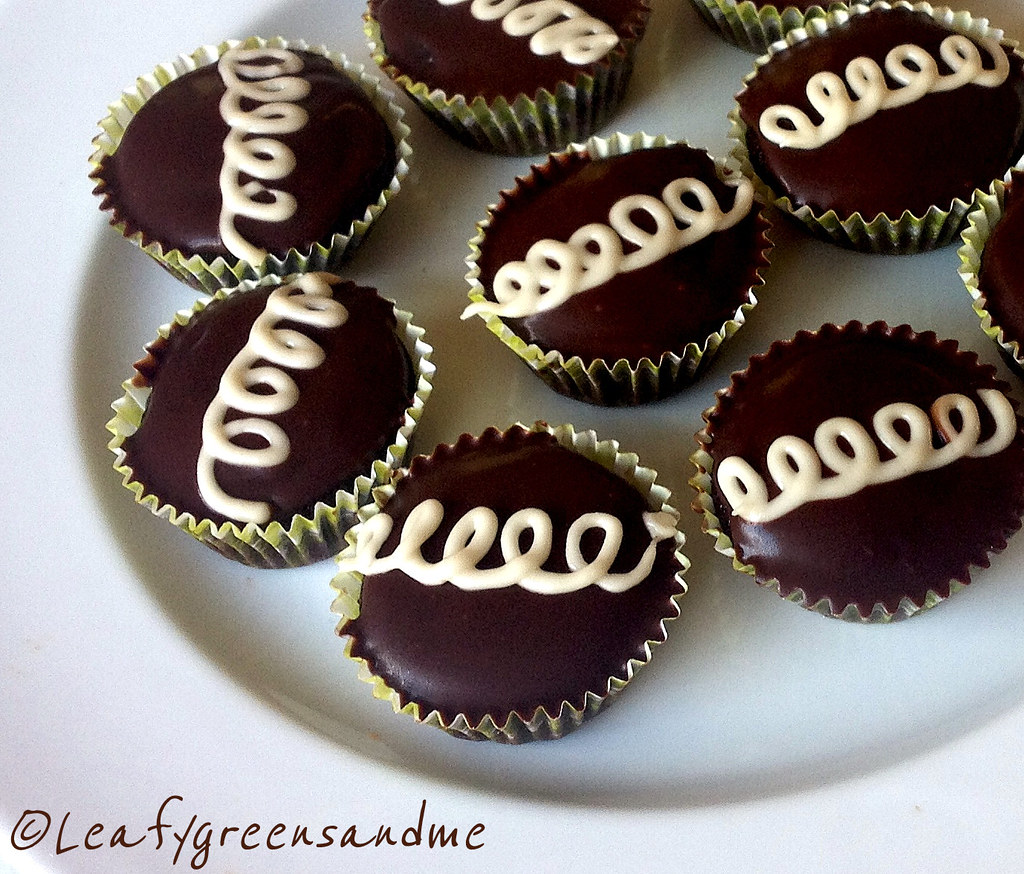
Gluten Free "Hostess" Cupcakes

My husband's birthday was a couple of weeks ago and I wanted to bake him a gluten-free cake from scratch, but I really didn't have time when I got home from work and so I made cupcakes using Pamela's Gluten Free Chocolate Cake Mix.  They were absolutely delicious...moist, rich and super chocolatey!  For the egg substitute, I used Bob's Red Mill Egg Replacer, but ground flax meal/water would work just as great.

https://farm3.staticflickr.com/2931/14321047731_2087b1719e_b.jpg

To be honest, my husband probably would of preferred if I made Hostess Twinkies instead of the cupcakes, but Twinkies are so boring...it's just a vanilla sponge cake with piped in frosting.  No creamy ganache icing or fun squiggly decoration on the top...just a boring sponge cake.  Anyway, he loved them and I think that I made a chocolate lover out of him!


For the filling I used the same buttercream recipe that I used for my Veggie Cupcakes, but only made half of the recipe and I added a little more cashew cream about 1 Tbsp to make the filling smoother.  Using a small plain piping tip and squeezed in enough frosting to cause the cupcake to puff up, but not to break.


For the ganache topping I used 1/2 cup Ghiradelli semi-sweet chocolate chips and about 3 Tbsp cashew cream.  I placed it in the microwave for about 30 seconds until melted and then stirred in 1 tsp Earth Balance Butter.  Before decorating the cupcakes, I let both the cupcakes and the ganache cool to room temperature and the iced the top of the cupcakes using a small off-set spatula. 


And for the squiggle design I used a 1/2 cup sifted confectioners sugar with 1 Tbsp cashew cream and stirred until smooth.  You want this to be really thick so that when you pipe the icing will hold its shape.  Also, let the ganache set-up completely for about 30 minutes before piping the squiggly design.  To speed up the process you can place the cupcakes in the fridge for about 10 minutes until the ganache sets.


Tuesday, May 27, 2014

Deviled Goodness (Vegan Deviled Eggs)

You can't have a holiday weekend without serving Vegan Deviled Eggs.   Seriously these are amazing!  My husband could not get over how much they tasted like the real deal, texture and everything.  As I mentioned in previous posts, I have never liked eggs (no matter how they were prepared)...but with one exception...my Mom's Deviled Eggs.  Everything she made tasted great and I think that she would love these too!

https://farm6.staticflickr.com/5160/14283368091_faaf1cbc15_b.jpg

This recipe is so simple, but you'll need a mold to create the cashew-agar base to hold the piped tofu mousse.  I used a ceramic deviled egg holder that I had in cabinet, but it was a little shallow.  I'm going to look on line and see if I can find a deeper base, but other than that they were absolutely perfect...beautiful and delicious.


This recipe makes about 36 portions so you will need more than one mold because the agar will solidify if you don't work quickly.  Or you can cut the tofu mouse recipe in half and pipe less.

Cashew Cream-Agar Egg Base:

1/2 cup cashew cream, (1/2 cup cashews blended in a high speed blender with 1-1/4 cup water.  If you don't have a high-speed blender then you will need to soak the cashews for about 4 hours and then strain through cheesecloth or a fine strainer.  You will not use all the cashew cream but it will keep in the refrigerator covered for up to five days.)
3/4 warm water
1 tsp Agar-Agar powder (I purchased my powder at an Asian market, for $2.99, but Whole Foods carries the agar flakes, but it will cost you about $9.00.  Also, if you use the flakes then you'll need to increase the amount to 1 Tbsp and boil it a little longer.
1/4-1/2 tsp Black Salt (found in an Indian or Asian market--it's actually pink and very salty.)

Method:  
  • Lightly oil mold with vegetable oil and set aside.  
  • Blend cashews with water and measure out a 1/2 cup of cashew cream.  Whisk in black salt and set aside.
  • Pour 3/4 cup water into a measuring cup and warm in the microwave for 30-40 seconds.  Whisk in agar-agar powder and then place back in the microwave for 1-2 minutes and let it boil.  
  • Place cashew cream into microwave for 30-40 seconds to warm and then whisk mixture into hot agar water making sure there are no lumps.
  • Skim off any bubbles off the top before pouring into mold, or pop bubbles with a toothpick.
  • Let mold sit on the counter for about 15 minutes before moving and placing in the refrigerator to chill for about one hour to harden completely.


Once hardened, using a small pairing knife, remove cashew-agar base and place on a plate.  Then using a small melon baller or spoon, scoop out a small portion of the base without breaking through the bottom.  Then pipe in the tofu mousse and chill for about an hour before serving.  Also, the agar will not melt or soften if these are left out for a little while at room temperature, but they are better served chilled.  So if you are serving a lot of people, I would serve a dozen at a time and keep the others chilled.

Tofu Mousse:
(You can cut the recipe in half if you are making less portions)

7.5 oz organic sprouted extra firm tofu (I used Wildwood--it comes it two sealed pouches, 7.5 oz each).
1/4 cup Follow Your Heart original organic Vegenaise
2 tsp spicy brown mustard
1 tsp turmeric powder
1/2 - 3/4 tsp black salt
1 tsp apple cider, or white wine vinegar

Method:
  • Drain tofu and press dry with paper towels and place in a food processor.
  • Add all ingredients except for black salt and blend until smooth and creamy.  You may need to add a little more Vegenaise to get the right texture.
  • Add black salt to taste and then pipe or spoon mousse into base.
  • Garnish with paprika and chives and chill for about one hour before serving.


Monday, April 28, 2014

Strawberry Shortcake...or a Parfait Please!

YAY...strawberries are here!  There is nothing better than biting into a fresh, juicy, organic strawberry...except for maybe strawberry shortcake!  Strawberries are just perfect on their own this time of year, but strawberry shortcake screams the start of summer and it's supposed to be 90 here this week!  The strawberries are definitely the main attraction, but the supporting cast is just as important.  I adapted a recipe from Cook's Illustrated by using flaxmeal for the binder, cashew milk, and added fresh lemon zest (totally makes a big difference) and vanilla extract.  If I would of had a fresh vanilla bean, I would of scrapped some of the seeds into the batter...that would of just taken the recipe over the top!

https://farm3.staticflickr.com/2896/14034475226_19d363a399_h.jpg


Even though the shortcakes did not rise as high as I wanted, they were still delicious with a crunchy exterior and a moist and fluffy interior--and oh the lemon zest was divine!  I had thought about using Energ Egg Replacer, but feel that this is best used when making cookies or crispier baked goods.  The flaxmeal provided the perfect moisture to the cakes and I loved the little flecks of flax throughout...not to mention the added bonus of Omega 3s!  And of course if they don't rise as high as you like...then just make a parfait and your family or guests will think they've gone to strawberry heaven!

https://farm8.staticflickr.com/7361/14077635953_10809e1616_b.jpg

While making the dough, I experimented with using a food processor or using the hand method and both biscuits came out the same.  So if you have a food processor then by all means use it but just make sure that you pulse the ingredients instead of letting the machine run.  I also baked some of the biscuits off right after forming and also let several rest in the fridge for 30 minutes until they were chilled and both turned out the same as well.  My next experiment will be making these gluten-free using Bob's Red Mill A/P flour and adjusting the recipe accordingly.  Also in order to get more height on the biscuit I might try dropping the dough from a spoon onto a sheet pan instead of cutting them out with a cookie cutter.  If I do this then I will need to add more liquid to the dough and turn it into a thick batter.  This however, might change the texture and the texture was perfect.  Stay tuned...

https://farm6.staticflickr.com/5515/14054389641_267a371ed4_h.jpg

This recipe makes about six-eight biscuits using a 2-3/4 cookie cutter.  For the strawberries I just purchased two pounds (organic) and reserved several strawberries aside for the top, and then divided up the rest by slicing some and dicing and mashing the others in separate bowls.  I then added some sugar to each bowl, about 2 TBSP each and then let the fruit macerate for about 30 minutes to release the juices and to soften.   Depending on how sweet your strawberries are you may need to add less or more sugar...taste them first!  For the whipped cream I used SOYATOO! Whipped Rice Topping.

Shortcake Dough Recipe:

2 cups organic unbleached all-purpose flour
5 TBSP organic unbleached cane sugar (3 for the dough, 2 for the topping)
1 TBSP aluminum free baking powder
1/2 tsp salt
8 TBSP Earth Balance Buttery Sticks (cut into 16 pieces and chilled)
1 Flax egg (1 TBSP ground flax meal and 3 TBSP warm filtered water, whisked)
1/2 cup cashew milk (1/4 cup soaked cashews, drained and blended with 1/2 cup filtered water), or you can use any dairy free milk product.
1 tsp pure vanilla extract
1 tsp organic lemon zest

Method:

  • Preheat oven to 425 and position rack in the middle of the oven.
  • In a bowl whisk together flour, 3 TBSP cane sugar, baking powder and salt.
  • Using a pastry cutter add chilled butter and cut through the flour until the butter is the size of peas.
  • In a measuring cup whisk together milk, flax egg, vanilla extract and lemon zest.
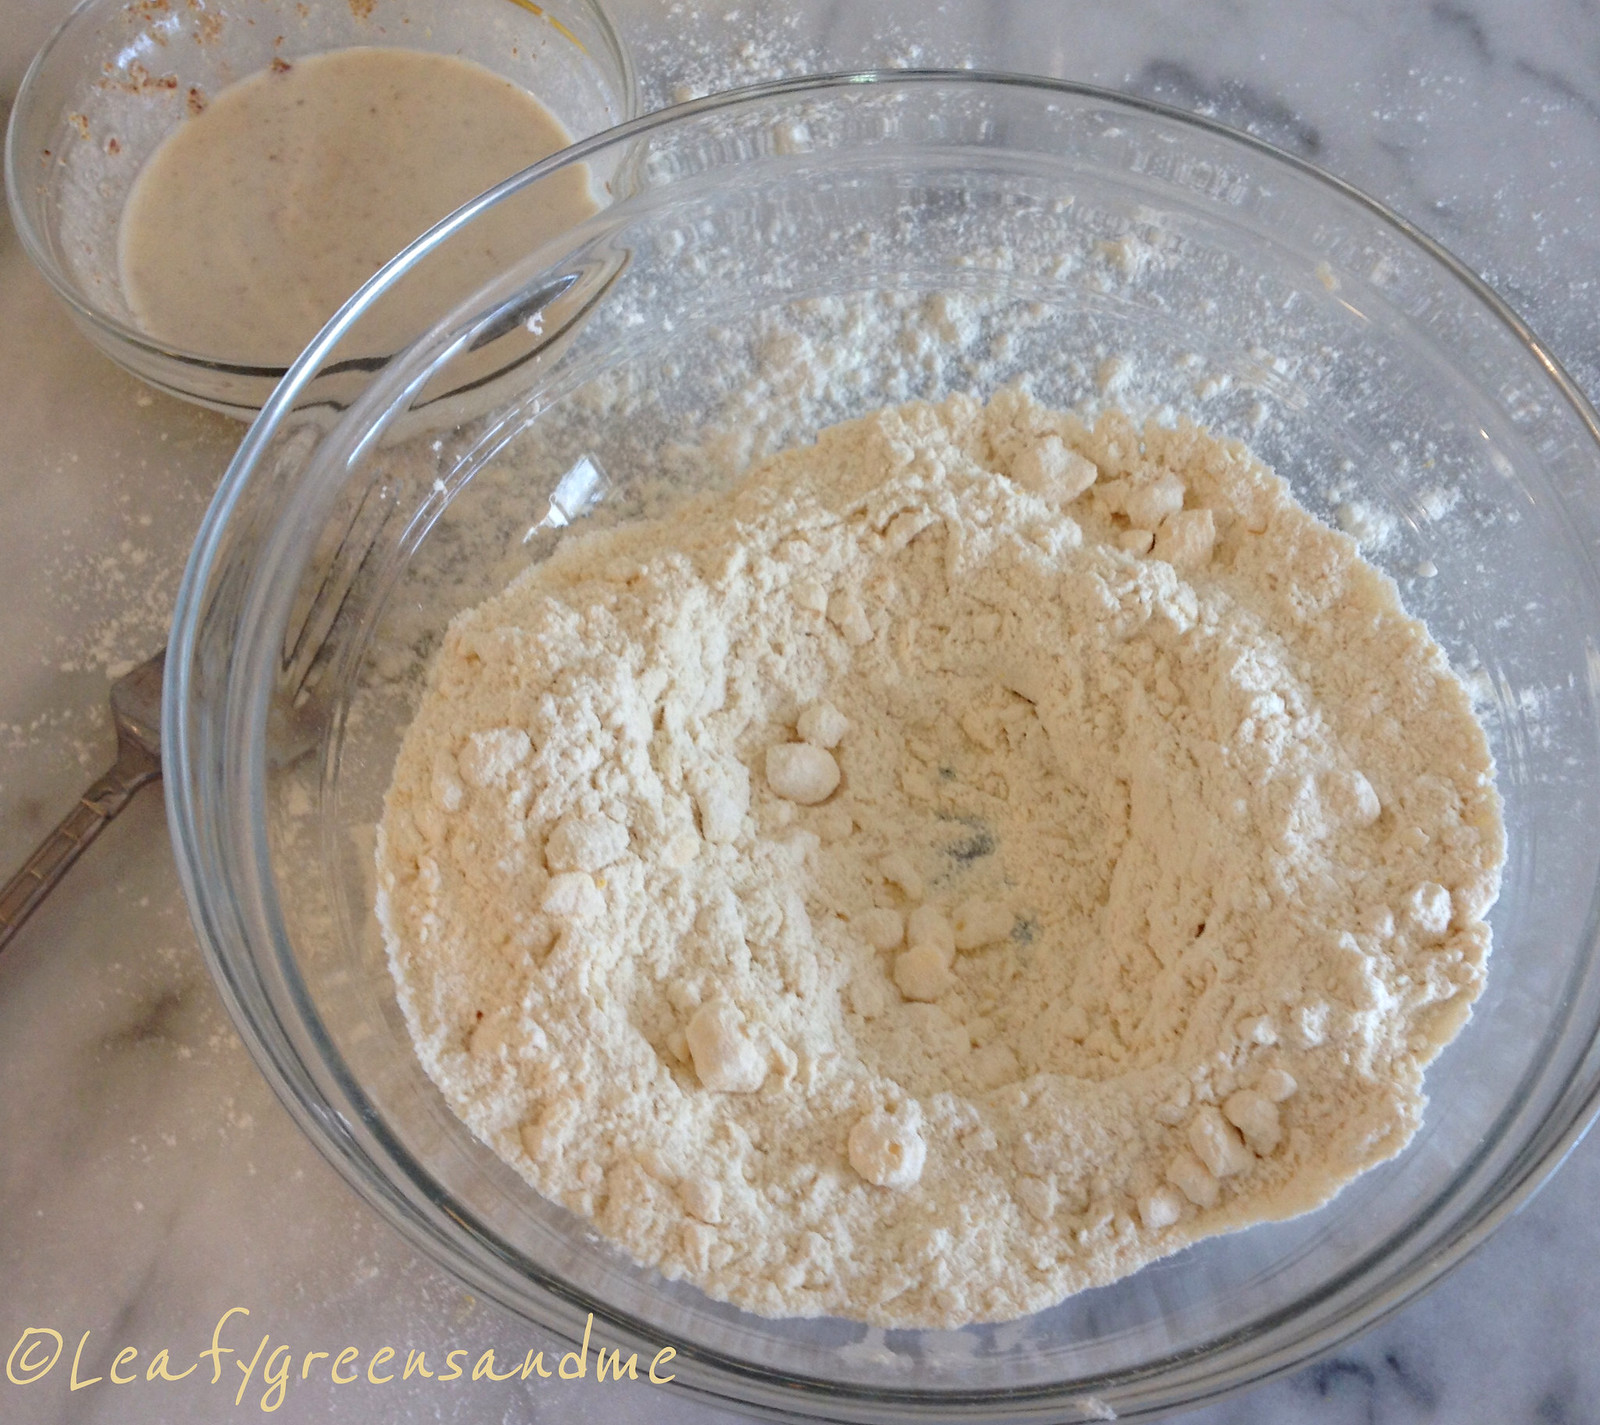
  • Create a well in the flour mixture and add wet ingredients.  Using a large fork mix ingredients until just combined and then turn out onto a lightly floured work surface and pat ingredients into a 9x6 rectangle, 3/4" thick.  
  • Cut six biscuits out of the dough and reform scraps and cut an additional two biscuits.
  • Place biscuits on a sheet tray covered with parchment paper and brush the tops with cashew milk and sprinkle with remaining sugar.
  • Bake in the oven until the tops are golden brown about 12-14 minutes, turning half way through.
  • Remove from the oven and transfer biscuits to a cooling rack and let cool for about 10 minutes before cutting. 
My husband told me that I definitely have to stop baking sweets--he's trying to cut back on gluten...so it looks like something gluten-free and most likely sweet is in my near future!  Hope you enjoy!   


Sunday, April 13, 2014

Gluten Free Cupcakes with Veggie Colored Frosting

Growing up as a kid my mom, sister and I would always dye eggs this time of year.  Our mom being the natural artist that she was would create the most beautiful designs. It was hard to compete, considering the only artistic ability I have is to draw stick people, but it was fun and I have great memories of sharing this tradition with my mom and sis.
 

https://farm4.staticflickr.com/3695/13831206343_abbc72702f_h.jpg 

I have never liked eating eggs and never understood how you could dye them, and then several days later peel and eat them.  The food coloring would seep through the shell and the white of the egg would be purple, blue or grey.  Luckily for me I got to skip that part and now since I am vegan, creating beautiful cupcakes is my new tradition.

My hubby wanted gluten-free cupcakes and so I purchased a bag of Wholesome Chow Vanilla Cake Mix.  I've tried making gluten-free products from scratch, but it is really expensive.  By the time you purchase all the starches, g-f flours, xantham gum, etc., you're looking at a substantial cost.  Of course if I had a gluten intolerance then this would be fine, but they end up sitting in my pantry and then I just throw them out.  Wholesome Chow has the best packaged gluten-free products on the market, at least in my opinion.  Another brand that is suitable for Passover because it doesn't contain leavener is Manischewitz Gluten-Free Yellow Cake Mix. It comes with a chocolate frosting but you can omit this and use the buttercream recipe below.  This product is not vegan but you could substitute flax eggs in the recipe.

So what to do about the food coloring and frosting the cupcakes?  There's no way I would ever use commercial food dyes and the organic/natural plant-derived dyes are too expensive. I did an internship at a bakery once and I watched how much food coloring they used in everything and I would never eat their cookies, cakes or cupcakes...especially their red velvet. 

https://farm4.staticflickr.com/3695/13831497744_63858e438d_h.jpg

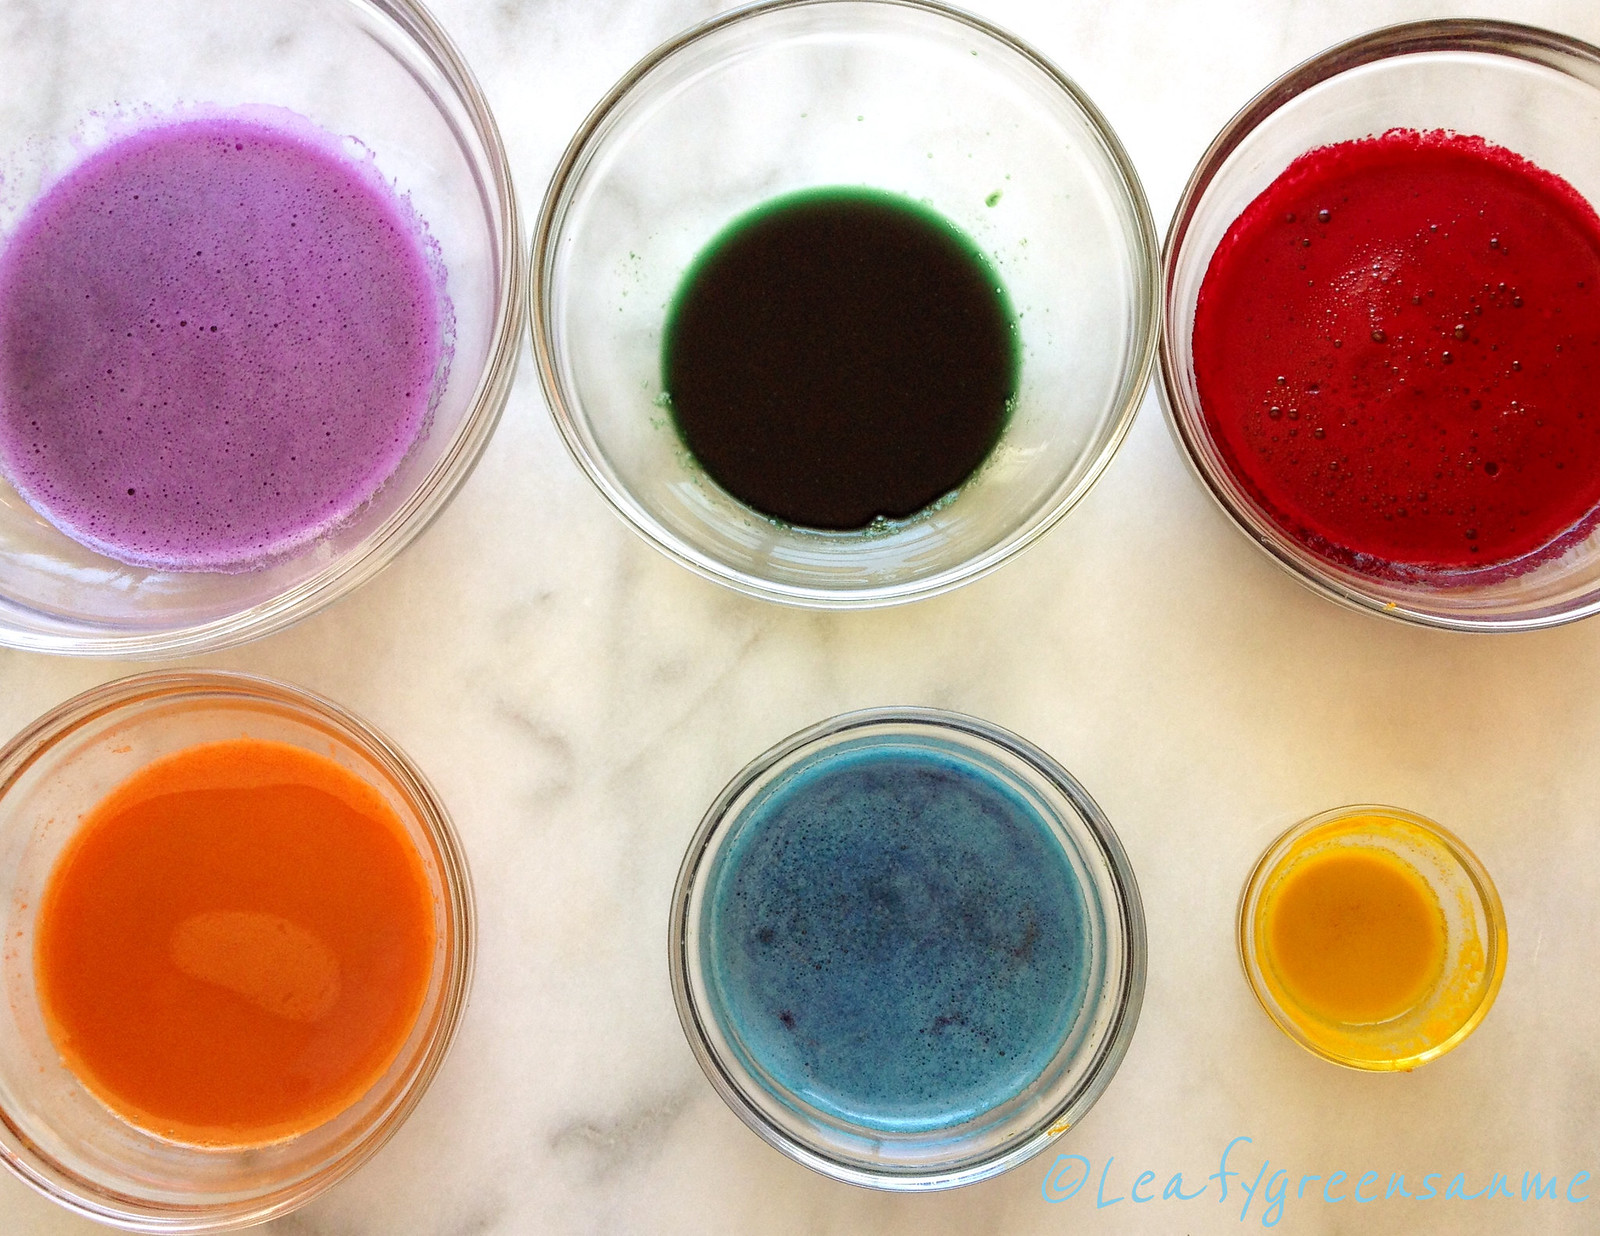
So instead of spending a lot of money, I decided to use what was in my fridge and the buttercream turned out beautiful and delicious.  Yes it takes a little bit more work because you have to juice the vegetables first, but you can still obtain beautiful pastel colors or even vibrant hues using vegetables.  Plus everything was organic!  Here's what I did:

Purple:  Red Cabbage
Green:  Spinach with a pinch of spirulina (could of used more spirulina to get a darker green--be careful though so that it doesn't taste like the ocean)
Red:  Beet
Orange:  Carrot (I also reduced the carrot juice down to a puree to obtain a darker hue)
Blue:  Red Cabbage and a 1/4-1/2 tsp of baking soda
Yellow:  Turmeric (I used about 1/4 tsp with 1-2 tsp water to make a paste)

Now you would think that by using vegetables and spices that it would impart these flavors into the frosting, but it is ever so faint and when you combine it with the cupcake you can't even tell.  Kids would love eating these even if they helped you make them and knew that they were made with vegetable juice!

https://farm4.staticflickr.com/3790/13831456534_30430bcd64_h.jpg

Vanilla Buttercream Frosting
1 tsp pure vanilla extract
2 - 3 Tbsp almond milk (or more to obtain desired consistency)
3 cups sifted organic powdered sugar

In a mixer fitted with a paddle attachment, beat butter and shortening on medium speed until combined and creamy.  Add vanilla extract, almond milk and then with speed on low, add powdered sugar until combined.  Once combined, increase speed to medium and then whip until creamy and fluffy about four minutes.  Portion buttercream evenly into six bowls and then start out adding 1/2 tsp vegetable juice to each bowl and whip with a spatula until creamy.

Note:  Because of the acidity of the vegetable juice, it will look as if the buttercream will start to curdle.  This is why it is good to start with a small amount and add slowly and beat with a spatula until creamy.  For all of the above colors, I used no more than 1 tsp veggie juice to each to get the desired effect.  Also, you can use all Earth Balance and not the Spectrum Shortening, however the shortening holds the buttercream at room temperature longer and so you do not need to worry about refrigeration.

I hope you'll give this recipe a try and start a new holiday tradition with your family!

Wishing you and yours a wonderful Passover and Easter!     
 

Wednesday, March 12, 2014

Sweet Potato Sunrise

This juice is BIG on (Beta-Carotene-Vitamin A) and Vitamin C, but the key to making it requires a little planning ahead and patience.  Sweet potatoes contain a lot of starch and you really don't want to be drinking a thick chalky substance.  So you need to juice it first and let the juice sit for about an hour so that the starch settles to the bottom of the glass.  The pure juice that rises to the top is mildly sweet with a beautiful orange color that you can now mix with other ingredients.

http://farm8.staticflickr.com/7397/13116571873_058dd574b4_b.jpg

In addition to carrots I added an orange to the sweet potato elixir, but as soon as cantaloupe comes into season I will be substituting out the orange.  I also added ginger--good for digestion and fresh turmeric root which aids in anti-inflammatory.  A perfect start to any morning!

1 medium-large sweet potato or yam, peeled
3 carrots
1 medium orange, peeled
1" piece of fresh ginger
1" piece of fresh turmeric (optional)

Make sure you peel your sweet potato before juicing.  It will just taste better and give you a brighter juice.  I let the juice sit in the fridge for about an hour and then carefully skimmed off the juice (about 1 cup) without disturbing the chalky sediment on the bottom.  I then juiced all my other ingredients and stirred in the sweet potato.

Enjoy!


Wednesday, January 29, 2014

Mexican Yuba Omelet

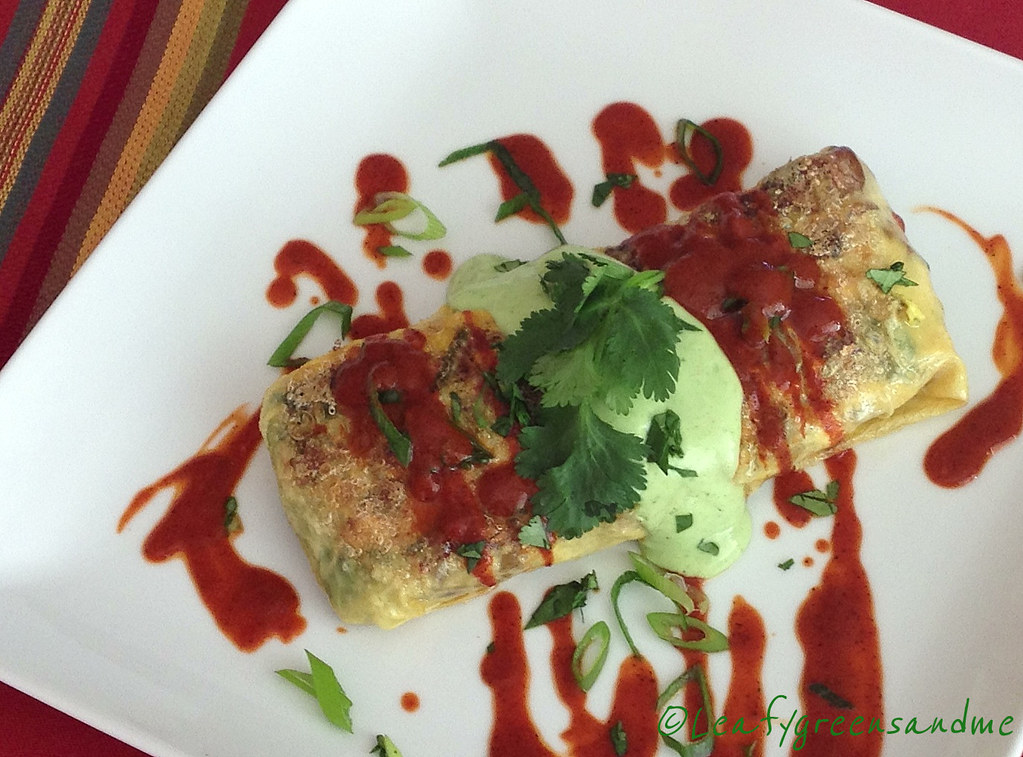
I love using yuba (tofu skins) because it is so versatile.  It's great for wrapping/stuffing, stir-fry's and soups.  You can purchase yuba at an Asian market, but I get mine freshly made at my local Sogo Tofu shop.  This yuba omelet tasted like the real deal because I also added shredded firm tofu, mixed with turmeric and black salt found at my local Indian market.  Black salt is an Indian spice that tastes like sulfur and imparts an "egg-like" flavor.  It is "rose" in color instead of black and a little goes a long way because it is very salty!   

http://farm4.staticflickr.com/3705/12214515663_f65ed4cc0b_b.jpg

For the enchilada sauce, you can purchase store bought or make your own using my recipe.  I cut the recipe in half for this dish, but if you want to make the full batch, you can store it in the fridge for a couple of weeks and use it for another meal.  For my avocado emulsion I used:  1/2 large avocado, 1 cup water, 2 tbsp vegan sour cream, a handful of cilantro leaves, the juice from a 1/2 lemon or lime, and salt and pepper to taste--then blended until creamy.

http://farm4.staticflickr.com/3793/12214908636_49304eee69_b.jpg 

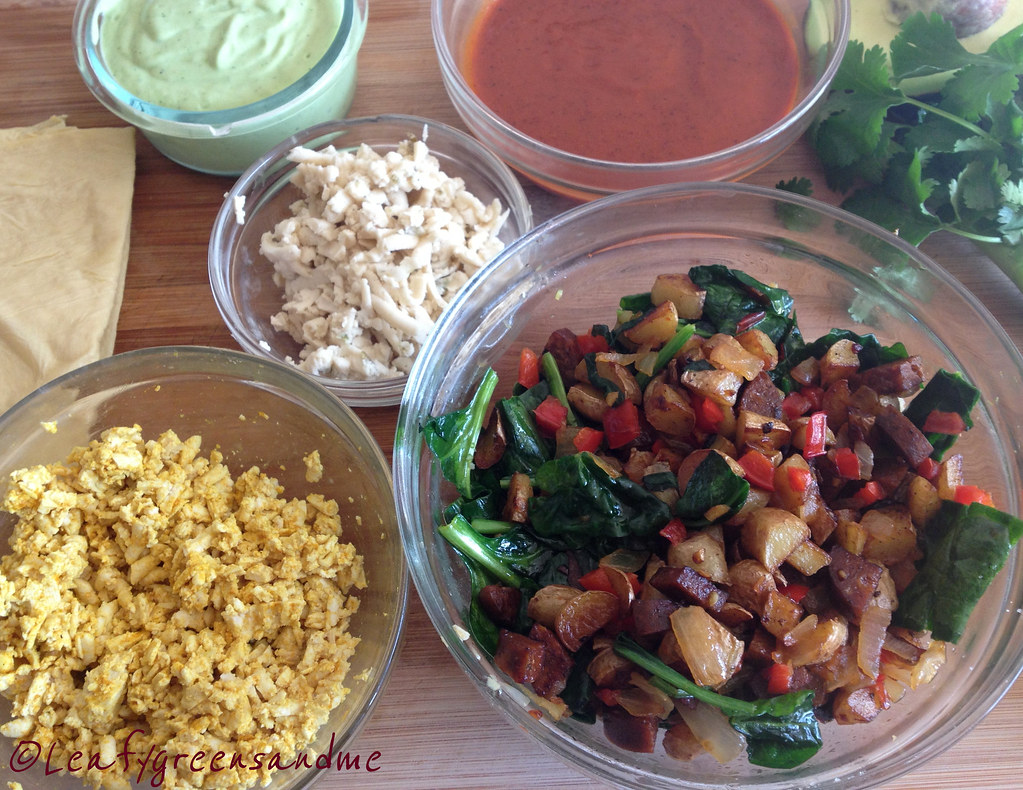
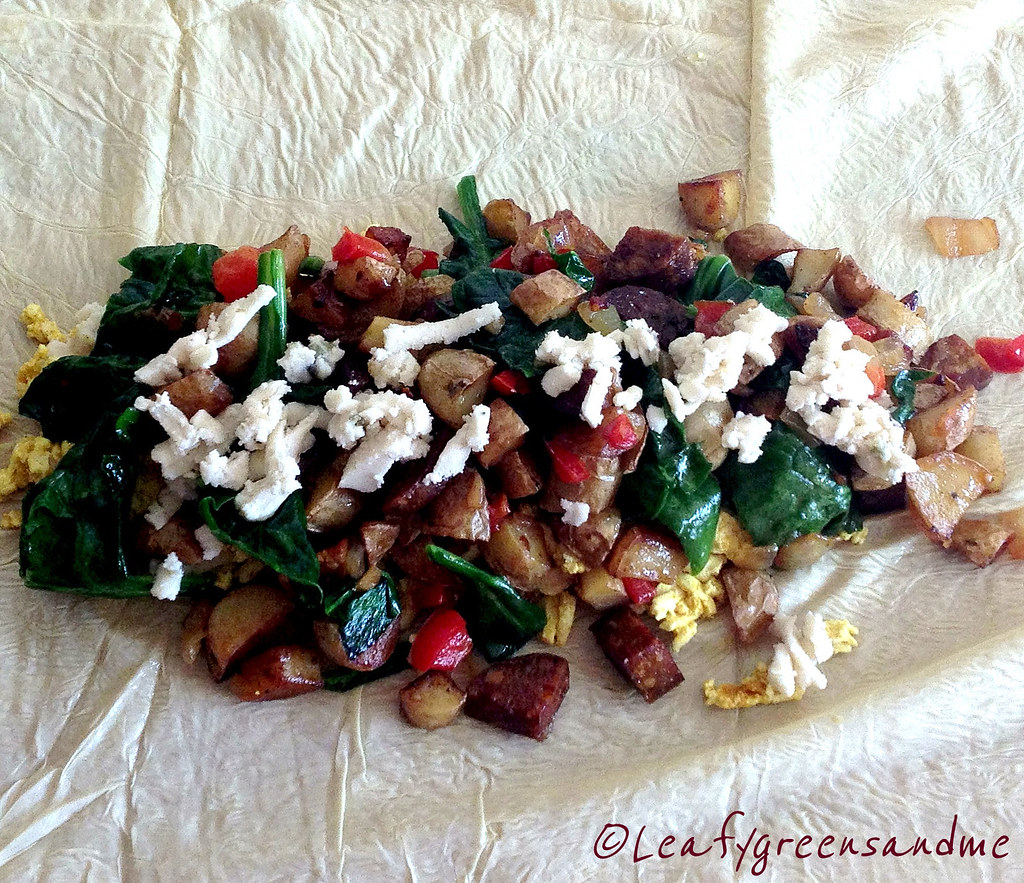
And now for the filling...the best part!  I used everything that I love in an omelet or burrito.  I pan roasted baby fingerling potatoes, and sauteed red bell pepper, onion and garlic.  I also sauteed one link of Artisan Tofurky Andouille Sausages (had this in my fridge and wanted to use it up), but sauteed cremini mushrooms would of been my first choice.  I then added fresh spinach, salt and pepper to the mix and cooked until just wilted.

To assemble, I unwrapped the tofu skin.  Depending on the size you may need to cut the tofu skin, but since they are rather thin I like to leave them big so that when I stuff, roll and wrap, I get double the coverage.  I placed a layer of shredded Daiya Havarti Style Wedge on the bottom, followed by shredded tofu mixed with turmeric and black salt, followed by the potato/veggie mixture, topped with more cheese and wrapped it up like a burrito.  I then added a little olive oil to a saute pan and browned on both sides before placing in a 350 degree oven for about 5 minutes just to make sure that it heated all the way through and golden brown.

http://farm4.staticflickr.com/3730/12214497593_f9e76cd5fb_b.jpg

Remove from the oven and top with enchilada sauce, avocado emulsion, cilantro and finely sliced green onion.  Perfect for breakfast, lunch or dinner...I could eat these every day stuffed with a different combination of ingredients and sauces!  For my next one I'm going to stuff with a stir-fry mixture of fresh veggies, grilled teriyaki tofu and serve with Asian dipping sauces!  YUM!      

Friday, January 24, 2014

Roasted Wild Mushroom Pizza Blanco

I never got my oven fixed last week but when I turned it on the other night it worked perfectly.  I'm sure eventually I'll need to call in the repair guy, or get a new one, but until then it's nice not having to spend the $100 plus!  I'd rather spend the money on quality ingredients to make delicious food!

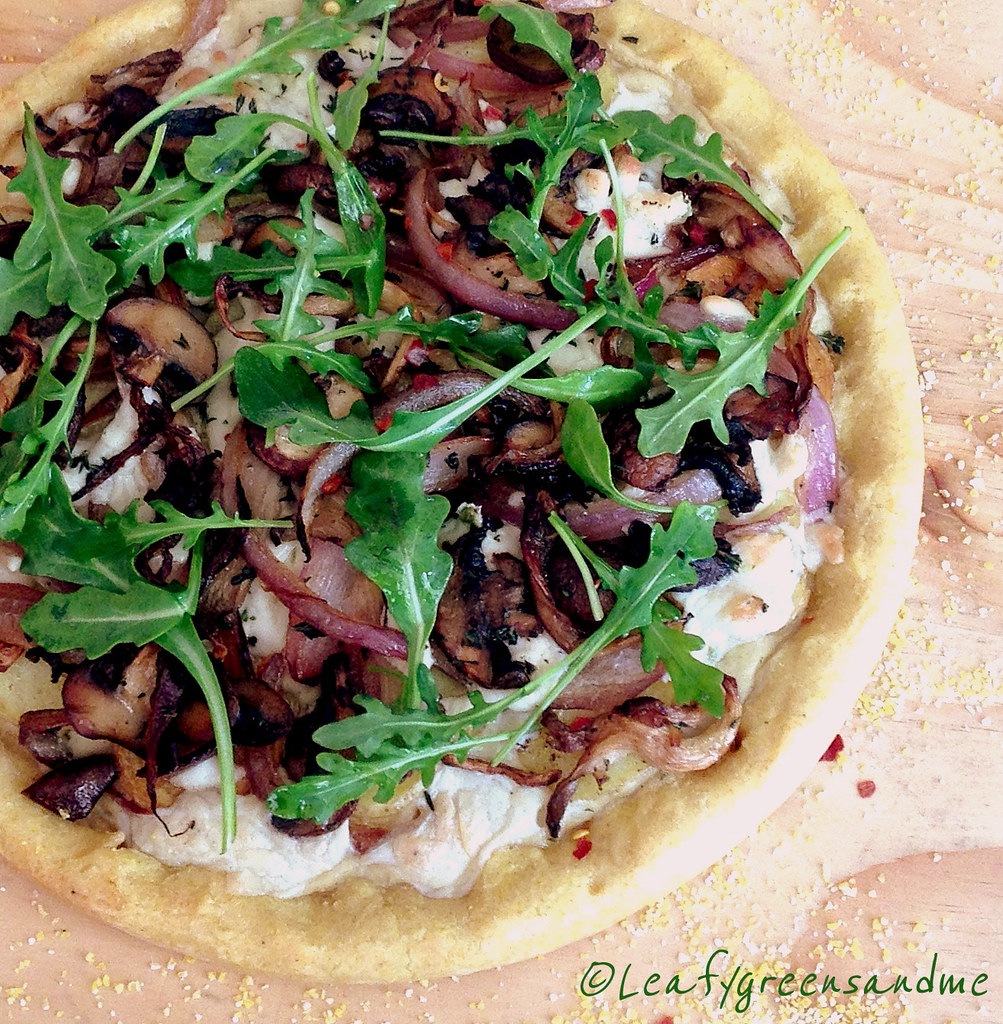
For this pizza I used a gluten free cornmeal crust.  I really didn't like the crust that much...it was chewy and didn't brown properly and I much prefer an extra-thin crispy crust for my pizza.  I do like using gluten free pizza crusts, but this was not one of them.  However, the toppings were amazing! Here's what I did:

http://farm8.staticflickr.com/7391/12125213085_838ce18314_b.jpg
  
I pan roasted both cremini and oyster mushrooms in olive oil, fresh thyme and salt and pepper until lightly golden brown.  While the mushrooms were roasting, I caramelized sliced red onions in olive oil and set aside.  I then sliced baby creamer potatoes about 1/8" thick and sauteed them in olive oil until golden brown.  

To assemble the pizza, I brushed the dough with extra virgin olive oil and then spooned about 1/3 cup of my homemade creamy pasta alfredo sauce on the bottom.  I topped the sauce with one cup of shredded Daiya Harvarti Style Cheese Wedge, followed by the roasted mushrooms and then the onions.  After baking the pizza I topped it with fresh arugula tossed in a little evoo, s&p, and finished with a sprinkle of crushed red pepper flakes.

If you make the alfredo sauce the day before and purchase a pre-made pizza crust, then this is an easy Friday night dinner after a long week at work!  And it was delicious!  Now I've got to figure out what I'm making for tonight...stay tuned...will post this weekend! 

Happy Friday! 

Monday, January 20, 2014

Beet Sliders with Dill Aioli and Crispy Onion Strings

I have made vegan burgers with just about every ingredient combination you can imagine (beans, mushrooms, rice, lentils, tempeh, TSP, nuts/seeds, gluten, etc.) and the texture is always off.  They are very flavorful but they tend to be either mushy, gummy, crumbly, or dry and so when I saw these Beet Sliders featured on Diner's, Drive-In's and Dives the other day, I knew that I had to make them for the 49ers vs. Seahawks game yesterday.  (Just a side note--bummed that the 9ers lost...:-(, but go Denver--I like Payton Manning--he's a classy guy!)  Did you happen to notice that my sliders are the same colors as the 49ers uniforms...:-)!

http://farm4.staticflickr.com/3782/12061100395_21b6a17888_b.jpg

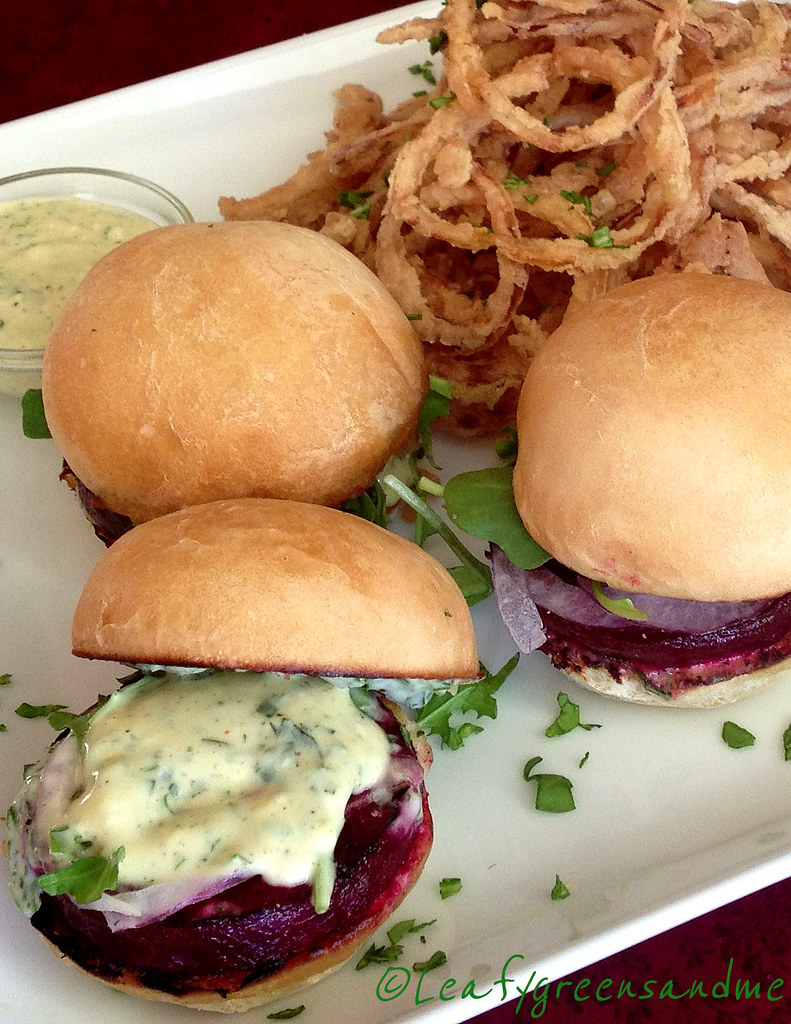
Anyway, back to the sliders.  I served these with two sauces:  a Dill-Green Goddess Aioli and a Tarragon-Spicy Mustard Aioli.  The dill aioli was the favorite, but the tarragon-mustard was a close second--such a classic combination.  To make the aioli dressings I used 1/2 cup Vegenaise and a 1/4 cup sour cream in each bowl.  I then added finely minced dill, green onion and parsley to one bowl, and finely minced tarragon and spicy brown mustard to the other bowl.  I added fresh lemon juice, salt and pepper to each and whisked until smooth.

For the sliders, I purchased beets that were about 3" in diameter, all about the same size and I poached them in a liquid made up of:  water, diced onion, carrots, celery, garlic cloves, fresh dill, fresh thyme, bay leaf, coriander seed, caraway seed, black peppercorns, and salt.  I simmered them for about 1-1/2 hours until tender, let them cool, peeled them and with a 2-1/2" cookie cutter cut them the same size 1/4" thick.  Before serving, I seared them in olive oil, salt and pepper, which gave them a great texture.

The most difficult part about these sliders was locating the perfect size and textured bun.  I went to Whole Foods, Trader Joes, Safeway and Lucky's and I purchased three different bags of buns, which are now taking up my freezer.  I wanted them the exact size of my beets, but I didn't want the bread to be too dense.  It all worked out and the beet to bun ratio was perfect! 

Finally, I shaved red onion very thin on a mandolin and topped each slider with onion, arugula and aioli of choice.  I was thinking about serving them with fries but went with the crispy onion stings.  I used one large sweet Maui onion (serves 2-3 people), shaved thinly on a mandolin and set up a dredging station (wet:  2 cups almond milk with 1/4 cup hot sauce, dry:  2 cups flour, 1/4 cup cornstarch, salt and pepper).  Using a candy thermometer, I heated 1 qt canola oil to 380 degrees and deep fried the onion strings until golden brown, drained on paper towels and sprinkled with sea salt!

These were so yummy and so easy to make that I will probably never go back to making burgers the other way!    


Sunday, January 12, 2014

The Perfect Start...to a Perfect Day!

So I thought that I would post something really healthy since it is the beginning of the New Year and we all are trying to keep our resolutions to eat healthy.  Actually, I really don't have any resolutions when it comes to food or diet.  Maybe I could be a little more patient, procrastinate less, or take time to smell the tulips more often, but pretty much everyday I have a healthy juice, or a smoothie and some days this is all that I drink!

http://farm6.staticflickr.com/5531/11911686916_06d02f05fa_b.jpg

I have never been able to go on a juice fast for more than 24 hours.  However, I do try to eliminate all solid food from my diet at least several of times a month.  I pick a Wednesday and drink only fresh vegetable juices and smoothies throughout the day, along with filtered water and herbal tea.   If you drink only pure vegetable juice then you are eliminating fiber from your diet and so I try to drink both while on my 24 hour cleanse.  Plus the smoothies keep you fuller longer. 

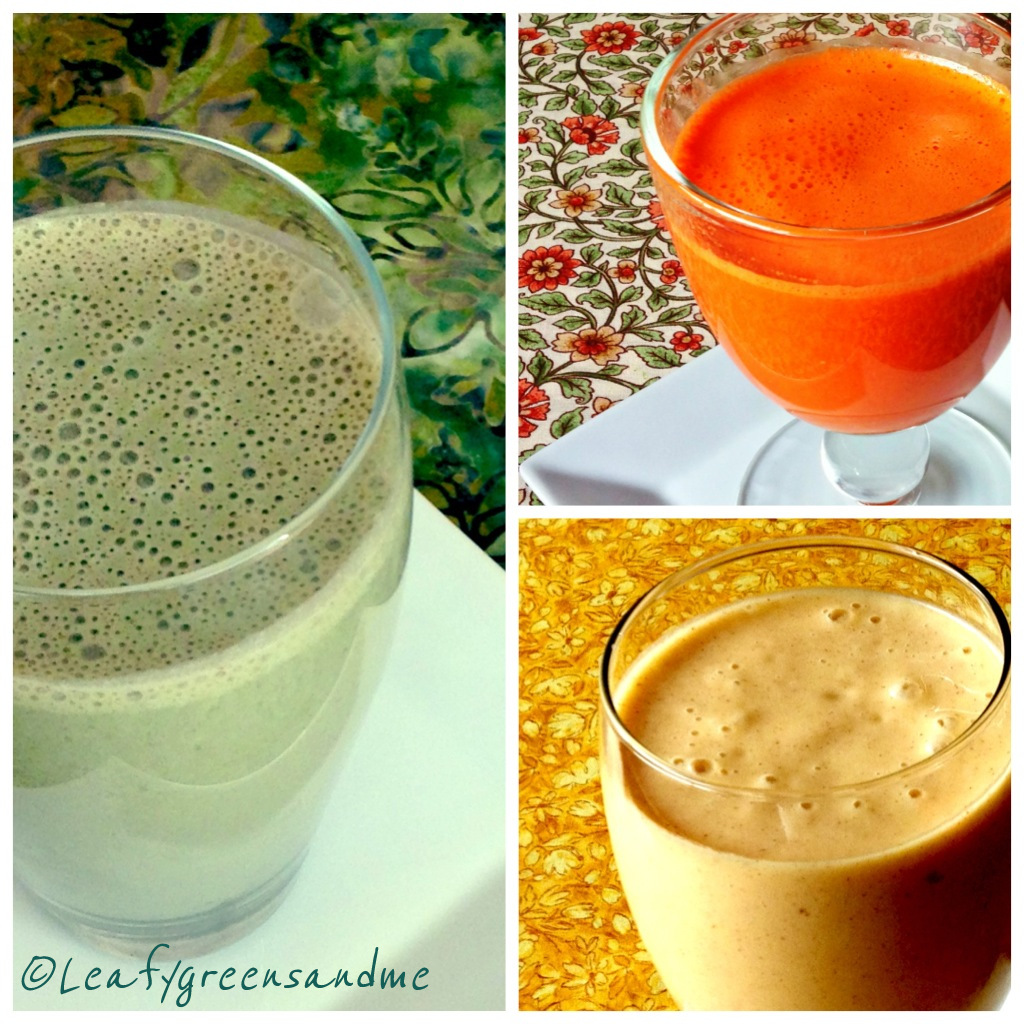
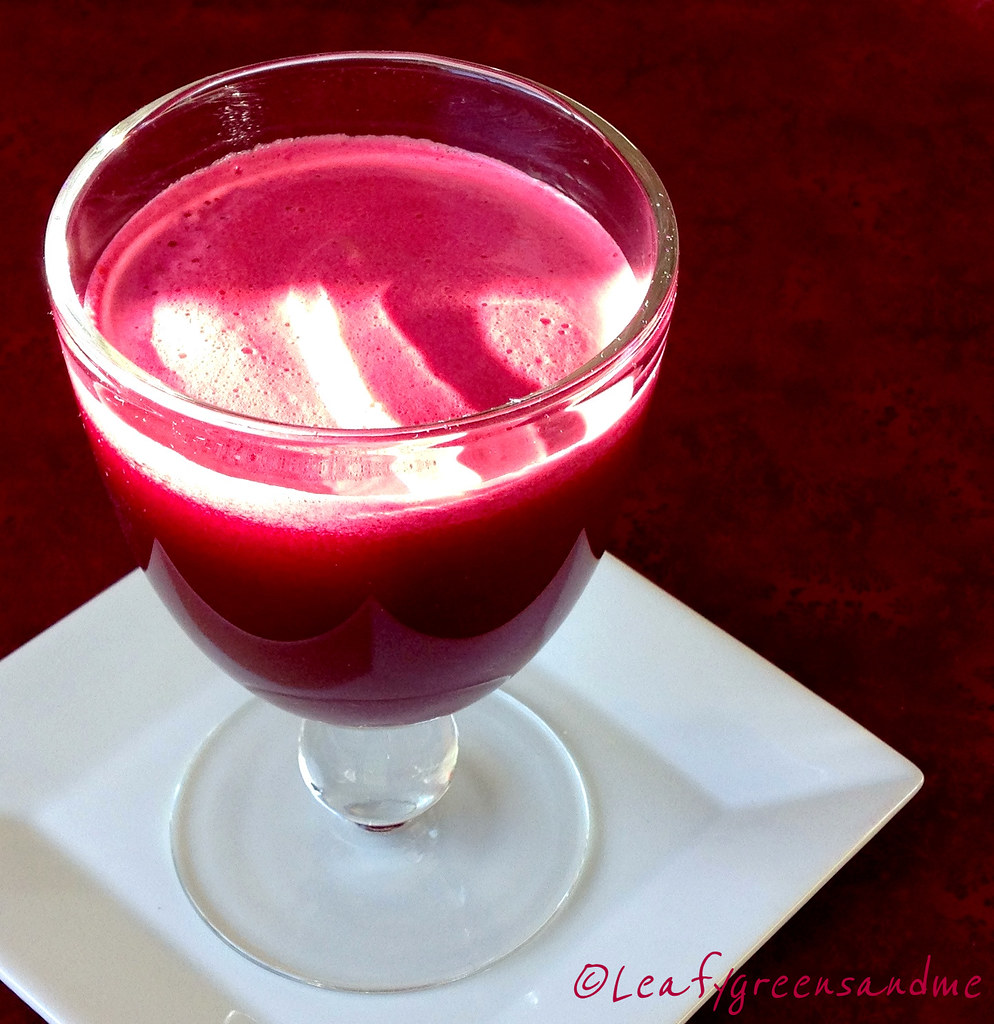
Here's a typical day:  6am (Herbal Tea with Lemon), 7am (Healthy Green Juice), 8am-11am (Herbal Tea and Water), 11am (Green Protein Power Smoothie) 12-2pm (Herbal Tea and Water), 2pm (Green Juice, Beet Blast or Crazy Carrot Juice), 3-5pm (Herbal Tea and Water) 6pm (Tropical Thunder Protein Smoothie), 7-9pm (Herbal Tea and Water).

The following day I wake up feeling refreshed, lighter and energized.  Perhaps just giving your digestive track a break from having to work so hard gives your body a needed lift.  I'm not a nutritionist and long-term fasting is not for me, but I do believe that I benefit from drinking fresh vegetable juice daily and following a 24 hour cleanse.  

http://farm3.staticflickr.com/2834/11911072893_d8e94c0102_b.jpg

I like experimenting and throwing a bunch of veggies in a juicer or blender and tasting the outcome.  Some come out horrible tasting but most are quite delicious.  Here are a few of my favorite drinks--just please make sure that you use all organic ingredients--you don't want to drink pesticides!
  • Healthy Green Juice--My Morning Cocktail
  • High Antioxidant Green Smoothie
  • Beet Blast:  1 medium beet, 2 medium carrots, 1 green apple, 1 small English cucumber, 1" piece fresh ginger root, juice from 1/2 lemon
  • Crazy Carrot:  1 large orange peeled, 2 large carrots, 1/4 cup pineapple, 1" piece fresh ginger root, 1/4 tsp turmeric, juice from 1/2 lemon
  • Green Protein Power Smoothie:  1 cup almond milk, 1 medium banana, 2 tbsp almond butter, 2 tbsp Warrior Force-Extreme Chocolate Plus Protein Powder, ice if banana isn't frozen
  • Tropical Thunder Power Smoothie:  1 cup coconut water, 1/2 banana, 1/2 cup frozen mango, 1/4 cup frozen pineapple, 2 tbsp soaked chia seeds.

http://farm3.staticflickr.com/2821/11911224214_29951eb38b_b.jpg

What Supplements to Add:

When drinking pure juice, I usually do not add any supplements, other than a 1 tsp of flax oil.  Or after juicing I will add the juice to the blender, add a 1/2 avocado or 2 tbsp hemp seeds and blend.  This adds fiber and protein to the juice and also gives it a creamy consistency.  

When drinking smoothies I add different supplements.  My favorite supplements are by Health Force Nutritionals.  I use their Warrior Food Protein Powder, VitaMineral Green, Earth, Maca, Vitamin C, and Spirulina.  All of their products are raw and I really like the taste--they do not taste gritty or gummy.  I pick and choose depending on what benefit I want.  I will also add soaked chia seeds or hemp seeds for protein/fiber and of course flaxmeal or flax oil.
     
Also, I prefer drinking juice over smoothies and green smoothies made with kale and mango over pure fruit smoothies.  I never drink smoothies made with strawberry or raspberry and prefer mango and peaches because they taste less sweet. To sweeten a smoothie I may also add soaked pitted dates, or pure maple syrup.  When making a green smoothie, the ratio of veggie to fruit should be 3:1.   

And of course, all of this is not possible without a good juicer and a high-speed blender.  I have a Breville Fountain Juicer and a VitaMix.  I use them daily.  It killed me to spend $400+ for a VitaMix and thought about owning one for years but it has been worth ever penny.  I use it every day and hardly ever pull out my food processor.

And one final note, I drink a shot of wheat grass daily, or try to at least a couple times per week.  I usually make my own during the summer but choose to buy it during the winter because it can get moldy because of moisture.  If you're interested in making your own this summer go to my link on "Growing Wheatgrass--My Liquid Sunshine"!  It's really fun to make...the taste not so much, but I do believe that it is good for me!

To your Health!


Friday, January 10, 2014

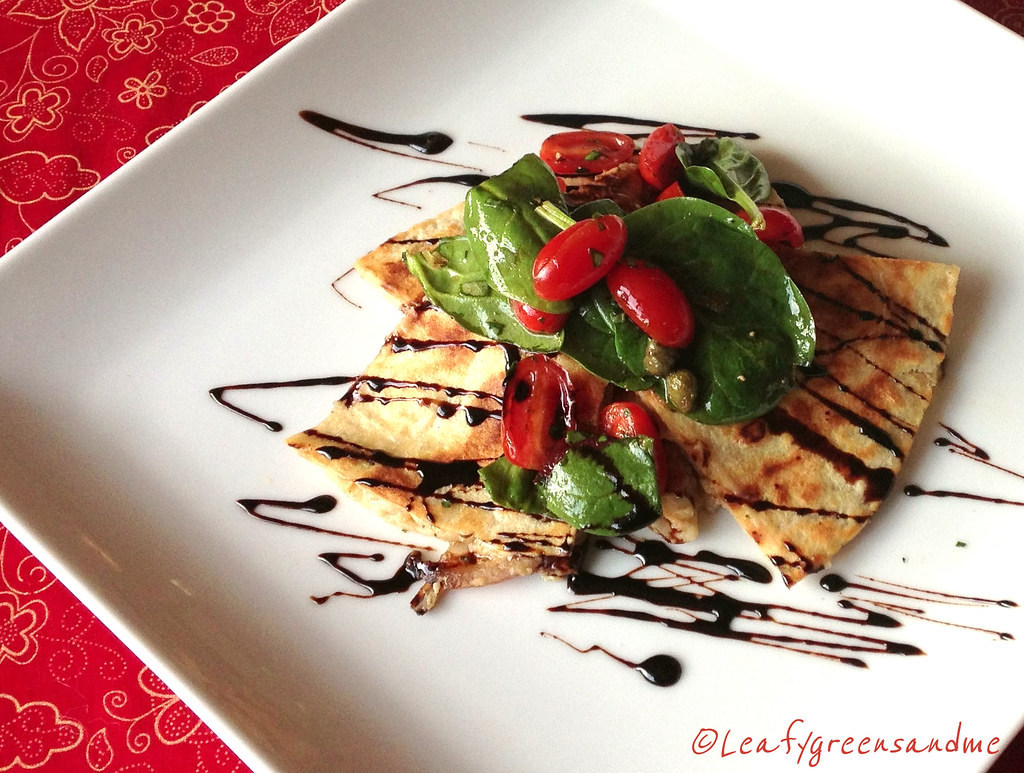
Tuscan White Bean Quesadilla with Balsamic Glaze

On Friday I'm always looking for a quick and easy dinner and this couldn't be simpler.  You can make the white bean spread from scratch or doctor up your favorite white bean hummus.  The key to this quesadilla is to make sure that the bean mixture is firm so that it is easy to cut.  

http://farm6.staticflickr.com/5522/11881189676_26a0294e60_b.jpg 

Top with a marinated salad of cherry tomatoes, arugula, capers and kalamata olives or eggplant capanata and drizzle with balsamic glaze. 

Ingredients:

1 can cannellini beans, rinsed, drained and dried really well with a towel
1 tbsp extra virgin olive oil
1 large onion, diced small
3 cloves garlic, minced
1 tsp dried Italian seasoning, or 2 tsp fresh herbs (rosemary, thyme, oregano, fennel), minced
Pinch crushed red pepper flakes
1/2-1 tsp grated lemon zest
Kosher salt and pepper to taste
Whole wheat tortillas
1 package Daiya Havarti Wedge Cheese, shredded
Balsamic Glaze
Tomato-Caper-Olive Arugula Salad

Method:
  • Saute onion, garlic and Italian seasoning and red pepper flakes until soft.
  • In a food processor, process beans until mostly smooth, adding 1 tbsp of bean fluid or water.
  • Remove bean mixture place in a bowl and stir in onion mixture and season with salt and pepper to taste.
  • Add shredded cheese, bean mixture to tortilla and saute until golden brown. 
  • Cut into wedges and garnish with balsamic glaze and salad.
Happy Friday!  


Wednesday, January 8, 2014

Italian Spaghetti Frittata

I always have leftover pasta.  My husband asks me why I cook the entire bag when it is only us.  I love pasta and it's hard just to make a small amount.  But not to worry because it never goes to waste when you can make a quick and easy weeknight spaghetti frittata!   This frittata can be on the table in 45 minutes from start to finish and that is mostly for baking!

http://farm6.staticflickr.com/5473/11846403865_659e98ecbc_b.jpg

You can use whatever ingredients you like to make yours!  I happen to like oven roasted tomatoes and briny olives and capers in mine.  Serve it with a side salad of arugula, and shaved fennel, tossed with a balsamic vinaigrette and a glass of red wine--a perfect ending to a long work day!  Now if it was only Friday!

Ingredients:

1/2 pound cooked whole wheat spaghetti, rinsed and drained
2 tbsp extra virgin olive oil
1 small red onion, sliced
1 red bell pepper, core removed, seeded and sliced
2 cloves garlic, minced
1/4 tsp crushed red pepper flakes
1/2 cup oven roasted tomatoes, julienned
1/2 cup California black olives, sliced
1 6 oz jar marinated artichoke hearts in olive oil 
3 tbsp capers
1/2 cup Daiya Harvarti Wedge Cheese, shredded
Kosher salt and freshly ground black pepper to taste
Basil chiffonade for garnish

Tofu Custard:

1 16 oz package of firm tofu (not silken or extra firm, just regular), drained
3/4-1 cup water
1-2 tbsp nutritional yeast
1 tsp turmeric powder
1 tsp black salt (found in Indian markets--not black in color, but pink)
Salt and pepper to taste (taste before adding because the black salt is salty)

Method:
  • Preheat oven to 350 degrees.
  • If you are using leftover pasta rinse to refresh it.  If making fresh, follow package directions, drain and place in a large bowl.
  • In a cast iron skillet, or non-stick skillet saute onions and bell peppers in olive oil until soft.
  • Add garlic and crushed red pepper flakes and salt and pepper to taste and cook a few minutes longer.
  • Add pepper/onion mixture to pasta, along with roasted tomatoes, olives, artichoke hearts, and capers and stir to combine.
  • In a food processor or blender, blend tofu custard until smooth.  You want it to be the consistency of thick creamy ranch dressing, but not mayonnaise.  You may need to add a little more or less water.  Taste and season with additional salt or turmeric if you want more color.
  • Pour tofu custard over pasta/veggies and mix to combine.  I did not use all of my custard--I had about 1 cup left over.
  • Spray pan with a little oil and pour spaghetti mixture into pan and smooth with a spatula.
  • Bake in the oven for 20-30 minutes until bubbly and set.  Five minutes before removing from the oven, sprinkle with shredded cheese and bake until melted.
  • Remove frittata from oven and let sit for about 5 minutes for custard to set.  Garnish with basil and enjoy!


Sunday, December 29, 2013

Glazed Cinnamon Rolls

My cravings for Cinnamon Rolls started two weeks ago when my daughter-in-law posted a photo on Instagram of her homemade cinnamon buns.  I immediately liked the photo and commented that I wanted the recipe.  When she emailed me the recipe she said..."have fun with this one!"  The recipe she sent me was not Vegan and was basically like making a brioche dough with butter, egg yokes and whole milk.  But I was up for the challenge and for the past two weeks all I have been thinking about is making these darn buns!
http://farm6.staticflickr.com/5548/11638703123_eb89021512_b.jpg

If you're in a hurry to make any yeast dough, you might think about making something else.  These cinnamon rolls take about five hours from start to finish.  If you want them for a mid-morning breakfast, then I recommend that you start the dough in the evening, let them go through the first rise, punch down, cover and place in the refrigerator overnight.  In the morning you can then finish the rolls and bake them off.  I started these at 6am (I'm an early riser) and they were ready at 11am.  My husband slept in until 10am and he was surprised that they weren't ready.  But YUMMY things come to those who wait and have patience!

http://farm4.staticflickr.com/3709/11638816624_d078e4aabc_b.jpg

When kneading the dough you want to keep in mind that you are not making bread and you do not want to develop the gluten.  You want the dough to be soft, glossy and smooth and the finished buns to be light, fluffy and tender.  I kneaded my dough for about 5-7 minutes in my Kitchen Aid mixer--just enough for the dough to pull away from the sides of the bowl.  I also added just enough flour so that I could handle the dough without it being too sticky.  I added about 3 1/3 cups of flour but you may need to add more or less during the mixing-kneading process. 

Dough Ingredients:

1 packet Active Dry Yeast
1/4 cup warm water (100 degrees)
1/3 cup sugar 
4 ounces Earth Balance Buttery Sticks, melted
1 cup cashew milk, warmed (1/2 cup cashews blended with 1-1/2 cups water)
3-4 cups of all purpose flour (I used organic unbleached)
1 tsp kosher salt

Filling Ingredients

3/4 cup light brown sugar, packed
2-3 tbsp ground cinnamon (I used 2 tbsp)

Icing Ingredients:

8 ounces Follow Your Heart Sour Cream or Cream Cheese
1 1/2 cups powdered sugar
1-2 tbsp cashew milk
1 tsp vanilla extract
1 tsp grated orange zest

http://farm8.staticflickr.com/7357/11638675593_58c190ba86_b.jpg
Method:
  • Place warm water and yeast in a small bowl and mix together.  Let sit for 10 minutes until it starts to bubble.
  • In a small sauce pan, heat butter until melted, remove from heat and add 1 cup of cashew cream, 1/3 cup of sugar, whisk together and set aside.
  • In the bowl of a kitchen-aid mixer, place 3 cups of flour and 1 tsp kosher salt and whisk together.  Create a well in the center and add butter/milk mixture, along with water/yeast mixture.  Stir together with a spatula and then start mixing with the dough hook on medium speed.  Add enough flour (I added about 1/3 cup) extra flour so that the dough pulled away from the side of the pan and when you touch the dough it is not sticky and it can be handled easily.  Again, I kneaded my dough for about 7 minutes, you may need more or less.
  • Lightly oil a medium sized bowl and place dough in the bowl and cover with plastic wrap.  Let rise for about two hours until doubled in size.  If your house is warm, it will rise quicker.
  • Lightly punch down the dough and place on a lightly floured work surface and roll out to a 12-16 rectangle.
  • Sprinkle cinnamon sugar mixture evenly over dough, leaving a 1/2" border and roll the dough up tightly, moistening the end with water and sealing the roll.  
  • Place the seam side down and dust roll lightly with flour, along dusting a sharp knife with flour for every cut.  Cut the dough in half and then cut each half in half so that you have four equal pieces.  Cut each of these four pieces into three pieces so that you have 12 pieces.
  • Butter a 9x12 pan and place the cut side up.  Cover with plastic wrap and let rise for another 1-1/2 - 2 hours.
  • Preheat oven to 350 degrees and adjust the baking rack to the center of the oven.
  • Bake rolls for 25-30 minutes until golden brown, turning half way-through the cooking process.
  • Remove from the oven and turn out onto a cooling rack and let cool 10 minutes before separating and drizzling with icing.
  • While the rolls are baking, make the icing in a mixer and chill in the refrigerator until ready to use.

http://farm3.staticflickr.com/2884/11639178326_9b4c3a71a3_b.jpg

My husband and I ate quite a few of these today and we felt so guilty that we went for a long hike in the mountains.  We still have about seven left on the kitchen counter and they are screaming at us...Eat Me!  But we are being strong and the remaining rolls are going to work with me tomorrow for others to enjoy!  I hope that you enjoy them too!

Saturday, December 3, 2011

Apple & Maple Tempeh Breakfast Patties

Frustrating...I woke up early and decided to make a nice weekend breakfast.  I have never made Apple & Maple Tempeh Breakfast Patties before and so I was measuring and writing down the recipe so that I could post it this evening.  Well, I had a bag of whole grain spelt four (for the pancakes) and a bag of vital wheat gluten (for the breakfast patties) right next to each other on the counter and I kind of lost track how much gluten I added to the patties.  I think that I added a cup, but I could of added some spelt by mistake.  Anyway, the patties had great flavor and texture, but I need to make them again next weekend before I post the recipe.  In the meantime if you're interested in making the whole grain pancakes, here's the recipe.  


Thursday, November 10, 2011

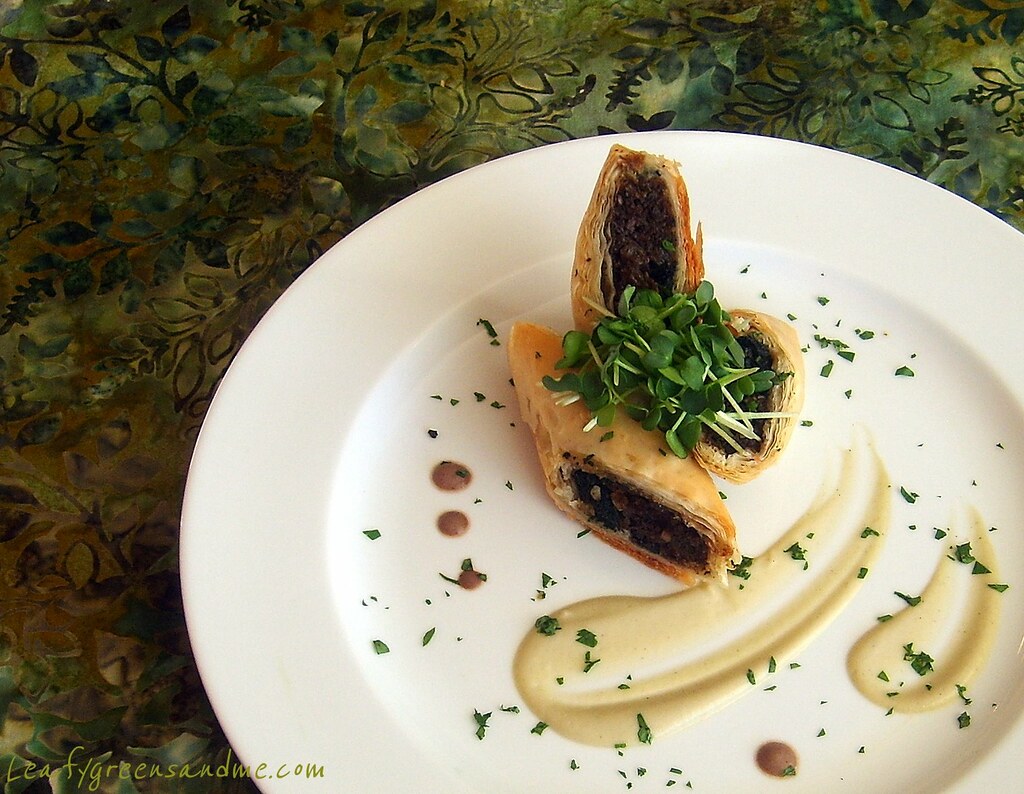
Mushroom Duxelles & Spinach Phyllo Strudel

This is a nice appetizer to serve your guests for Thanksgiving or anytime you entertain.  During the summer I make this with a Spanakopita filling and serve it with Tzazaki, but decided that a mushroom duxelles would be more appropriate for fall.  I served these with a cabernet sauvignon mushroom sauce, but a simple lemon aioli or porcini aioli would work just as well.   Also, you can shape the phyllo pastry into mini triangles or cigar shapes for a different presentation.
 

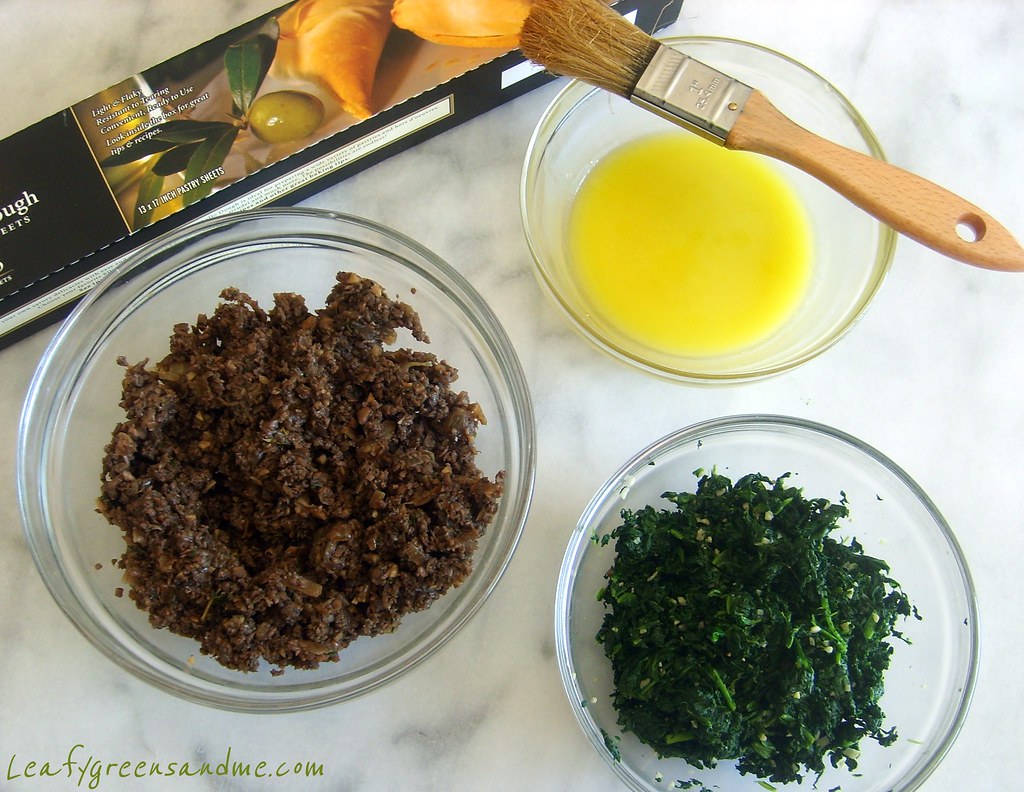
Mushroom Duxelles Ingredients:

1 lb cremini mushrooms, washed and roughly sliced
1 medium yellow onion, finely diced
2 tbsp finely minced garlic
1 tbsp finely mined fresh thyme
1/2 cup Maderia wine
2-3 tbsp extra virgin olive oil
Kosher salt and black pepper to taste

Method:

  • Place sliced mushrooms in a food processor and pulse until finely minced, be careful not to puree them.
  • Heat a large saute pan on medium heat, add olive oil and diced onions and cook for about 10 minutes until onions are soft.
  • Add minced mushrooms, garlic, thyme and salt and pepper to taste and cook mushrooms until all the liquid is absorbed, stirring frequently.  This takes about 30 minutes.
  • Deglaze the pan with Maderia wine and cook for about another 30 minutes, stirring frequently until all liquid is absorbed and the mushroom mixture is sticking to the bottom of the pan.
  • Check for seasonings, remove from heat and cool to room temperature.

Sauteed Spinach
:


2 large bunches of organic spinach, roughly chopped and washed
1 tbsp finely minced garlic
2 tbsp extra virgin olive oil
Kosher salt and black pepper to taste

Method:
  • Heat a large saute pan to medium-low, add olive oil and garlic and cook garlic for a couple of minutes until it starts to sizzle, stirring and making sure that it doesn't burn.
  • Immediately add chopped spinach (you may not be able to add all of it at once until it cooks down), and salt and pepper and cook for about 3-4 minutes, stirring frequently.
  • Remove from pan and strain away liquid, pressing with the back of a spoon or spatula to remove excess liquid.
  • Wrap spinach in a dish towel and squeeze to remove any remaining liquid.
  • Place spinach on a cutting board and chop finely.
  • Cool to room temperature and set aside.


Other Ingredients/Assembly:
Makes 2 logs
 
1 pkg frozen phyllo dough, thawed overnight in the refrigerator
3 tbsp Earth Balance Vegan Buttery Sticks, melted
3 tbsp extra virgin olive oil
Kosher salt and black pepper

Method:
  • Preheat oven to 350 degrees.
  • Whisk butter and oil together in a small bowl.
  • Remove phyllo from package and unroll.
  • While working with phyllo, keep it covered with plastic wrap and a damp towel so that it doesn't dry out.
  • Working with one sheet at a time with the longest edge facing you, brush the entire surface lightly with the butter/oil mixture.
  • Repeat this process for a total of 4 sheets.
  • Divide the duxelles mixture in half and place mixture evenly along the bottom edge leaving about 1/2" boarder along the bottom and a 1" along the sides.
  • Divide spinach mixture in half and place on top of the duxelles mixture.
  • Sprinkle lightly with salt and pepper.
  • Carefully lift the bottom edge and roll the phyllo into a smooth log, brushing lightly with more butter mixture, until all the phyllo is wrapped.
  • Score the phyllo lightly on a bias at 1-1/2 - 2" intervals.  You should have about 9 pieces per log.
  • Place strudel logs on two separate sheet trays covered with parchment or silpats.  Bake in the oven for 16-20 minutes (depending on oven), turning/rotating trays half way through the cooking process until puffy and lightly golden brown.


ShareThis