Monday, June 9, 2014

Watermelon-Chia Cooler

If the last two days are any indication of how hot it will be this summer, we're in trouble!  But I've been staying cool and hydrated drinking my refreshing Watermelon-Chia Cooler.

https://farm4.staticflickr.com/3901/14407038203_d76719faf8_b.jpg

You can use any melon, but I like the natural sweetness and color of seedless watermelon.  Also chia seeds pack a powerful punch.  They are high in Omega 3s, protein, fiber and are hydrating.  I soak one tablespoon in one cup of filtered water in the fridge overnight and then use them in my juices and smoothies for added nutrition during the week.  To get the full benefit of chia seeds you really need to soak them before using.

Ingredients:
Serves 1-2

1-1/2 - 2 cups organic seedless watermelon, chilled, cut into cubes
1-tbsp soaked chia seeds (You can add as much as you like, but they are very gelatinous and will thicken the consistency.  Also, I like using black colored chia seeds instead of the grey.  There is no difference in nutritional value between the two.)
1 tbsp finely chopped mint
1/4 - 1/2 cup sparkling water, chilled
Juice from a 1/2 lime
Agave nectar to taste (my watermelon was really sweet and so I didn't add any agave)

Method:  Soak 1 tbsp chia seeds overnight, covered in the fridge.  (Note:  one tablespoon will turn into 1/2 cup soaked seeds.)  Place watermelon in a blender and blend until smooth.  Transfer puree to a bowl and stir in the remaining ingredients.  Chill until cold and serve with a mint sprig.

Stay cool and enjoy!  


Thursday, June 5, 2014

Caprese Sandwich

Some of the best sandwiches are made with very few ingredients and this is one of them.  I remember years ago we were traveling in Normandy, France (which is fitting because tomorrow is the 70th year anniversary of the D-Day Invasion of Normandy) and were in Mont Saint-Michel, an island located on the coast with a beautiful medieval town perched near the very top.  Anyway, we stopped at a small outdoor stand and I ordered one of the best sandwiches I ever had, and it only had two ingredients:  Gruyère cheese and butter on a baguette.  Perhaps it was because we were sightseeing all day and we were exhausted, but coupled with the incredible scenery and history of the place, I will never forget eating that sandwich!

https://farm3.staticflickr.com/2904/14376260443_c767dcc66a_b.jpg

Now a Caprese sandwich has a whopping four ingredients but it is my go to sandwich when I want something quick after work for dinner in the summer.  I love eating this sandwich when the heirloom tomatoes are at their peak...it's just so delicious with the fresh fragrant basil, Daiya Havarti style cheese, good quality extra virgin olive oil and a crusty French sweet baguette!

https://farm4.staticflickr.com/3893/14169410089_7a82ebeb82_b.jpg

Cin cin!


Sunday, June 1, 2014

Gluten Free "Hostess" Cupcakes

My husband's birthday was a couple of weeks ago and I wanted to bake him a gluten-free cake from scratch, but I really didn't have time when I got home from work and so I made cupcakes using Pamela's Gluten Free Chocolate Cake Mix.  They were absolutely delicious...moist, rich and super chocolatey!  For the egg substitute, I used Bob's Red Mill Egg Replacer, but ground flax meal/water would work just as great.

https://farm3.staticflickr.com/2931/14321047731_2087b1719e_b.jpg

To be honest, my husband probably would of preferred if I made Hostess Twinkies instead of the cupcakes, but Twinkies are so boring...it's just a vanilla sponge cake with piped in frosting.  No creamy ganache icing or fun squiggly decoration on the top...just a boring sponge cake.  Anyway, he loved them and I think that I made a chocolate lover out of him!


For the filling I used the same buttercream recipe that I used for my Veggie Cupcakes, but only made half of the recipe and I added a little more cashew cream about 1 Tbsp to make the filling smoother.  Using a small plain piping tip and squeezed in enough frosting to cause the cupcake to puff up, but not to break.


For the ganache topping I used 1/2 cup Ghiradelli semi-sweet chocolate chips and about 3 Tbsp cashew cream.  I placed it in the microwave for about 30 seconds until melted and then stirred in 1 tsp Earth Balance Butter.  Before decorating the cupcakes, I let both the cupcakes and the ganache cool to room temperature and the iced the top of the cupcakes using a small off-set spatula. 


And for the squiggle design I used a 1/2 cup sifted confectioners sugar with 1 Tbsp cashew cream and stirred until smooth.  You want this to be really thick so that when you pipe the icing will hold its shape.  Also, let the ganache set-up completely for about 30 minutes before piping the squiggly design.  To speed up the process you can place the cupcakes in the fridge for about 10 minutes until the ganache sets.


Tuesday, May 27, 2014

Deviled Goodness (Vegan Deviled Eggs)

You can't have a holiday weekend without serving Vegan Deviled Eggs.   Seriously these are amazing!  My husband could not get over how much they tasted like the real deal, texture and everything.  As I mentioned in previous posts, I have never liked eggs (no matter how they were prepared)...but with one exception...my Mom's Deviled Eggs.  Everything she made tasted great and I think that she would love these too!

https://farm6.staticflickr.com/5160/14283368091_faaf1cbc15_b.jpg

This recipe is so simple, but you'll need a mold to create the cashew-agar base to hold the piped tofu mousse.  I used a ceramic deviled egg holder that I had in cabinet, but it was a little shallow.  I'm going to look on line and see if I can find a deeper base, but other than that they were absolutely perfect...beautiful and delicious.


This recipe makes about 36 portions so you will need more than one mold because the agar will solidify if you don't work quickly.  Or you can cut the tofu mouse recipe in half and pipe less.

Cashew Cream-Agar Egg Base:

1/2 cup cashew cream, (1/2 cup cashews blended in a high speed blender with 1-1/4 cup water.  If you don't have a high-speed blender then you will need to soak the cashews for about 4 hours and then strain through cheesecloth or a fine strainer.  You will not use all the cashew cream but it will keep in the refrigerator covered for up to five days.)
3/4 warm water
1 tsp Agar-Agar powder (I purchased my powder at an Asian market, for $2.99, but Whole Foods carries the agar flakes, but it will cost you about $9.00.  Also, if you use the flakes then you'll need to increase the amount to 1 Tbsp and boil it a little longer.
1/4-1/2 tsp Black Salt (found in an Indian or Asian market--it's actually pink and very salty.)

Method:  
  • Lightly oil mold with vegetable oil and set aside.  
  • Blend cashews with water and measure out a 1/2 cup of cashew cream.  Whisk in black salt and set aside.
  • Pour 3/4 cup water into a measuring cup and warm in the microwave for 30-40 seconds.  Whisk in agar-agar powder and then place back in the microwave for 1-2 minutes and let it boil.  
  • Place cashew cream into microwave for 30-40 seconds to warm and then whisk mixture into hot agar water making sure there are no lumps.
  • Skim off any bubbles off the top before pouring into mold, or pop bubbles with a toothpick.
  • Let mold sit on the counter for about 15 minutes before moving and placing in the refrigerator to chill for about one hour to harden completely.


Once hardened, using a small pairing knife, remove cashew-agar base and place on a plate.  Then using a small melon baller or spoon, scoop out a small portion of the base without breaking through the bottom.  Then pipe in the tofu mousse and chill for about an hour before serving.  Also, the agar will not melt or soften if these are left out for a little while at room temperature, but they are better served chilled.  So if you are serving a lot of people, I would serve a dozen at a time and keep the others chilled.

Tofu Mousse:
(You can cut the recipe in half if you are making less portions)

7.5 oz organic sprouted extra firm tofu (I used Wildwood--it comes it two sealed pouches, 7.5 oz each).
1/4 cup Follow Your Heart original organic Vegenaise
2 tsp spicy brown mustard
1 tsp turmeric powder
1/2 - 3/4 tsp black salt
1 tsp apple cider, or white wine vinegar

Method:
  • Drain tofu and press dry with paper towels and place in a food processor.
  • Add all ingredients except for black salt and blend until smooth and creamy.  You may need to add a little more Vegenaise to get the right texture.
  • Add black salt to taste and then pipe or spoon mousse into base.
  • Garnish with paprika and chives and chill for about one hour before serving.


Thursday, May 22, 2014

Spicy Korean Tacos with Pickled Cucumber Salad

I must confess...these really aren't spicy Korean tacos because I didn't have any Gochugaru (Korean red pepper flakes or paste), but you really don't need it.  I made a quick spicy BBQ sauce using ketchup, sriracha, tamari, rice wine vinegar and water.  But you can just purchase your favorite spicy BBQ sauce, and doctor it up with some soy sauce and you're all set.  Whenever possible try to purchase organic BBQ sauce that doesn't contain high-fructose corn syrup.

https://farm6.staticflickr.com/5557/14246310272_4051e9b757_b.jpg

What really makes these tacos is the crunchy pickled cucumber salad.  Here's what I used:

1 medium English cucumber sliced into half moons
1/4 red bell pepper, seeds and ribs removed and julienned into thin strips
1/4-1/2 tsp crushed red pepper flakes
1/3-1/2 cup rice wine vinegar
1-2 Tbsp light agave syrup
1/4 cup green onion, sliced on a bias
Kosher salt to taste

Method:  Place all ingredients in a bowl (except for the salt) and let marinate in the fridge for about one hour before using.  Salt just before serving so that the cucumbers maintain their crunch.
 

Not only is this a super quick weeknight dinner but it would be great for Memorial Day weekend.  If you can find sheets of seitan, I would brush the grill lightly with oil and grill for 1-2 minutes on each side, then slice into thin strips and toss in the warm BBQ sauce.

For the tortillas you can use corn or flour, but I prefer flour because this is a substantial taco and corn tortillas will not hold up to all the ingredients.  For garnish I used green onion, cilantro and toasted sesame seeds.

Wishing you a safe holiday weekend and I'll post my homemade hot dogs and buns next week (if they turn out...but I think they will)!


Sunday, May 18, 2014

Verde (Tomatillo-Poblano) Chilaquiles

I learned how to make Chilaquiles as a line cook working at a restaurant.  At least once a week while we were prepping for service Noel and Bernardo (my amigos) would take turns making them for our family meal.  They were always made with a red sauce, somewhat spicy and super delicious.  Noel would always give me a hard time because I never made Chilaquiles for them.  So one day I came in a little early and I made Verde Chilaquiles and they loved them...I felt so great that the pressure was finally off.  But one can only produce the best dish when one learns from the best...and Noel and Bernie were truly the best!

https://farm6.staticflickr.com/5501/14030273539_8ba7191bd9_b.jpg

Verde Sauce:

3 Tomatillos, skins removed
1 Poblano pepper
1 Jalapeno pepper
1 Onion sliced (skin on)
3-4 Garlic cloves (skin on)
1/3-1/2 cup vegetable broth
1/3-1/2 cup cashew cream (1/2 cup cashews, blended with 1 cup water)
1/4 cup cilantro (optional)
Kosher salt and black pepper to taste

Method:  Preheat oven to 400 degrees.  Place all ingredients on a sheet tray and roast for 10-15 minutes until charred.  You may need to need to remove the garlic first so that it doesn't burn.  Let cool and peel and seed peppers.  Place in a blender and blend until smooth.  I did not add cilantro to my sauce because I added it to the pico de gallo and guacamole. 

https://farm6.staticflickr.com/5492/14214529622_c7cafe6790_b.jpg

After you make the sauce, turn the oven down to 325 degrees to toast the tortilla chips.  Normally, the tortilla chips are fried but you don't need to do this.  Baking produces the same end result without all the fat and calories.  When purchasing the corn tortillas I usually look for a heartier brand that will hold up to the weight of the sauce and cheese without becoming too soggy, but soggy is good too!  I like using the sliders because they cut perfectly into 4ths.  

Method:  Spray a sheet pan with vegetable spray and then spray the top of the tortillas lightly and sprinkle with salt.  Bake in the oven for about 12-14 minutes until crisp and lightly golden brown.  Turn chips over half way through the baking and keep an eye on them so they don't burn.


https://farm3.staticflickr.com/2897/14030298430_70816638ac_b.jpg

You have no idea how many gallons of pico de gallo I have made in my lifetime!  It is so easy and I prefer homemade salsa over store bought any day!  There is really no recipe for fresh salsa.  If you don't like white onion, add red onion and if you like it super spicy then add the whole jalapeno or leave in the seeds.  The most important thing is to dice and mince the tomatoes/vegetables perfectly...it's all about uniformity!... :-)

Pico de Gallo:

5 organic Roma tomatoes, seeded, julienned and diced
1/4 cup finely diced white onion
1/2 jalapeno, seeds removed and finely diced 
1/4 cup chopped cilantro
Juice of 1 lime
Kosher salt and black pepper to taste

https://farm6.staticflickr.com/5198/14030228459_1dd6c89818_b.jpg

Assembly:
I  like using individual cazuelas to serve my Chilaquiles.  (Serves 2) 

Baked Tortilla Chips
2 - 3 cups Verde Sauce
1 package Daiya Havarti-Jalapeno Style Cheese, shredded
Kosher salt and black pepper to taste

Method:  Preheat oven to 350 degrees.  Add chips to a large bowl, along with 1/2 of the shredded cheese.  Heat sauce on the stove, adding additional veg stock if the sauce is too thick.  Pour sauce over chips and toss evenly to coat.  Divide mixture evenly between cazuelas or ramekins and top with additional cheese.  Bake in the oven for 10-15 minutes on a sheet tray until mixture is bubbly.  Remove from oven and serve immediately garnished with cilantro and green onions.

And now for the toppings.  At the restaurant we would always serve our Chilaquiles topped with pico, guacamole (avocado, cilantro, green onion, Vegenaise, lime juice, salt and pepper) and salad made with romaine lettuce, radish, jalapeno, tossed with a red wine-oregano vinaigrette.  It doesn't get any better than this.  To my friends...Noel & Bernardo...thank you for everything you taught me in the kitchen!   

https://farm3.staticflickr.com/2930/14030229078_2b1fc65e00_b.jpg

Thursday, May 15, 2014

Smoked Tofu and Cucumber-Dill Tea Sandwiches

With all of our record temperatures the past three days my house hasn't been too unbearable, but I still haven't turned on the stove or oven.  These little tea sandwiches are just perfect for the dog days of summer, as well as any upcoming wedding or baby showers!  If you want more variety you could serve my Egg(less) Salad on white bread, my TuNo Salad on wheat bread, and the smoked tofu on rye, which is what I used.

https://farm8.staticflickr.com/7385/14215193273_f9caa80b8f_b.jpg
Dill Aioli:

1/2-3/4 cup Vegenaise
1/4 cup minced dill (more or less)
2 TBSP minced capers (more or less)
Juice from 1/2 lemon
Kosher salt and black pepper

Other ingredients:

1 packet sprouted organic smoked tofu, sliced thinly (I used Wildwood with Szechuan spices because I like a little kick)
1/2 English cucumber, sliced thinly
Red onion, shaved thinly (optional)
Rye bread (I used Genuine Bavarian Whole Rye Bread)

Enjoy and stay cool!


Tuesday, May 13, 2014

Horiatiki Salata (Greek Salad) with Homemade Feta

Whew...it's a toasty one...reaching 98 degrees here today.  Whenever it gets this hot out it reminds me of when my husband and I were traveling in Crete and we were staying along the Libyan Sea.  It was like 100 degrees, combined with Southern California Santa Ana type winds (if you've ever experienced them before) and you get the idea of how hot and dry it was.  We lived off of Greek Salads and good Greek wine and beer...not a bad vacation!   I really love the hot weather though, especially if it's only for a few days.  There is nothing better than taking a walk at 9:00pm and having it be 80 degrees outside!

https://farm6.staticflickr.com/5522/13994516129_c45fa8f18c_b.jpg

So tonight, the stove and the oven will remain off and a Greek Salad is the order of the day.  I've always been interested in making my own vegan cheese, but I just haven't had time.  My hubby bought me a vegan cheese making book for Xmas, but they didn't have a recipe for Feta.  So I decided to throw something simple together using Greek flavors such as oregano, basil and mint.  Since this Feta is made with tofu, it doesn't have a melting quality, but it is great for a salad and really resembles Feta.  Plus it gives the salad some protein!

https://farm8.staticflickr.com/7375/13994554397_ab9c6dcce8_b.jpg

Feta Ingredients:

1 10 oz block of organic Sprouted Wildwood Super Firm Tofu (or similar)
Juice of 1/2 lemon
1-2 tsp red wine vinegar
1 tsp kosher salt (or to taste)
1 tsp fresh minced oregano
1 tsp fresh minced basil
1 tsp fresh minced mint
1/2 tsp oregano flakes
Freshly ground black pepper

Method:  Remove tofu from package and pat dry.  Slice in half and using a fork crumble into 1" sized pieces.  Place in a bowl and add lemon juice, vinegar and salt, stir and set aside while mincing herbs.  Combine all ingredients together and let sit for about an hour in the fridge for flavors to combine.  Best used within 1-2 days.

In Greece they don't crumble the Feta (you get a 1" thick slice on top, drizzled with olive oil and oregano, nor do they use red wine vinegar.  They also don't use romaine lettuce, but since this is our dinner this evening I wanted a more substantial salad.

Other Ingredients:

Chopped romaine lettuce
Roma tomatoes, quartered
Cucumber, sliced
Green bell pepper, sliced
Red onion, sliced thinly
Kalamata olives, pitted
Oregano flakes
Kosher salt and fresh cracked black pepper
Red wine vinaigrette (I just whisked together a quick vinaigrette, but you could just drizzle your salad with good quality (preferably Greek) cold pressed olive oil!)

Enjoy (Opa!) 


Sunday, May 11, 2014

Berger Cookies...My Mom's Favorite Cookie!

Mother's Day is a tough day this year because my mom passed away in August.  Normally on this day we would talk on the phone and I would send her a card, flowers (usually tulips) and a box of cookies...she had a sweet tooth...especially for Berger Cookies, a local Baltimore favorite.  So in memory of my mom today I decided to make homemade Berger cookies which are unlike any other cookie in the universe!  They are a cake-like vanilla cookie covered with chocolate-fudge ganache.  The cookie to ganache ratio should be 50-50, so don't skimp on the chocolate! 

https://farm6.staticflickr.com/5537/14163245535_74845a2607_b.jpg

In addition to Berger Cookies, Baltimore is known also for Old Bay Seasoning and steamed crabs, UTZ Potato Chips (puts Lays to shame) and Natty Boh (National Bohemian) Beer.  My mom could care less for the beer (she preferred wine), but she loved Old Bay Seasoning, UTZ potato chips and of course her Berger Cookies!  My mom was an excellent cook and it was hard deciding what to make in her memory (I could of gone with a savory dish), but I believe that she would be in Berger Heaven after eating these, and I know that she is!

Cookie Base:
Makes about 30 cookies

1 stick Earth Balance Butter
3/4 cup pure organic sugar
1 tsp pure vanilla extract 
1 1/2 Tbsp Egg Replacer powder, whisked with water according to package directions (I used Bob's Red Mill, but you could use Energ instead...you just want the equivalent of 1 1/2 eggs.  You could also use flax eggs but the cookie will be even more cake like without any crunch.) 
2 1/4 cups organic unbleached all purpose flour
3/4 tsp kosher salt
1 1/2 tsp baking powder
1/2 cup cashew milk (see below)

Cashew Milk:

1/2 cup cashews soaked for 4 hours and drained.  Place in a high-speed blender with 1 1/4 cups filtered water and blend on high for a couple of minutes.  If you don't have a high speed blender then strain milk before using.  You will have enough milk for the cookie as well as the ganache frosting.

https://farm8.staticflickr.com/7423/13976593800_bba5eb469f_b.jpg

Method:  Preheat oven to 375 degrees.  Using the standard cookie creaming method, cream the butter and sugar in the bowl of a mixer until fluffy, add vanilla extract and the egg replacer mixture and mix until combined.  In another bowl whisk together, flour, salt, and baking powder and add alternating flour and milk to the mixer and only mix until combined.  Line a sheet pan with either parchment paper or a silpat and scoop dough using a teaspoon or a 1-teaspoon ice cream scooper (which is what I used).  Take your fingers and press the dough lightly to flatten.  Bake cookies in the middle of the oven rack for 9-10 minutes (turning halfway through the baking process).  Remove the cookies immediately with a spatula onto a cooling rack and cool completely before icing.

https://farm6.staticflickr.com/5077/13976586618_939b4520c3_b.jpg


Fudge-Ganache:
I made my ganache the day before and kept it in the refrigerator so that it would set-up be ready to frost the cookies after they cooled.  Also, my ganache was just a tad soft.  It still set up fine, but it could of been a little firmer.  Perhaps it is because of the cashew cream or because I ran out of chocolate chips.  But here's what I did--if you want it firmer then add a little bit more chocolate.  Also, I don't like using light corn syrup, but this will give the chocolate a glossier finish.

1 1/2 cups good quality semi-sweet chocolate chips (I used Ghirardelli)
3/4 cup cashew cream
1 tsp pure vanilla extract
1 tbsp Earth Balance Buttery Sticks
1 1/2 cups organic confectioners sugar, shifted

Method:  Cashew Cream and chocolate can easily burn and so I placed the chocolate and cashew cream in a bowl over a pan of slightly simmering water for about a minute until the chocolate melted.  You could also microwave in increments of 25 seconds, stirring in between until chocolate is melted.  Once melted, whisk in melted butter, vanilla extract and stir in powdered sugar and beat with a spatula until creamy and combined.  Chill in the fridge for about 4 hours to chill and harden.  Before icing the cookies, beat the ganache lightly.  You can either hand dip the cookies (the traditional method) or use a small off-set spatula or pipe the ganache with a plain tip, like I did.  Let the icing set for about 30 minutes before eating (if you can wait that long).  My teeth hurt from all the chocolate!

Wishing you and yours a wonderful Mother's Day and if you ever get a chance surprise your mom with a batch of homemade Berger Cookies on her special day!


Thursday, May 8, 2014

Creamy Spring Orzo Pasta

Easy weeknight dinner...fresh and delicious.  By Thursday night I'm really tired and I don't feel like cooking so I usually throw a quick pasta dish together.  This pasta is so great for spring using fresh English peas and asparagus.  I purchased my peas already shucked from the pod to save time, but you could use frozen peas and it would taste just a delicious.  For the herbs I used only fresh parsley, but tarragon would of been a great addition.  And instead of using pine nuts because they are outrageously expensive $35/pound, I used slithered almonds, toasted lightly.  You couldn't even tell the difference and they added a great contrasting texture to the orzo.

https://farm8.staticflickr.com/7434/14138269762_fdec4ecd1f_b.jpg
Ingredients:
(Serves 2)

1/2 pound orzo pasta, cooked according to package directions
1 TBSP EVOO
2 TBSP minced garlic
1/2-3/4 cup low-sodium vegetable stock
1/2 cup shucked fresh English peas or frozen
1/2 lb asparagus, tossed in EVOO, s&p and roasted in a 400 degree oven for 5 minutes and then cut on a 1" bias
1/4 cup chopped fresh parsley
1/2-3/4 cup cashew milk (1/4 cup soaked cashews blended with 3/4 cup water in high-speed blender)
1-2 tsp fresh lemon zest
Kosher salt and black pepper to taste
1/4 cup toasted almonds or pine nuts
Juice from 1/2 lemon
Parsley for garnish

Method:

Cook pasta to al dente (about 9 minutes), drain well and set aside.  In a medium sized saute pan add olive oil and garlic and cook over medium-low heat for about a minute.  Deglaze with vegetable stock and reduce by half.  Add orzo (you may not use it all), asparagus, peas, cashew milk, lemon zest salt and pepper to taste and cook until heated through and creamy.  (If using fresh peas you may need to add them first to the vegetable stock and cook for about two minutes before adding the other ingredients.)  If sauce becomes too thick or liquid is absorbed by the pasta, add more vegetable stock and/or cashew milk.  Stir in fresh parsley, lemon juice and top with toasted almonds.


Sunday, May 4, 2014

Classic Cuban Sandwich with Citrus-Mojo Sauce

Miami and Tampa you've got nothing on this sandwich and I challenge anyone who loves Cuban sandwiches to tell me that this isn't the best sandwich they've ever eaten...even though it's 100% vegan!

https://farm3.staticflickr.com/2930/13920808128_ee891b39ee_b.jpg

It all starts with the bread and then goes from there.  Since I couldn't go to my local market and purchase traditional Cuban bread, I went to Le Boulangerie and purchased two freshly baked French rolls--super crispy crust with a soft interior.  Hoagie or sub rolls that you purchase in the grocery store will not hold up to the pressing or substantial ingredients so make sure you search around and find the best rolls.


For a traditional Cuban sandwich the pork is braised and so I wanted to create a mojo braising liquid for the three seitan deli cuts that I used:  Tofurky Smoked, Tofurky Peppered and Yves Ham.  I made the mojo sauce, poured it into a saute pan and then added four slices of each of the deli cuts to heat through and reduce the sauce.  That's 12 slices for one sandwich!

Citrus-Mojo Sauce
1 large Valencia Orange
1/2 lemon
1 1/2 limes
1 TBSP paprika
1 tsp ground cumin
2 tsp finely minced fresh garlic
1 TBSP extra virgin olive oil
Salt and pepper to taste


And now for the assembling...Cuban sandwiches use Swiss cheese, but I don't like the flavor of Daiya Swiss or Provolone and so I used my normal standby, which I love...Daiya Havarti Wedge, thinly sliced.  On one side of the bread I placed a generous slather of spicy brown mustard and the other side Vegenaise.  I then added cheese to both sides, dill pickle slices on one side and then layered on the deli cuts and topped with the reduced sauce and freshly black ground pepper and kosher salt.
 

This is a substantial sandwich folks...enough for two with a side salad or fries, but we each had our own and were stuffed!
 
https://farm6.staticflickr.com/5496/14084233486_4e34579a35_b.jpg 

A panini press with grill marks is not traditional and will not do, unless that's all you've got.  I used my trusty cast iron skillet, along with my cast iron Indian bread pan, which provided a perfect weight to press the bread without flattening to a pancake.  I added Earth Balance Butter to pan and cooked the sandwich on medium-low for three minutes, added more butter and flipped and cooked on the other side for three minutes.
  
https://farm8.staticflickr.com/7299/14107359435_57b0ed47af_b.jpg

Fantástico! and Delicioso!  Need I say more?
 
https://farm8.staticflickr.com/7327/14127411283_aeffbdaab7_b.jpg

Wednesday, April 30, 2014

Cobb Salad with Creamy Dill Buttermilk Dressing

Is there such a thing as a healthy Cobb Salad?...you bet!  No saturated fat, cholesterol and tons of texture and flavor.  I could drink the Creamy Dill Buttermilk Dressing and be satisfied and my hubby could eat the entire bag of Phoney Baloney's Coconut Bacon...had to hide it from him...seriously! A perfect salad for a hot day...reaching 90+ here today!

https://farm6.staticflickr.com/5499/14054277056_f3dd4582b5_h.jpg 

Salad Ingredients:

Organic Romaine Lettuce, chopped and rinsed
Seeded, Diced Roma Tomatoes
Shredded Daiya Cheddar Style Cheese
Phoney Baloney's Coconut Bacon
Organic, Sprouted Extra-Firm Tofu, crumbled and mixed with turmeric and black salt (can be purchased at an Indian or Asian market).
Diced Avocado
Creamy Dill Buttermilk Dressing (see recipe below)
Kosher Salt and Pepper to Taste

Creamy Dill Buttermilk Dressing 

1/2 cup Organic Vegenaise
1/4 cup cashew milk mixed with 1 tsp apple cider vinegar and let sit for 10 minutes
1/2-1 tsp finely minced shallot
1/2 tsp finely minced garlic
2 TBSP fresh dill, minced
1 tsp red wine vinegar
Kosher salt and fresh black pepper to taste

Note:  Whisk all ingredients together in a bowl and chill until ready to use.  For the cashew milk, I always keep some ready to go in my fridge.  It will keep chilled 5-7 days.  I soak 1/2 cup cashews over night, drain and then add them to my Vitamix with 1 cup of filtered water.  If you don't have a high-speed blender then you should strain the milk before using. 

Monday, April 28, 2014

Strawberry Shortcake...or a Parfait Please!

YAY...strawberries are here!  There is nothing better than biting into a fresh, juicy, organic strawberry...except for maybe strawberry shortcake!  Strawberries are just perfect on their own this time of year, but strawberry shortcake screams the start of summer and it's supposed to be 90 here this week!  The strawberries are definitely the main attraction, but the supporting cast is just as important.  I adapted a recipe from Cook's Illustrated by using flaxmeal for the binder, cashew milk, and added fresh lemon zest (totally makes a big difference) and vanilla extract.  If I would of had a fresh vanilla bean, I would of scrapped some of the seeds into the batter...that would of just taken the recipe over the top!

https://farm3.staticflickr.com/2896/14034475226_19d363a399_h.jpg


Even though the shortcakes did not rise as high as I wanted, they were still delicious with a crunchy exterior and a moist and fluffy interior--and oh the lemon zest was divine!  I had thought about using Energ Egg Replacer, but feel that this is best used when making cookies or crispier baked goods.  The flaxmeal provided the perfect moisture to the cakes and I loved the little flecks of flax throughout...not to mention the added bonus of Omega 3s!  And of course if they don't rise as high as you like...then just make a parfait and your family or guests will think they've gone to strawberry heaven!

https://farm8.staticflickr.com/7361/14077635953_10809e1616_b.jpg

While making the dough, I experimented with using a food processor or using the hand method and both biscuits came out the same.  So if you have a food processor then by all means use it but just make sure that you pulse the ingredients instead of letting the machine run.  I also baked some of the biscuits off right after forming and also let several rest in the fridge for 30 minutes until they were chilled and both turned out the same as well.  My next experiment will be making these gluten-free using Bob's Red Mill A/P flour and adjusting the recipe accordingly.  Also in order to get more height on the biscuit I might try dropping the dough from a spoon onto a sheet pan instead of cutting them out with a cookie cutter.  If I do this then I will need to add more liquid to the dough and turn it into a thick batter.  This however, might change the texture and the texture was perfect.  Stay tuned...

https://farm6.staticflickr.com/5515/14054389641_267a371ed4_h.jpg

This recipe makes about six-eight biscuits using a 2-3/4 cookie cutter.  For the strawberries I just purchased two pounds (organic) and reserved several strawberries aside for the top, and then divided up the rest by slicing some and dicing and mashing the others in separate bowls.  I then added some sugar to each bowl, about 2 TBSP each and then let the fruit macerate for about 30 minutes to release the juices and to soften.   Depending on how sweet your strawberries are you may need to add less or more sugar...taste them first!  For the whipped cream I used SOYATOO! Whipped Rice Topping.

Shortcake Dough Recipe:

2 cups organic unbleached all-purpose flour
5 TBSP organic unbleached cane sugar (3 for the dough, 2 for the topping)
1 TBSP aluminum free baking powder
1/2 tsp salt
8 TBSP Earth Balance Buttery Sticks (cut into 16 pieces and chilled)
1 Flax egg (1 TBSP ground flax meal and 3 TBSP warm filtered water, whisked)
1/2 cup cashew milk (1/4 cup soaked cashews, drained and blended with 1/2 cup filtered water), or you can use any dairy free milk product.
1 tsp pure vanilla extract
1 tsp organic lemon zest

Method:

  • Preheat oven to 425 and position rack in the middle of the oven.
  • In a bowl whisk together flour, 3 TBSP cane sugar, baking powder and salt.
  • Using a pastry cutter add chilled butter and cut through the flour until the butter is the size of peas.
  • In a measuring cup whisk together milk, flax egg, vanilla extract and lemon zest.
  • Create a well in the flour mixture and add wet ingredients.  Using a large fork mix ingredients until just combined and then turn out onto a lightly floured work surface and pat ingredients into a 9x6 rectangle, 3/4" thick.  
  • Cut six biscuits out of the dough and reform scraps and cut an additional two biscuits.
  • Place biscuits on a sheet tray covered with parchment paper and brush the tops with cashew milk and sprinkle with remaining sugar.
  • Bake in the oven until the tops are golden brown about 12-14 minutes, turning half way through.
  • Remove from the oven and transfer biscuits to a cooling rack and let cool for about 10 minutes before cutting. 
My husband told me that I definitely have to stop baking sweets--he's trying to cut back on gluten...so it looks like something gluten-free and most likely sweet is in my near future!  Hope you enjoy!   


Sunday, April 13, 2014

Gluten Free Cupcakes with Veggie Colored Frosting

Growing up as a kid my mom, sister and I would always dye eggs this time of year.  Our mom being the natural artist that she was would create the most beautiful designs. It was hard to compete, considering the only artistic ability I have is to draw stick people, but it was fun and I have great memories of sharing this tradition with my mom and sis.
 

https://farm4.staticflickr.com/3695/13831206343_abbc72702f_h.jpg 

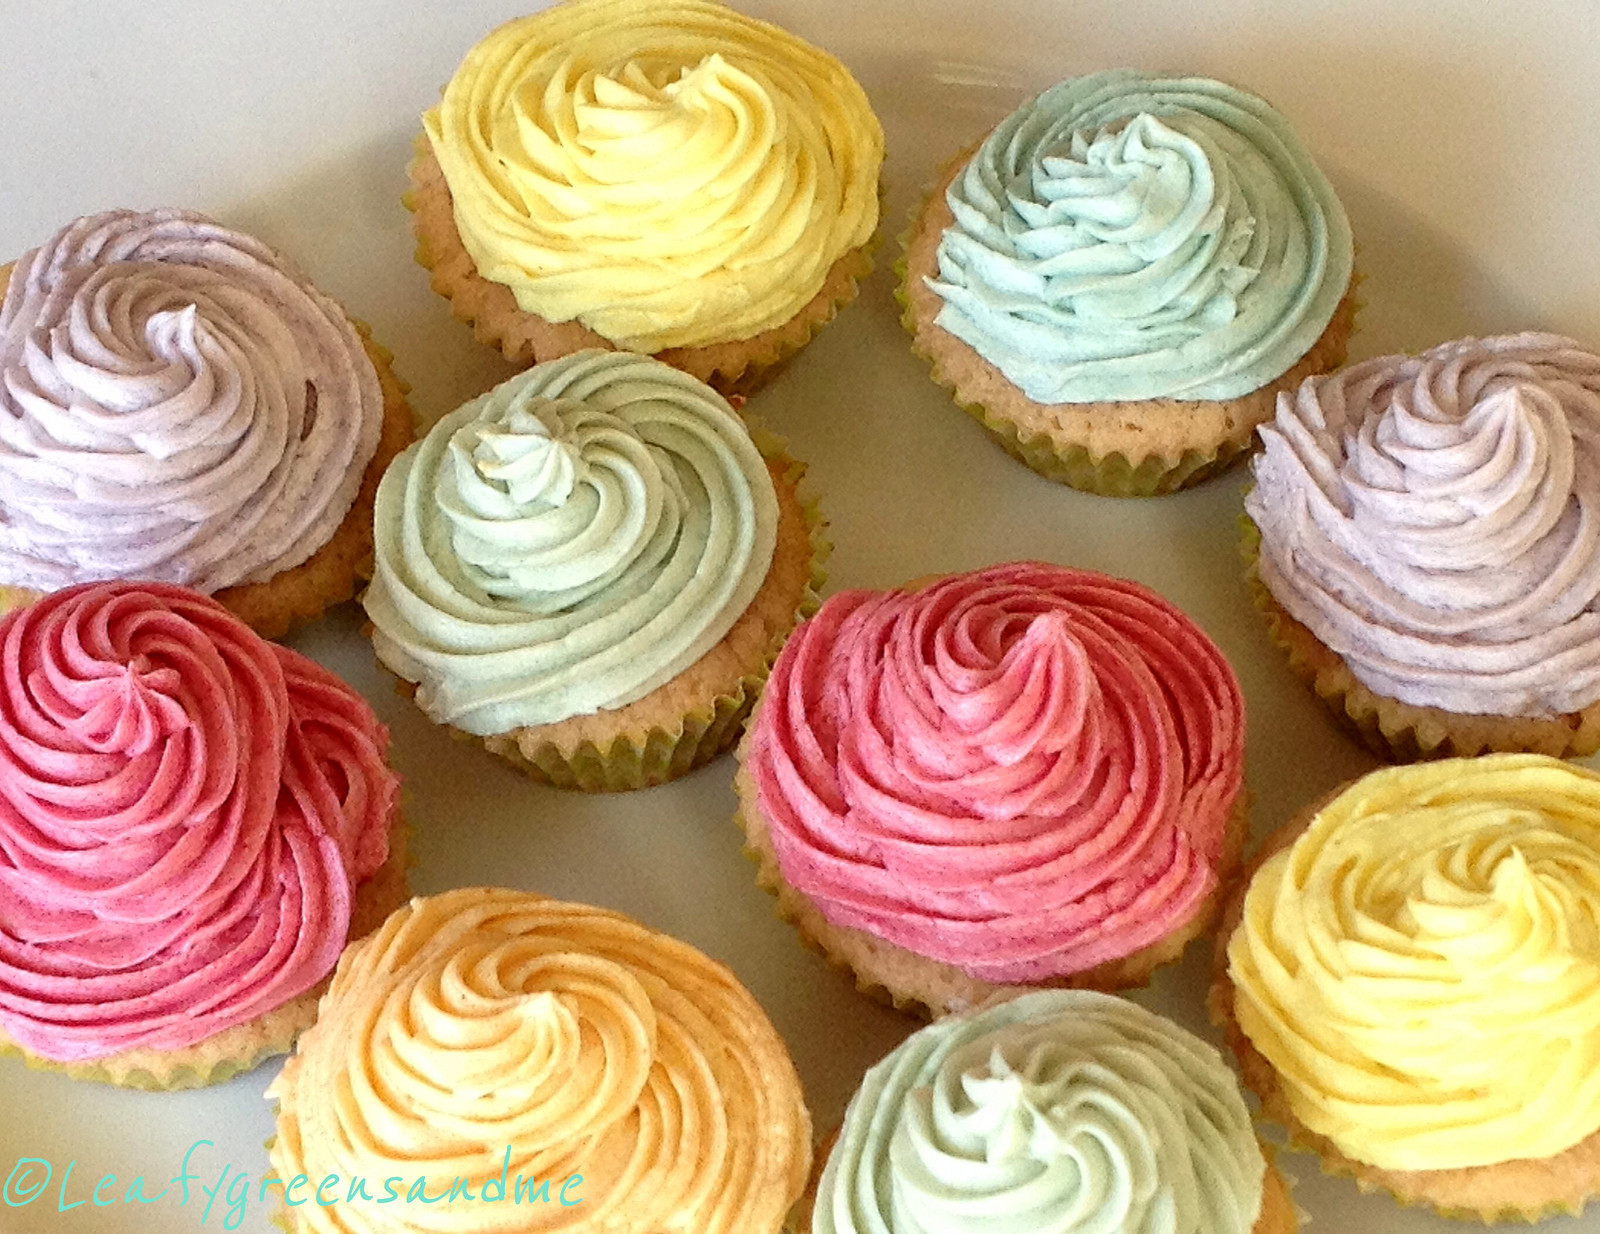
I have never liked eating eggs and never understood how you could dye them, and then several days later peel and eat them.  The food coloring would seep through the shell and the white of the egg would be purple, blue or grey.  Luckily for me I got to skip that part and now since I am vegan, creating beautiful cupcakes is my new tradition.

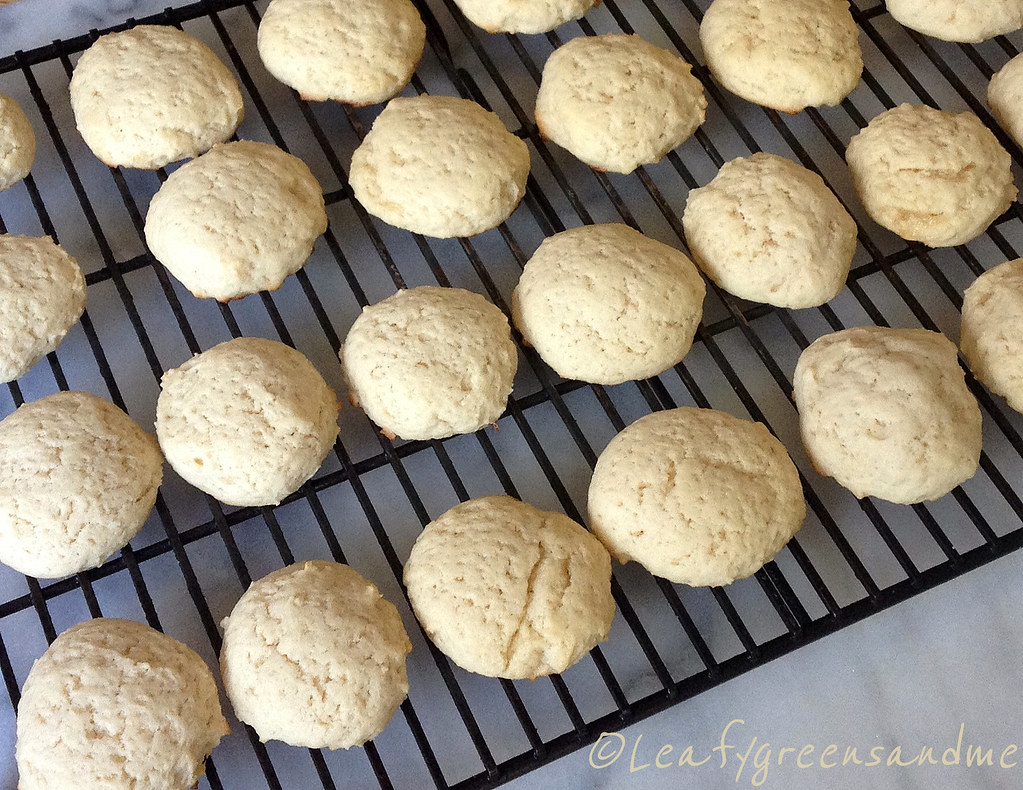
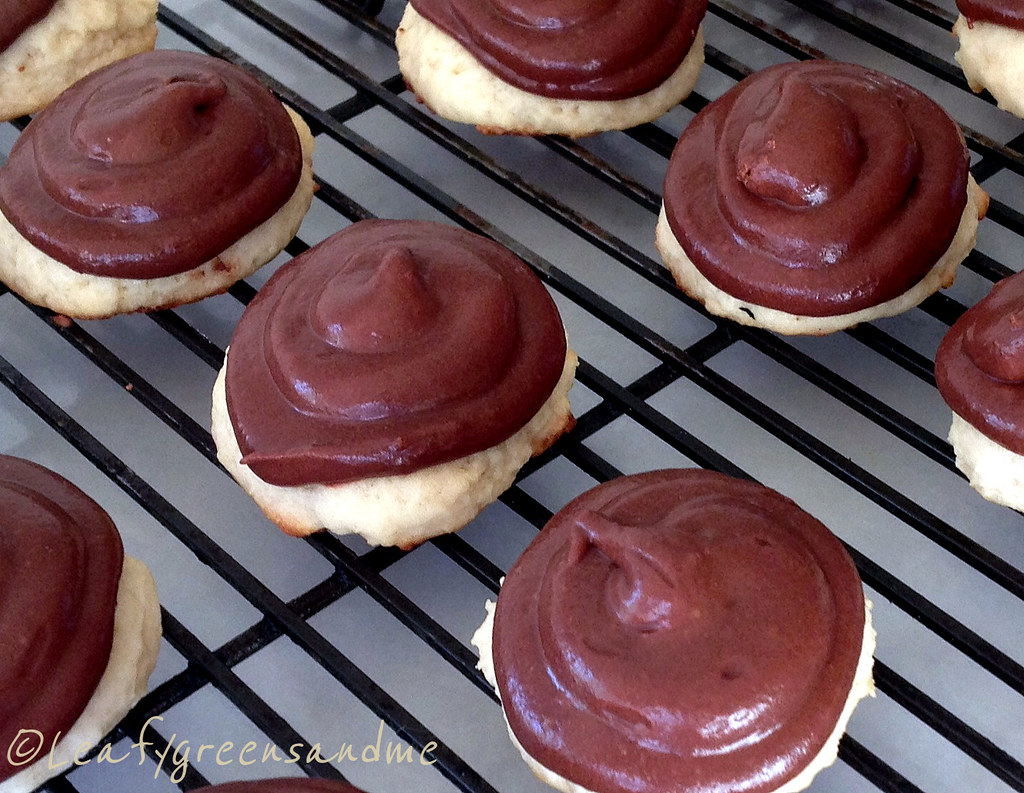
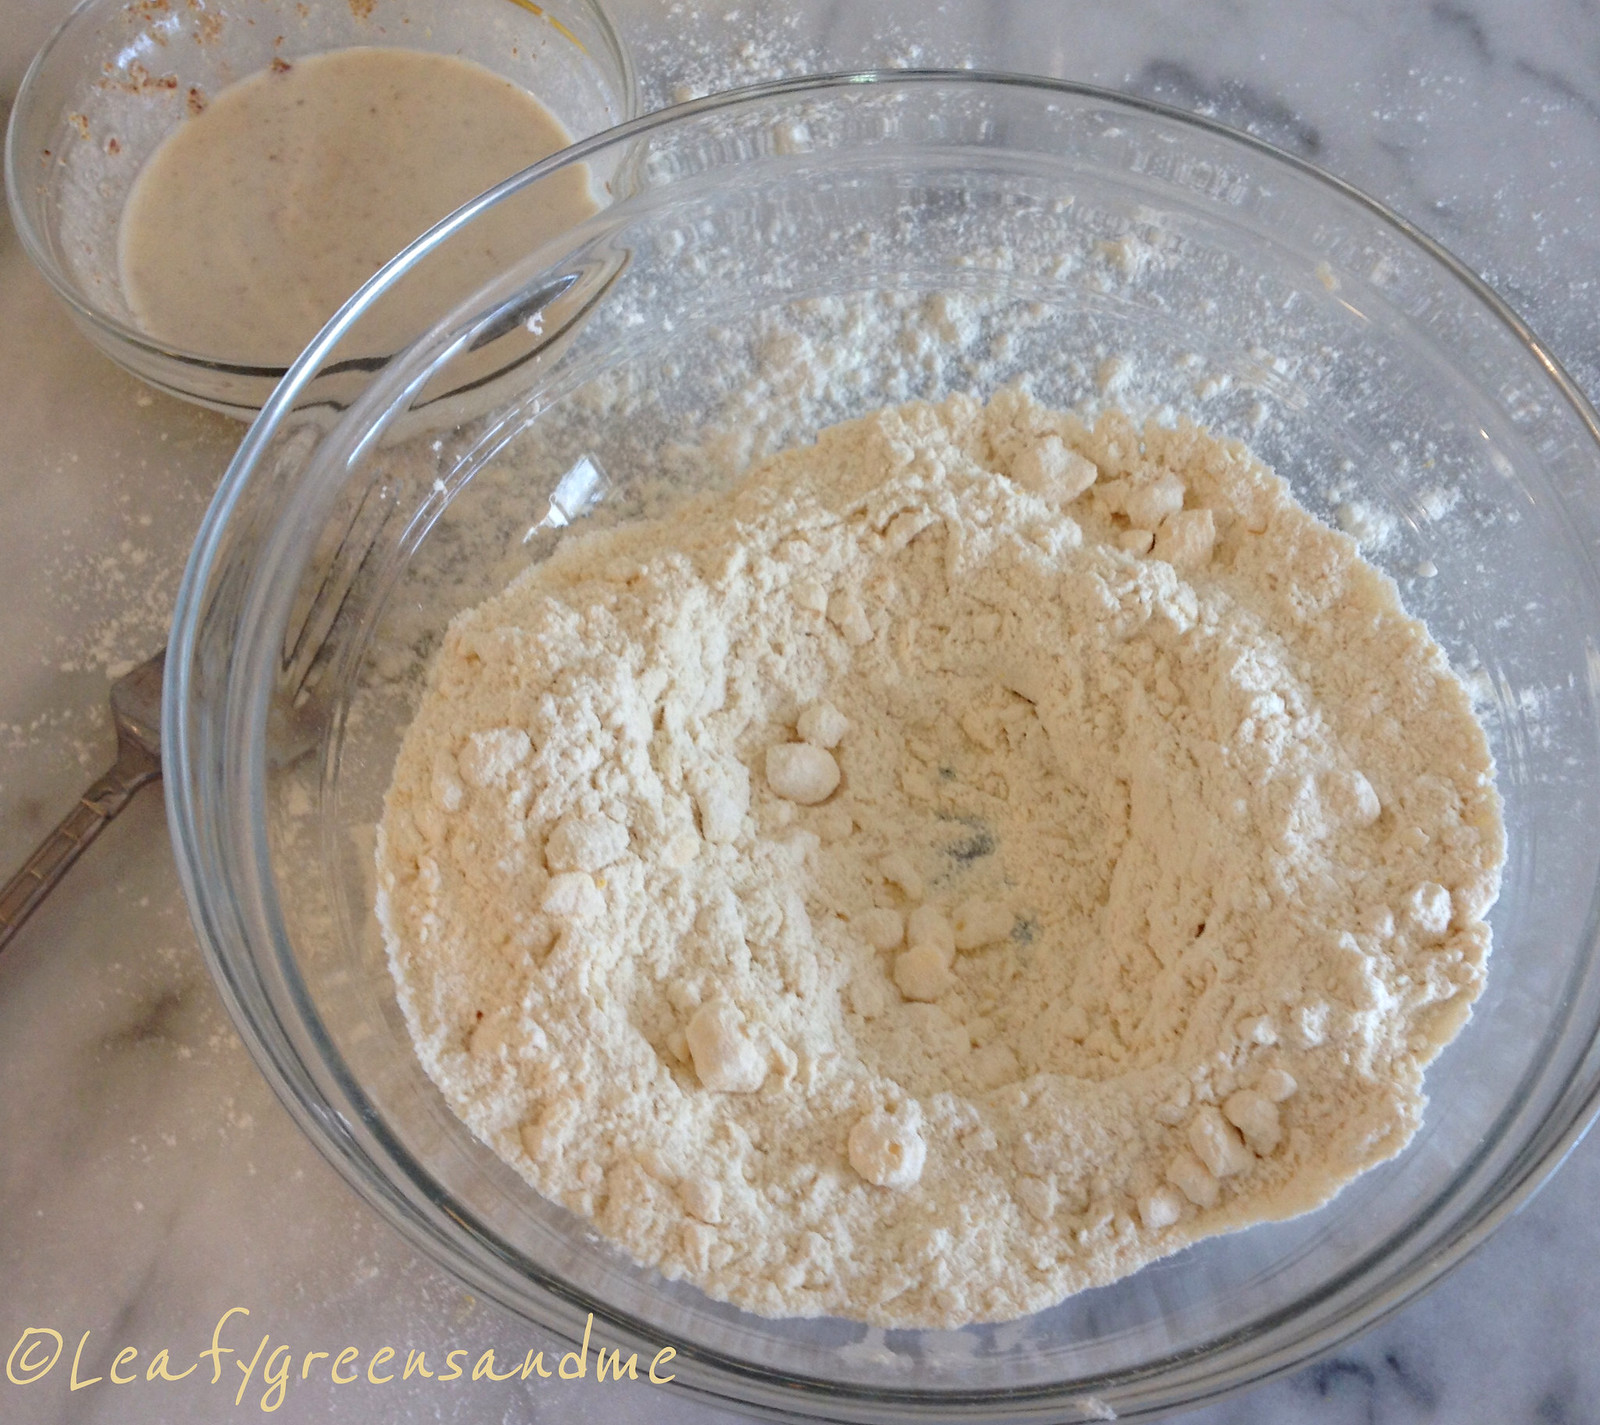
My hubby wanted gluten-free cupcakes and so I purchased a bag of Wholesome Chow Vanilla Cake Mix.  I've tried making gluten-free products from scratch, but it is really expensive.  By the time you purchase all the starches, g-f flours, xantham gum, etc., you're looking at a substantial cost.  Of course if I had a gluten intolerance then this would be fine, but they end up sitting in my pantry and then I just throw them out.  Wholesome Chow has the best packaged gluten-free products on the market, at least in my opinion.  Another brand that is suitable for Passover because it doesn't contain leavener is Manischewitz Gluten-Free Yellow Cake Mix. It comes with a chocolate frosting but you can omit this and use the buttercream recipe below.  This product is not vegan but you could substitute flax eggs in the recipe.

So what to do about the food coloring and frosting the cupcakes?  There's no way I would ever use commercial food dyes and the organic/natural plant-derived dyes are too expensive. I did an internship at a bakery once and I watched how much food coloring they used in everything and I would never eat their cookies, cakes or cupcakes...especially their red velvet. 

https://farm4.staticflickr.com/3695/13831497744_63858e438d_h.jpg

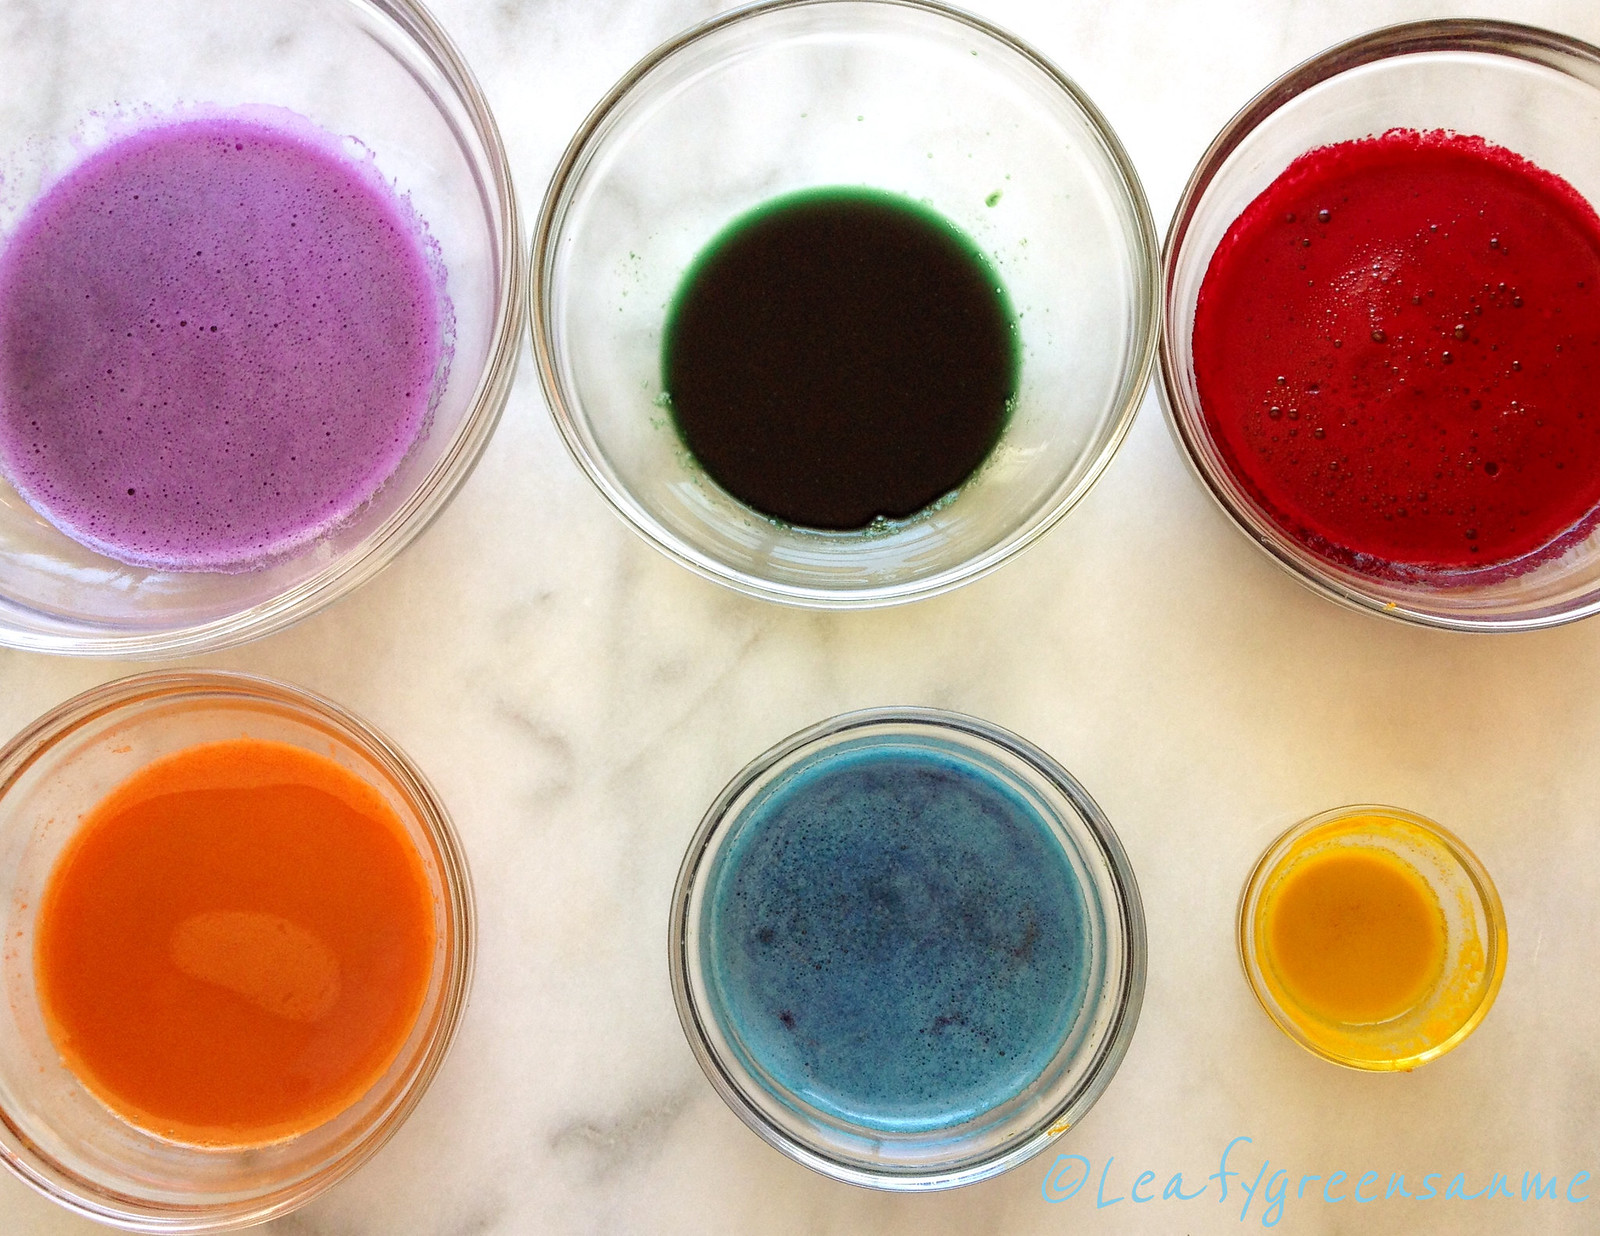
So instead of spending a lot of money, I decided to use what was in my fridge and the buttercream turned out beautiful and delicious.  Yes it takes a little bit more work because you have to juice the vegetables first, but you can still obtain beautiful pastel colors or even vibrant hues using vegetables.  Plus everything was organic!  Here's what I did:

Purple:  Red Cabbage
Green:  Spinach with a pinch of spirulina (could of used more spirulina to get a darker green--be careful though so that it doesn't taste like the ocean)
Red:  Beet
Orange:  Carrot (I also reduced the carrot juice down to a puree to obtain a darker hue)
Blue:  Red Cabbage and a 1/4-1/2 tsp of baking soda
Yellow:  Turmeric (I used about 1/4 tsp with 1-2 tsp water to make a paste)

Now you would think that by using vegetables and spices that it would impart these flavors into the frosting, but it is ever so faint and when you combine it with the cupcake you can't even tell.  Kids would love eating these even if they helped you make them and knew that they were made with vegetable juice!

https://farm4.staticflickr.com/3790/13831456534_30430bcd64_h.jpg

Vanilla Buttercream Frosting
1 tsp pure vanilla extract
2 - 3 Tbsp almond milk (or more to obtain desired consistency)
3 cups sifted organic powdered sugar

In a mixer fitted with a paddle attachment, beat butter and shortening on medium speed until combined and creamy.  Add vanilla extract, almond milk and then with speed on low, add powdered sugar until combined.  Once combined, increase speed to medium and then whip until creamy and fluffy about four minutes.  Portion buttercream evenly into six bowls and then start out adding 1/2 tsp vegetable juice to each bowl and whip with a spatula until creamy.

Note:  Because of the acidity of the vegetable juice, it will look as if the buttercream will start to curdle.  This is why it is good to start with a small amount and add slowly and beat with a spatula until creamy.  For all of the above colors, I used no more than 1 tsp veggie juice to each to get the desired effect.  Also, you can use all Earth Balance and not the Spectrum Shortening, however the shortening holds the buttercream at room temperature longer and so you do not need to worry about refrigeration.

I hope you'll give this recipe a try and start a new holiday tradition with your family!

Wishing you and yours a wonderful Passover and Easter!     
 

Tuesday, April 1, 2014

Whole Grain Chocolate Chip Cookies

I've been bad...so bad...I'm still drinking fresh juices daily but it was rainy and chilly on Saturday and I just wanted to turn on the oven and bake something yummy.  The good thing about making chocolate chip cookies is that they can satisfy your sweet tooth within 30 minutes.  The bad thing is that it's hard to eat just one!  So I've had my fill over the past three days.  There's nothing like drinking healthy juice and eating cookies at the same time--my body is really confused!  The daffodils are just because they brighten up a gloomy day and are my second favorite flower to tulips!

https://farm4.staticflickr.com/3688/13571512393_b0e1a52775_c.jpg
 
So here's the recipe...not that you need another chocolate chip cookie recipe but I found these to be perfect.  Crunchy out the outside while moist on the inside and they were better the next day, and the next day...unfortunately. 

Ingredients
(Makes 2 dozen)

1 1/2 cups organic whole grain spelt flour
3/4 tsp baking powder
1/2 tsp baking soda
3/4 tsp kosher salt
1 stick Earth Balance Buttery Sticks (I used 6 Tbsp Earth Balance Buttery Sticks and 2 Tbsp Spectrum Organic All Vegetable Butter Flavor Shortening Non-Hydrogenated).  I like the crunch and airiness it gives the cookies--but using all Earth Balance is fine too.)
1/2 cup dark brown sugar
1/2 cup organic unbleached cane sugar
1 flax egg (1 Tbsp ground flaxmeal with 3 Tbsp room temperature filtered water, whisked)
1 tsp pure vanilla extract
1/2 cup vegan semisweet chocolate chips

https://farm4.staticflickr.com/3813/13571495143_db794ae3aa_c.jpg
Method
  • Preheat oven to 350 and position racks on upper and lower portion of oven.
  • In the bowl of an electric mixer place room temperature butter and sugar and mix on medium for about 3 minutes until creamy.  Add flax egg mixture and vanilla and mix until combined.
  • In another bowl, sift and whisk together dry ingredients (not including chocolate chips) and then add to butter-sugar mixture and mix until ingredients are just incorporated.  You don't want to over mix the flour and develop the gluten or your cookies will be tough.  Then with the motor running add the chocolate chips until combined.
  • Using a small ice cream scoop (about 1-1/2 Tbsp) place 12 evenly spaced scoops on two cookie trays and flatten slightly with your fingers.  Bake in the oven for 12-14 minutes (turning and switching the trays after 7 minutes) until golden brown around the edges, but tender in the center.  Remove from the oven and let cool for about 5 minutes before transferring them to a cooling rack.

https://farm3.staticflickr.com/2864/13571796064_9f341499ae_c.jpg

Hope you enjoy and stay tuned for more juicing recipes once the gloomy rain goes away!       


ShareThis